Posted on

The Magic of Vintage Lenses: Why Old Glass Still Matters

Discover the magic of vintage lenses and why old glass still matters for modern photographers. Learn about their unique character, affordability, and how they add timeless charm to your photos.

The Magic of Vintage Lenses: Why Old Glass Still Matters

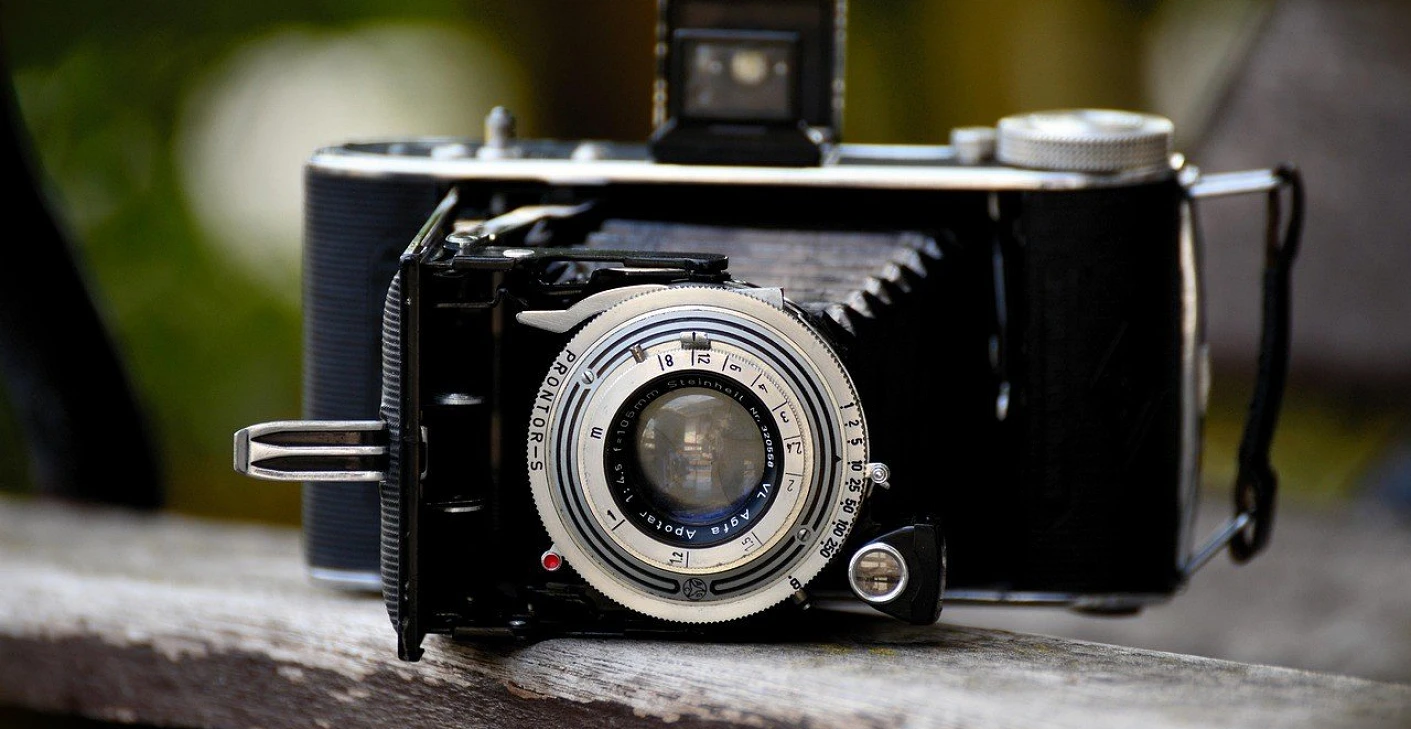
In an era of cutting-edge autofocus systems, razor-sharp optics, and ever-evolving lens technologies, it might seem counterintuitive for photographers to reach back in time and use decades-old lenses on modern digital cameras. Yet, a growing number of enthusiasts and professionals are rediscovering the magic of vintage lenses. Despite lacking modern conveniences like autofocus or weather sealing, these old lenses bring something irreplaceable to the table—character, creativity, and a unique visual charm that modern lenses often can’t replicate.

In this article, we’ll explore why vintage lenses continue to matter in photography, the distinct qualities they offer, and how to integrate them into a modern workflow.


1. Unique Optical Character

Modern lenses are designed to deliver clinical sharpness, minimal distortion, and corrected aberrations. While this technical perfection is often desirable, it can also result in images that feel sterile or lacking in personality. Vintage lenses, on the other hand, embrace imperfection—and that’s where their magic lies.

Older glass often exhibits characteristics like:

  • Swirly bokeh (background blur with a circular motion)
  • Lens flare and glow that add atmosphere
  • Softness at wide apertures that creates a dreamy effect
  • Vignetting and slight distortions that give images a nostalgic feel

Lenses like the Helios 44-2 58mm f/2 are famous for their swirly bokeh, while the Canon FD 50mm f/1.4 delivers a warm, vintage glow that’s difficult to mimic with modern optics. These optical quirks can add mood and emotion to portraits, street photography, and artistic projects.


2. Affordability and Accessibility

One of the most appealing aspects of vintage lenses is their affordability. High-end modern lenses often cost hundreds or even thousands of dollars. In contrast, many vintage gems can be found for under $100, especially when sourced from local camera shops, flea markets, or online marketplaces.

This accessibility makes vintage lenses an excellent entry point for photographers on a budget who still want to experiment with high-quality glass. You can build a diverse collection of primes—50mm, 85mm, 135mm—for a fraction of the price of a single new lens.


3. Manual Focus for Creative Control

While autofocus is a technological marvel, it sometimes removes a layer of intentionality from the creative process. Shooting with manual focus vintage lenses forces photographers to slow down, pay closer attention to composition, and engage more deeply with their subject.

For genres like portraiture, product photography, and fine art photography, this deliberate approach often results in more thoughtful and intimate images. Many photographers find manual focusing with vintage lenses to be a meditative experience that reconnects them with the fundamentals of photography.

Modern mirrorless cameras make manual focusing easier than ever with tools like focus peaking and magnified view, ensuring accurate focus even with old glass.


4. Build Quality That Lasts

Vintage lenses were often crafted from metal and glass, built with a level of craftsmanship that’s rare in today’s plastic-heavy designs. The tactile experience of operating a vintage lens—smoothly turning a perfectly damped focus ring or clicking through aperture stops—adds a level of satisfaction that many modern lenses lack.

Because of this robust build, many lenses from the 1960s, 70s, and 80s remain in excellent working condition today. As long as they’ve been stored properly and cared for, vintage lenses are remarkably durable and can continue to perform beautifully for decades.


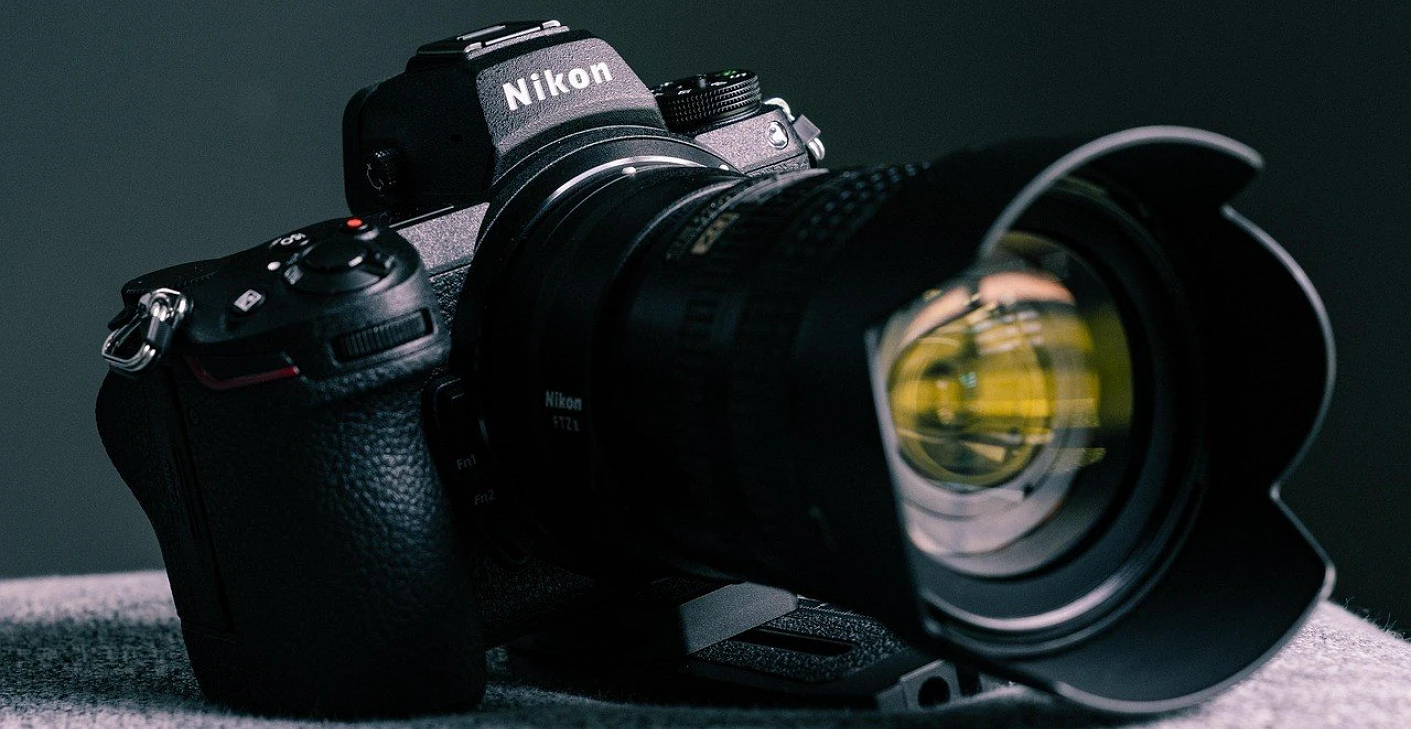
5. Adaptability to Modern Cameras

One of the primary reasons vintage lenses are seeing a resurgence is the ease with which they can be adapted to modern mirrorless cameras. Thanks to their short flange distances, mirrorless bodies can mount almost any lens from any era with a simple mechanical adapter.

Whether you’re using a Sony E-mount, Canon RF, Nikon Z, or Fujifilm X camera, there are adapters available for classic mounts like:

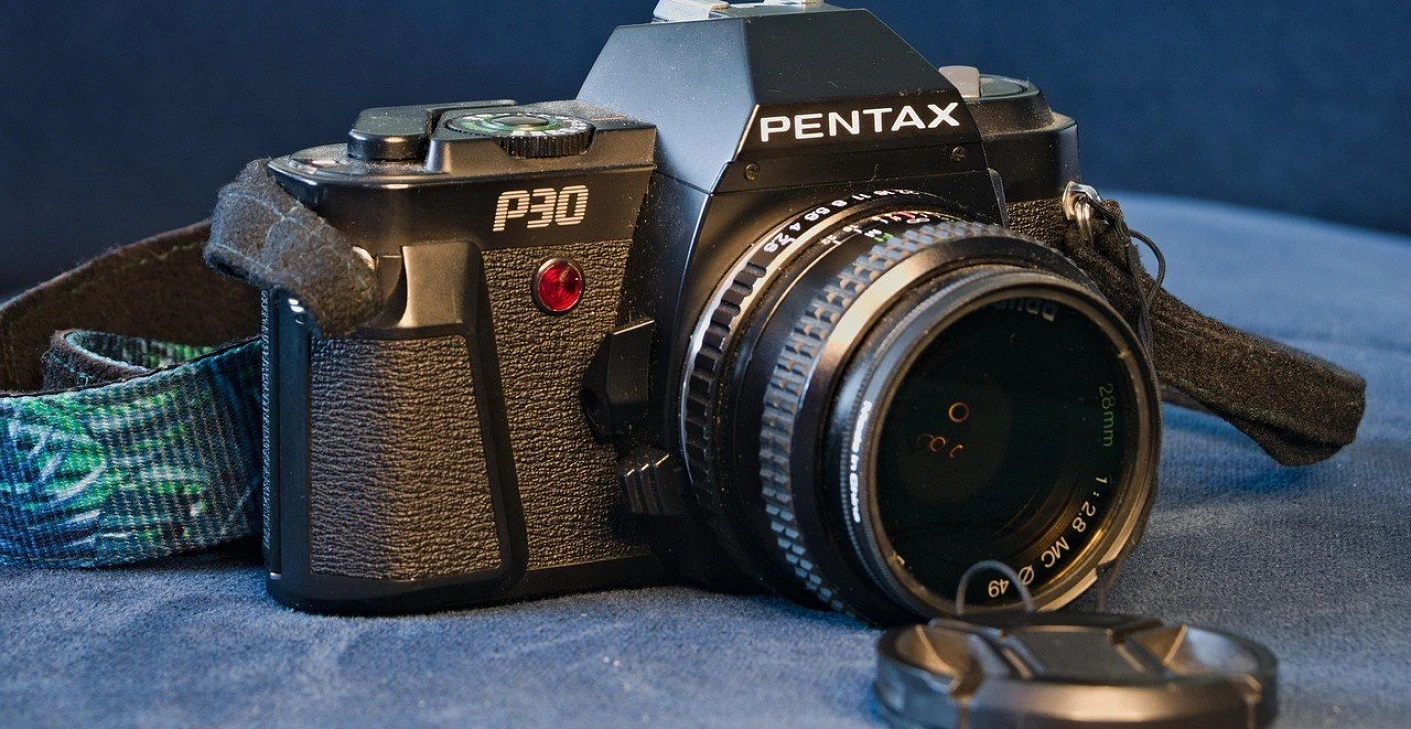
  • M42 screw mount (Pentax, Helios)
  • Canon FD
  • Nikon F manual lenses
  • Minolta MD/MC
  • Pentax K

These adapters are inexpensive and often don’t require any glass elements, ensuring the original optical character of the vintage lens is preserved.


6. Vintage Lenses for Video Creators

Filmmakers and videographers are especially fond of vintage lenses for their organic rendering and cinematic look. Unlike modern lenses that can appear too sharp or clinical on digital sensors, vintage glass softens digital footage and provides a more film-like aesthetic.

Many vintage lenses offer de-clicked apertures, smooth focus throws, and a less contrasty look, which is ideal for narrative and artistic video projects. Lenses like the Takumar 50mm f/1.4 or Contax Zeiss series are revered in the indie film community.


7. Sustainability and Eco-Friendly Gear Choices

In an age where environmental consciousness is becoming increasingly important, buying and using vintage lenses is a sustainable choice. Repurposing existing gear reduces electronic waste and promotes a more eco-friendly approach to photography.

Instead of contributing to the constant cycle of buying the latest gear, photographers who embrace vintage lenses extend the lifecycle of perfectly functional equipment, reducing their carbon footprint in the process.


8. Developing a Signature Style

Perhaps the most profound reason to explore vintage lenses is the opportunity to develop a unique photographic style. In a world flooded with technically perfect images, the subtle imperfections and unique renderings of vintage lenses allow photographers to create work that stands out.

By experimenting with different vintage lenses, you can discover optical quirks that align with your creative vision, helping you craft a distinct look that’s entirely your own.


Popular Vintage Lenses Worth Trying

Here are a few beloved vintage lenses that are readily available and affordable for those starting their vintage lens journey:

  • Helios 44-2 58mm f/2 (M42 mount): Known for its swirly bokeh.
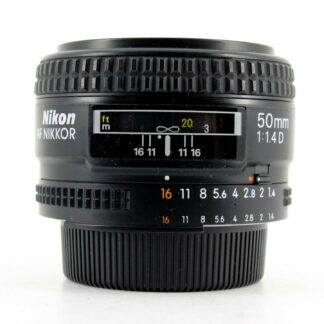
  • Canon FD 50mm f/1.4: Warm tones with a smooth rendering.
  • Pentax Super-Takumar 55mm f/1.8: Classic build with creamy bokeh.
  • Minolta Rokkor 58mm f/1.4: Gorgeous vintage softness at wide apertures.
  • Carl Zeiss Jena Flektogon 35mm f/2.4: A wide-angle lens with a distinctive rendering.

Challenges of Using Vintage Lenses

While vintage lenses are full of charm, it’s important to be aware of their limitations:

  • Manual Focus Only: Slower for action or event photography.
  • No Electronic Communication: Aperture control is manual; no EXIF data.
  • Potential for Fungus or Haze: Always inspect used lenses before buying.
  • Variable Sharpness: Often softer wide open compared to modern lenses.

However, for photographers who embrace these quirks, vintage lenses offer creative opportunities that outweigh these inconveniences.


Conclusion

The resurgence of vintage lenses isn’t a trend—it’s a rediscovery of a timeless photographic art form. In a world obsessed with technical perfection, vintage lenses remind us that photography is as much about emotion, mood, and storytelling as it is about sharpness and specifications.

Whether you’re a beginner looking to expand your lens collection affordably, a seasoned photographer seeking a distinctive look, or a filmmaker wanting that cinematic feel, vintage lenses offer a path that’s rich with creative potential. By blending old glass with modern digital bodies, you can create images that are not only beautiful but uniquely yours.

Posted on

Used Portrait Lenses That Deliver Stunning Bokeh

Discover the best used portrait lenses that deliver stunning bokeh without breaking the bank. Explore affordable Canon, Nikon, Sony, Fujifilm, and vintage lenses for beautiful background blur.

Used Portrait Lenses That Deliver Stunning Bokeh

For portrait photographers, few things are as desirable as lenses that produce beautiful, creamy bokeh—that smooth, dreamy background blur that makes subjects pop and gives images a professional look. While modern high-end lenses are engineered to deliver flawless bokeh, they often come with steep price tags. Fortunately, the used lens market is filled with incredible portrait lenses that offer stunning bokeh at a fraction of the cost.

In this article, we’ll explore some of the best used portrait lenses renowned for their bokeh quality. Whether you’re a beginner looking for affordable options or an enthusiast seeking unique character, these lenses will elevate your portrait photography without breaking the bank.


Why Bokeh Matters in Portrait Photography

Bokeh, derived from the Japanese word “boke” meaning blur, refers to the aesthetic quality of the out-of-focus areas in an image. In portrait photography, good bokeh helps isolate the subject from distracting backgrounds, creating a sense of depth and enhancing the overall visual appeal.

Lenses that render smooth, circular bokeh balls and soft background transitions are highly sought after. Factors influencing bokeh quality include:

  • Wide apertures (f/1.2, f/1.4, f/1.8)
  • Optical design and diaphragm blade shape
  • Focal length (longer lenses compress backgrounds more effectively)

Top Used Portrait Lenses for Stunning Bokeh

1. Canon EF 85mm f/1.8 USM

  • Mount: Canon EF (Full-frame & APS-C)
  • Why it’s great: Known as the “budget portrait king,” the Canon EF 85mm f/1.8 offers beautiful background blur, fast autofocus, and excellent sharpness.
  • Bokeh Quality: Smooth and creamy, with soft edge transitions that give portraits a professional feel.
  • Used Price Range: $250–$350

2. Nikon AF-S 85mm f/1.8G

  • Mount: Nikon F (Full-frame & APS-C)
  • Why it’s great: Lightweight, sharp, and with superb color rendering, this lens is a go-to for Nikon shooters wanting portrait-quality bokeh without paying for the more expensive f/1.4 version.
  • Bokeh Quality: Clean, soft bokeh with minimal chromatic aberrations.
  • Used Price Range: $300–$400

3. Sony FE 85mm f/1.8

  • Mount: Sony E (Full-frame & APS-C)
  • Why it’s great: One of the best value lenses in Sony’s lineup, it combines fast autofocus with exceptional sharpness and pleasing bokeh.
  • Bokeh Quality: Smooth, round bokeh highlights thanks to a 9-blade circular aperture.
  • Used Price Range: $350–$450

4. Fujifilm XF 56mm f/1.2 R

  • Mount: Fujifilm X (APS-C)
  • Why it’s great: Arguably the best portrait lens in Fujifilm’s lineup, offering a full-frame equivalent focal length of 85mm.
  • Bokeh Quality: Silky smooth with excellent subject isolation. The f/1.2 aperture delivers beautiful background blur.
  • Used Price Range: $500–$700

5. Sigma 85mm f/1.4 EX DG HSM (Canon/Nikon Mounts)

  • Mount: Canon EF, Nikon F
  • Why it’s great: Sigma’s older Art predecessor, this lens is known for its sharpness and fantastic bokeh at a more accessible price point than Canon or Nikon’s f/1.4 offerings.
  • Bokeh Quality: Creamy bokeh with excellent separation, especially at f/1.4.
  • Used Price Range: $400–$600

6. Canon EF 135mm f/2L USM

  • Mount: Canon EF (Full-frame & APS-C)
  • Why it’s great: A legendary lens for portraits and headshots, offering buttery smooth bokeh and excellent subject compression.
  • Bokeh Quality: One of the smoothest bokeh renderings in Canon’s lineup.
  • Used Price Range: $600–$800

7. Nikon AF DC-Nikkor 105mm f/2D

  • Mount: Nikon F (Full-frame & APS-C)
  • Why it’s great: A unique Defocus Control (DC) lens that allows photographers to fine-tune the foreground and background bokeh.
  • Bokeh Quality: Creamy with the ability to adjust the softness via DC controls.
  • Used Price Range: $600–$750

8. Helios 44-2 58mm f/2 (M42 Mount)

  • Mount: Adaptable to most mirrorless cameras
  • Why it’s great: A vintage gem, beloved for its unique swirly bokeh effect that gives portraits a dreamy, artistic feel.
  • Bokeh Quality: Character-rich, swirly bokeh that’s hard to replicate with modern lenses.
  • Used Price Range: $50–$100

What to Look for When Buying Used Bokeh Lenses

When shopping for used portrait lenses with bokeh in mind, here are key factors to inspect:

1. Lens Optics Condition

  • Check for scratches, haze, or fungus on glass elements.
  • Minor internal dust is common in used lenses and rarely affects image quality.

2. Aperture Blade Function

  • Ensure aperture blades are free from oil and move smoothly.
  • Aperture shape directly affects bokeh rendering, so circular blades are preferred.

3. Autofocus Performance

  • Test autofocus speed and accuracy if applicable.
  • Some used lenses may have worn motors, leading to slower or noisy focusing.

4. Build Quality

  • Check for dents or damage to the lens barrel, filter threads, and mount.
  • A well-maintained lens will feel solid with smooth focus and zoom rings.

5. Compatibility and Adaptability

  • Ensure the lens mount is compatible with your camera body.
  • For vintage lenses like the Helios, you’ll need a proper adapter for mirrorless systems.

Vintage Lenses: The Bokeh Artist’s Secret Weapon

Many vintage lenses are celebrated for their unique bokeh character. While they lack autofocus and electronic contacts, they reward photographers with creative, artistic rendering. Lenses like the Carl Zeiss Jena Biotar 58mm f/2 and the Pentacon 135mm f/2.8 are popular among bokeh enthusiasts for their distinctive background blur.

With manual focus and aperture control, using vintage lenses encourages a slower, more intentional shooting process. This can lead to more thoughtful compositions and a deeper appreciation of how light interacts with your subject and background.


Why Used Lenses Are Perfect for Bokeh Lovers on a Budget

The used market provides access to professional-grade lenses at a price point that’s friendly to enthusiasts and hobbyists. While brand-new bokeh-centric lenses like the Canon RF 85mm f/1.2L or Sony FE 135mm f/1.8 GM can cost over $2000, their used counterparts—or older versions—deliver stunning results at a fraction of the price.

Additionally, lens designs that emphasize bokeh quality (such as wide maximum apertures and specialized optical coatings) retain their value and performance for many years, making them safe investments even when bought used.


Tips for Capturing Beautiful Bokeh Portraits

  • Shoot at Wide Apertures: Use f/1.2 to f/2.8 for the softest background blur.
  • Increase Subject-Background Distance: The farther your subject is from the background, the smoother the bokeh.
  • Choose Backgrounds with Light Points: Light sources like fairy lights or sunlight filtering through trees create pleasing bokeh balls.
  • Use Telephoto Focal Lengths: Longer focal lengths like 85mm, 105mm, or 135mm compress the background, enhancing the bokeh effect.
  • Mind the Distance to Subject: Get closer to your subject to amplify the depth-of-field separation.

Conclusion

You don’t need to spend a fortune to capture portraits with mesmerizing bokeh. The used lens market is filled with hidden gems that deliver professional-level background blur, allowing photographers of all levels to create stunning, dreamy portraits. From classic 85mm primes to unique vintage lenses like the Helios 44-2, there are countless affordable options that bring character and depth to your images.

Whether you’re shooting with Canon, Nikon, Sony, Fujifilm, or adapting vintage glass to a modern mirrorless body, investing in a well-chosen used portrait lens will dramatically elevate your photography, all while keeping your budget intact.

Posted on

The Best Used Lenses for Wildlife and Nature Photography

Discover the best used lenses for wildlife and nature photography. Explore affordable telephoto and wide-angle lens options for Canon, Nikon, Sony, Sigma, and Tamron that deliver stunning results on a budget.

The Best Used Lenses for Wildlife and Nature Photography

Wildlife and nature photography demand specialized gear to capture subjects that are often distant, elusive, and in constant motion. Telephoto reach, fast autofocus, and sharp optics are essential for bringing the beauty of the natural world into stunning focus. However, new professional-grade lenses can be prohibitively expensive, especially for hobbyists and aspiring photographers.

The good news is that the used lens market is filled with excellent options that deliver professional-level performance at a fraction of the original price. Whether you’re shooting birds, mammals, or scenic landscapes, investing in used lenses for wildlife and nature photography is a smart and budget-friendly approach.

In this article, we’ll explore the best used lenses across popular brands—Canon, Nikon, Sony, and more—that excel in capturing wildlife and nature in all their glory.


What to Look for in a Wildlife/Nature Lens

Before diving into specific lens recommendations, it’s important to understand the key features that matter most in wildlife and nature photography:

  1. Focal Length (Reach): A long focal length (300mm and above) is crucial for photographing distant subjects without disturbing them.
  2. Aperture: Wide apertures (f/2.8–f/5.6) allow for faster shutter speeds and better low-light performance.
  3. Autofocus Speed & Accuracy: Fast-moving subjects require lenses with reliable autofocus tracking.
  4. Image Stabilization (IS/VR/OSS): Helps in reducing camera shake when shooting handheld, especially with long telephoto lenses.
  5. Build Quality & Weather Sealing: Nature photographers often shoot in harsh environments, so robust construction is a plus.

Best Used Canon Lenses for Wildlife Photography

1. Canon EF 100-400mm f/4.5-5.6L IS USM (Version I)

  • Focal Length: 100-400mm
  • Why it’s great: A versatile telephoto zoom with excellent reach, solid image quality, and built like a tank.
  • Image Stabilization: Yes (2-stop IS)
  • Used Price Range: $600–$900
  • Ideal For: Bird photography, safaris, and general wildlife shooting.

2. Canon EF 400mm f/5.6L USM

  • Focal Length: 400mm prime
  • Why it’s great: Lightweight, razor-sharp, and fast-focusing. While it lacks IS, its optical performance is outstanding for its price.
  • Image Stabilization: No
  • Used Price Range: $800–$1000
  • Ideal For: Birds in flight, wildlife in good lighting conditions.

Best Used Nikon Lenses for Wildlife Photography

3. Nikon AF-S 300mm f/4D IF-ED

  • Focal Length: 300mm prime
  • Why it’s great: A sharp and compact telephoto prime known for its excellent optical performance.
  • Image Stabilization: No (but sharp enough to compensate)
  • Used Price Range: $500–$700
  • Ideal For: Wildlife in controlled or good light settings.

4. Nikon AF-S 200-500mm f/5.6E ED VR

  • Focal Length: 200-500mm
  • Why it’s great: A budget wildlife photography powerhouse, offering incredible reach and sharpness with VR.
  • Image Stabilization: Yes (VR)
  • Used Price Range: $900–$1200
  • Ideal For: Bird photography, wildlife at a distance, safaris.

Best Used Sony Lenses for Wildlife Photography

5. Sony FE 100-400mm f/4.5-5.6 GM OSS

  • Focal Length: 100-400mm
  • Why it’s great: Professional-grade zoom with lightning-fast autofocus, optical excellence, and OSS stabilization.
  • Image Stabilization: Yes (OSS)
  • Used Price Range: $1600–$2000
  • Ideal For: Wildlife, sports, nature photography with Sony mirrorless cameras.

6. Sony FE 70-300mm f/4.5-5.6 G OSS

  • Focal Length: 70-300mm
  • Why it’s great: A more budget-friendly zoom for Sony users, offering solid reach and stabilization.
  • Image Stabilization: Yes (OSS)
  • Used Price Range: $900–$1200
  • Ideal For: Wildlife enthusiasts who need a versatile, lightweight telephoto option.

Best Used Third-Party Lenses for Wildlife

7. Sigma 150-600mm f/5-6.3 DG OS HSM Contemporary

  • Mounts: Canon EF, Nikon F
  • Focal Length: 150-600mm
  • Why it’s great: Exceptional reach with reliable autofocus, lightweight compared to its “Sports” sibling, and excellent value.
  • Image Stabilization: Yes (OS)
  • Used Price Range: $800–$1000
  • Ideal For: Birders and wildlife photographers needing extra focal length without breaking the bank.

8. Tamron SP 150-600mm f/5-6.3 Di VC USD (G1)

  • Mounts: Canon EF, Nikon F
  • Focal Length: 150-600mm
  • Why it’s great: Tamron’s first-generation ultra-telephoto zoom, offering solid sharpness and effective stabilization.
  • Image Stabilization: Yes (VC)
  • Used Price Range: $700–$900
  • Ideal For: Beginners and hobbyists looking to get into wildlife photography.

Great Used Lenses for Nature & Landscape Photography

While wildlife photographers often seek telephoto lenses, nature and landscape shooters benefit from wide-angle and mid-range zooms to capture vast scenic views.

9. Canon EF 17-40mm f/4L USM

  • Focal Length: 17-40mm
  • Why it’s great: An affordable wide-angle L-series lens perfect for landscapes, with robust weather sealing.
  • Used Price Range: $350–$500
  • Ideal For: Nature landscapes, wide scenic shots, waterfalls.

10. Nikon AF-S 16-35mm f/4G ED VR

  • Focal Length: 16-35mm
  • Why it’s great: Sharp, stabilized wide-angle zoom ideal for landscape and nature photography.
  • Used Price Range: $600–$800
  • Ideal For: Handheld landscape shooting, wide nature scenes.

11. Sony FE 16-35mm f/4 ZA OSS Vario-Tessar T*

  • Focal Length: 16-35mm
  • Why it’s great: High-quality wide-angle zoom with OSS, perfect for landscape and nature photography.
  • Used Price Range: $800–$1000
  • Ideal For: Travel, landscapes, forest photography.

Why Buy Used Lenses for Wildlife and Nature Photography?

  1. Significant Cost Savings: Used lenses can save you 30–50% compared to new models, especially in the telephoto range where prices are steep.
  2. High-Quality Optics Age Well: Lenses, especially professional-grade telephotos, are built to last and deliver consistent optical performance for years.
  3. Access to Specialized Lenses: You can afford specialty lenses (like a 600mm zoom) that might be out of reach if bought new.
  4. Expand Your Kit Faster: With the money saved, you can invest in accessories like sturdy tripods, gimbals, and camouflage covers.

Tips for Buying Used Wildlife Lenses

  • Inspect for Wear and Tear: Check the lens barrel, mount, and filter threads for signs of damage.
  • Test Autofocus Performance: Ensure the lens locks focus quickly and accurately.
  • Check Image Stabilization Functionality: For lenses with IS/VR/OSS, verify that stabilization is operational.
  • Inspect Optics for Dust and Fungus: Shine a flashlight through the lens to spot any internal issues.
  • Buy from Reputable Sellers: Opt for camera stores with return policies or warranty options when possible.

Conclusion

Capturing breathtaking images of wildlife and nature doesn’t require the latest and most expensive gear. The used lens market is filled with exceptional telephoto and wide-angle lenses that can meet the demands of serious photographers while being gentle on your budget.

Whether you need the reach of a Sigma 150-600mm for bird photography or the wide, sweeping views of a Canon 17-40mm for landscapes, there are numerous used lenses that deliver professional results without the premium price tag.

With thoughtful research and careful inspection, you can build a wildlife and nature photography kit that allows you to explore the great outdoors and bring home images that do justice to its beauty.

Posted on

Street Photography on a Budget: Top Used Lenses to Try

Discover the best budget-friendly used lenses for street photography. Explore affordable Canon, Nikon, Sony, Fujifilm, and vintage lens options that deliver sharp images and stunning street captures.

Street Photography on a Budget: Top Used Lenses to Try

Street photography is all about capturing candid moments, vibrant city life, and the unique stories unfolding around us every day. Unlike studio or landscape photography, street photography often demands a compact, discreet, and lightweight setup that allows photographers to blend into their environment. But here’s the challenge: camera gear can be expensive, especially high-quality lenses.

The good news is you don’t need to buy brand-new gear to excel at street photography. The used lens market is a treasure trove of affordable, high-performance lenses perfect for shooting in urban environments. In fact, some older lenses are better suited to street photography because of their compact size and character-rich rendering.

In this article, we’ll explore the best used lenses for street photography that deliver exceptional results without draining your wallet.


Why Buy Used Lenses for Street Photography?

  • Affordability: You can save 30–50% compared to buying new, giving you access to higher-quality optics.
  • Character Over Clinical Perfection: Older lenses often have unique rendering, flares, and micro-contrast that enhance street photos with a timeless feel.
  • Compact and Lightweight Designs: Many older lenses are smaller and lighter, making them less intrusive for candid street work.
  • Manual Focus Mastery: Many vintage lenses encourage a slower, more deliberate shooting style, perfect for honing your composition and focus skills.

What to Look for in a Street Photography Lens

When choosing a lens for street photography, especially on a budget, consider:

  • Focal Length: 35mm and 50mm are classic choices for their natural perspective.
  • Aperture: A fast aperture (f/1.8 to f/2.8) helps in low light and allows for subject isolation.
  • Size & Weight: Compact, lightweight lenses are easier to carry and draw less attention.
  • Autofocus or Manual Focus: Both can work; manual focus lenses can slow you down for more thoughtful compositions.

Top Used Lenses for Street Photography

1. Canon EF 50mm f/1.8 STM (“Nifty Fifty”)

  • Mount: Canon EF (Full-frame & APS-C)
  • Why it’s great: Sharp, fast, and ultra-affordable. This lens is a no-brainer for Canon users wanting shallow depth of field on a budget.
  • Size & Weight: Extremely compact, making it great for discreet shooting.
  • Used Price Range: $80–$120

2. Canon EF 40mm f/2.8 STM Pancake Lens

  • Mount: Canon EF
  • Why it’s great: Ultra-slim pancake design makes your DSLR almost pocketable. Its focal length sits perfectly between 35mm and 50mm.
  • Size & Weight: One of Canon’s most compact lenses.
  • Used Price Range: $100–$150

3. Nikon AF-S 35mm f/1.8G DX

  • Mount: Nikon F (DX-format APS-C)
  • Why it’s great: Equivalent to a 52mm field of view on DX bodies, this is a sharp, fast, and affordable lens ideal for Nikon shooters.
  • Size & Weight: Compact and unobtrusive for street use.
  • Used Price Range: $120–$160

4. Nikon AF 50mm f/1.8D

  • Mount: Nikon F (Full-frame & APS-C)
  • Why it’s great: A lightweight, fast prime with classic rendering. On full-frame bodies, it delivers that traditional 50mm “street” perspective.
  • Used Price Range: $100–$150

5. Sony E 35mm f/1.8 OSS (APS-C)

  • Mount: Sony E (APS-C)
  • Why it’s great: With Optical SteadyShot (OSS) and a fast aperture, this lens is a compact workhorse for Sony mirrorless users.
  • Size & Weight: Small and light, great for discreet shooting.
  • Used Price Range: $250–$350

6. Sony FE 50mm f/1.8

  • Mount: Sony E (Full-frame & APS-C)
  • Why it’s great: Affordable full-frame 50mm prime lens with good bokeh and portability.
  • Used Price Range: $150–$200

7. Fujifilm XF 35mm f/2 R WR (“Fujicron”)

  • Mount: Fujifilm X (APS-C)
  • Why it’s great: Weather-sealed, razor-sharp, and compact. Equivalent to 53mm in full-frame terms, it’s perfect for Fujifilm street shooters.
  • Size & Weight: Lightweight and discreet.
  • Used Price Range: $250–$350

8. Fujifilm XF 27mm f/2.8 Pancake Lens

  • Mount: Fujifilm X (APS-C)
  • Why it’s great: Equivalent to a 41mm field of view, this pancake lens is ultra-slim, making your Fujifilm body feel like a compact camera.
  • Used Price Range: $200–$250

9. Sigma 30mm f/1.4 DC DN Contemporary (Sony/Fujifilm/Canon EF-M)

  • Mounts: Sony E, Fujifilm X, Canon EF-M
  • Why it’s great: Excellent optical quality with a fast f/1.4 aperture, perfect for low-light street scenes.
  • Used Price Range: $250–$300

10. Voigtländer Nokton Classic 40mm f/1.4 (M-mount)

  • Mount: Leica M (Adaptable to mirrorless)
  • Why it’s great: A legendary manual focus lens with a distinctive vintage rendering and creamy bokeh.
  • Used Price Range: $300–$400 (excluding adapter)

Best Vintage Lenses for Street Photography

For those willing to embrace manual focus, vintage lenses are a goldmine of character and affordability.

11. Canon FD 50mm f/1.4

  • Mount: Canon FD (Adaptable to mirrorless)
  • Why it’s great: Warm tones, smooth bokeh, and excellent build quality.
  • Used Price Range: $100–$150

12. Minolta Rokkor 45mm f/2

  • Mount: Minolta MD/MC (Adaptable to mirrorless)
  • Why it’s great: Small, sharp, and beautifully built. A hidden gem for mirrorless street shooters.
  • Used Price Range: $80–$120

13. Pentax Super-Takumar 55mm f/1.8

  • Mount: M42 (Adaptable to mirrorless)
  • Why it’s great: Known for its smooth rendering and exceptional build quality.
  • Used Price Range: $80–$120

Tips for Buying Used Street Photography Lenses

  1. Inspect Optics: Look for scratches, haze, or fungus on lens elements.
  2. Test Focus Rings and Aperture Blades: Ensure smooth rotation and clicky aperture stops.
  3. Check Mount Condition: Ensure the mount isn’t bent or excessively worn.
  4. Autofocus Speed & Accuracy: For AF lenses, make sure the motor is still responsive.
  5. Ask About Return Policies: Especially when buying online, ensure there’s a return window.

What Focal Length is Best for Street Photography?

  • 35mm: The classic street lens, offering a natural field of view with a bit of context.
  • 50mm: Ideal for subject isolation and tighter compositions.
  • 28mm: For dynamic, wide street scenes where you want to include more environment.
  • 40mm: A versatile in-between focal length, popular among rangefinder enthusiasts.

Why Compact Lenses Matter in Street Photography

In street photography, being discreet is often key to capturing genuine moments. Bulky telephoto lenses not only attract attention but can also make subjects uncomfortable. Compact primes or pancake lenses allow you to blend in, stay agile, and shoot candidly. Lightweight setups are also less tiring during long photo walks.


Conclusion

Street photography isn’t about having the latest, most expensive gear—it’s about capturing stories, emotions, and fleeting moments. By tapping into the used lens market, you can equip yourself with high-quality optics that deliver professional results on a modest budget.

From the ever-popular Canon 50mm f/1.8 to vintage gems like the Helios 44-2 or the Pentax Super-Takumar, there are countless affordable lenses that allow you to dive into street photography and develop your unique visual style. With thoughtful choices and a bit of patience, you can build a compact, powerful street photography kit that won’t break the bank.

Posted on

Which Used Lens Is Best for Low-Light Photography?

Looking for the best used lenses for low-light photography? Discover budget-friendly prime and zoom lenses for Canon, Nikon, Sony, Fujifilm, Sigma, and vintage options that excel in dim lighting.

Which Used Lens Is Best for Low-Light Photography?

Low-light photography is a thrilling challenge for photographers. Whether you’re capturing vibrant cityscapes at night, atmospheric indoor scenes, or intimate portraits in dim lighting, having the right lens is essential. The lens you choose can significantly impact image quality, sharpness, and overall shooting flexibility in low-light conditions.

While modern camera sensors have improved in handling high ISO settings, a fast lens with a wide maximum aperture remains one of the most important tools for low-light shooting. But premium low-light lenses can be expensive. Thankfully, the used lens market offers incredible options that deliver professional results at a fraction of the cost.

In this article, we’ll explore what to look for in a low-light lens, and recommend some of the best used lenses across popular brands for capturing stunning images in challenging lighting conditions.


Key Features of a Good Low-Light Lens

Before we dive into lens recommendations, it’s important to understand the critical attributes that make a lens suitable for low-light photography:

  1. Wide Maximum Aperture (f/1.2 to f/2.8)
    A wide aperture allows more light to hit the sensor, enabling faster shutter speeds and lower ISO settings.
  2. Image Stabilization (IS/VR/OSS/VC)
    Helps reduce camera shake when shooting handheld at slower shutter speeds.
  3. Reliable Autofocus Performance in Low Light
    Fast and accurate autofocus is crucial for capturing sharp images in dim environments.
  4. Focal Length Depending on Genre
    • Portraits: 50mm to 85mm
    • Events: 24mm to 70mm
    • Concerts & Nightlife: 35mm to 135mm
    • Astrophotography: Wide-angle lenses like 14mm or 24mm

Top Used Lenses for Low-Light Photography

1. Canon EF 50mm f/1.4 USM

  • Mount: Canon EF (Full-frame & APS-C)
  • Why it’s great: A step up from the 50mm f/1.8, this lens offers a wider f/1.4 aperture, delivering better light-gathering ability and creamy bokeh.
  • Low-Light Performance: Excellent for portraits, street photography, and indoor events.
  • Used Price Range: $250–$350

2. Canon EF 85mm f/1.8 USM

  • Mount: Canon EF
  • Why it’s great: Known for its sharpness and beautiful bokeh, this lens is a favorite among portrait photographers, especially in low-light scenarios.
  • Low-Light Performance: Great for indoor portraits, concerts, and nighttime street photography.
  • Used Price Range: $300–$400

3. Nikon AF-S 50mm f/1.4G

  • Mount: Nikon F (Full-frame & APS-C)
  • Why it’s great: A solid low-light performer with a wide aperture and smooth rendering. It’s lightweight, sharp, and reliable.
  • Low-Light Performance: Excellent for portraits and general low-light work.
  • Used Price Range: $300–$400

4. Nikon AF-S 85mm f/1.8G

  • Mount: Nikon F
  • Why it’s great: Offers impressive sharpness, quick autofocus, and great subject isolation in low light.
  • Low-Light Performance: Perfect for portraits, indoor events, and concerts.
  • Used Price Range: $300–$450

5. Sony FE 50mm f/1.8

  • Mount: Sony E (Full-frame & APS-C)
  • Why it’s great: An affordable prime for Sony mirrorless users, providing bright f/1.8 aperture for low-light shooting.
  • Low-Light Performance: Great for beginners needing a fast lens for evening cityscapes or indoor shots.
  • Used Price Range: $150–$200

6. Sony FE 85mm f/1.8

  • Mount: Sony E
  • Why it’s great: Offers excellent image quality, fast autofocus, and beautiful bokeh at a reasonable price.
  • Low-Light Performance: Ideal for portraits and events in dim conditions.
  • Used Price Range: $350–$450

7. Fujifilm XF 35mm f/1.4 R

  • Mount: Fujifilm X (APS-C)
  • Why it’s great: Known for its magical rendering and character-rich bokeh, it’s a cult favorite among Fujifilm users.
  • Low-Light Performance: Excellent for street photography and indoor shooting.
  • Used Price Range: $400–$500

8. Sigma 30mm f/1.4 DC DN Contemporary (Sony E, Fujifilm X, Canon EF-M)

  • Why it’s great: A fast, compact, and affordable prime lens with superb optical quality.
  • Low-Light Performance: Fantastic for handheld shooting in low-light conditions, offering a bright f/1.4 aperture.
  • Used Price Range: $250–$300

9. Tamron SP 24-70mm f/2.8 Di VC USD (Canon/Nikon)

  • Why it’s great: A versatile workhorse zoom lens that covers wide to short telephoto with a constant f/2.8 aperture and image stabilization.
  • Low-Light Performance: Excellent for event photographers who need flexibility and stabilization in dimly lit venues.
  • Used Price Range: $500–$700

10. Sigma 18-35mm f/1.8 DC HSM Art (Canon/Nikon/Sony A Mounts)

  • Why it’s great: One of the few zoom lenses with an ultra-wide f/1.8 aperture, making it a powerhouse for low-light APS-C shooters.
  • Low-Light Performance: Outstanding for concerts, indoor events, and even astrophotography.
  • Used Price Range: $500–$650

Vintage Lenses for Low-Light Photography

If you’re open to manual focus, vintage lenses can provide a unique aesthetic and wide apertures at bargain prices:

11. Canon FD 50mm f/1.4

  • Mount: Canon FD (adaptable to mirrorless)
  • Why it’s great: Warm tones, creamy bokeh, and wide f/1.4 aperture for low-light work.
  • Used Price Range: $100–$150

12. Pentax Super-Takumar 50mm f/1.4 (M42 Mount)

  • Mount: M42 screw mount (adaptable to mirrorless)
  • Why it’s great: Renowned for its dreamy rendering and beautiful flare.
  • Used Price Range: $100–$150

Why Aperture is Key in Low Light

A lens with a wide maximum aperture (f/1.2 to f/2.8) allows significantly more light to reach the camera sensor compared to a kit lens with a variable f/3.5–5.6 aperture. For example, an f/1.4 lens lets in four times more light than an f/2.8 lens. This allows you to:

  • Use faster shutter speeds to avoid motion blur.
  • Keep ISO settings lower for cleaner images.
  • Create shallow depth of field for subject isolation in portraits.

Do You Need Image Stabilization for Low Light?

While a wide aperture helps capture more light, image stabilization (IS/VR/OSS/VC) becomes essential when shooting handheld at slower shutter speeds. This is especially helpful for:

  • Event photography
  • Handheld night scenes
  • Indoor shooting without a tripod

However, for moving subjects like dancers, street performers, or animals, a faster shutter speed is more critical than stabilization, making a fast aperture lens your top priority.


Autofocus Performance in Dim Conditions

Autofocus systems can struggle in low light, so lenses with robust, reliable AF motors (USM for Canon, SWM for Nikon, or linear motors for Sony/Fujifilm) perform better in these challenging environments. In situations where AF fails, switching to manual focus (aided by focus peaking on mirrorless cameras) can save the shot.


Conclusion

Low-light photography doesn’t require the most expensive, brand-new lenses. By exploring the used lens market, you can find incredible deals on fast prime lenses and versatile zooms that deliver stellar low-light performance.

From budget-friendly classics like the Canon 50mm f/1.4 and Nikon 85mm f/1.8G, to more specialized lenses like the Sigma 18-35mm f/1.8 Art, there are countless options to fit different shooting styles and budgets. Vintage manual lenses also offer a cost-effective path to low-light creativity for those willing to embrace manual focus.

With careful research and a keen eye for deals, you can build a low-light photography kit that delivers professional-quality images without overspending.

Posted on

Understanding Focal Length: A Guide for Lens Shoppers

Confused about focal lengths? This guide explains how focal length affects composition, perspective, and lens choices for photography. Learn which focal lengths suit portraits, landscapes, wildlife, and more.

Understanding Focal Length: A Guide for Lens Shoppers

When shopping for a new camera lens, one of the first specifications you’ll encounter is focal length. Numbers like 35mm, 50mm, 85mm, 70-200mm can seem confusing to beginners, but understanding focal length is essential for choosing the right lens for your photography needs.

Focal length affects more than just how “zoomed in” your photos appear. It influences composition, perspective, subject compression, and depth of field. Whether you’re capturing wide landscapes, portraits with creamy bokeh, or distant wildlife, choosing the right focal length makes all the difference.

In this guide, we’ll break down what focal length means, how it impacts your images, and help you understand which focal lengths are best suited for different photography genres.


What is Focal Length?

Focal length, measured in millimeters (mm), describes the distance between the lens’s optical center and the camera’s image sensor when the subject is in focus. It essentially determines how much of the scene will fit into your frame (angle of view) and how large your subject will appear (magnification).

  • Shorter focal lengths (wide-angle lenses) capture a broader field of view.
  • Longer focal lengths (telephoto lenses) provide a narrower field of view and magnify distant subjects.

Prime vs Zoom Lenses

Before diving into specific focal lengths, it’s important to understand the difference between:

  • Prime Lenses: Fixed focal length (e.g., 35mm, 50mm). Known for superior image quality and larger maximum apertures.
  • Zoom Lenses: Variable focal length (e.g., 24-70mm, 70-200mm). Offer flexibility in framing without changing lenses.

Focal Length Categories Explained

1. Ultra-Wide Angle (10-24mm)

  • Field of View: Extremely wide, often beyond what the human eye can see.
  • Best For: Architectural photography, expansive landscapes, interior shots.
  • Effects: Exaggerated perspective, making foreground elements appear larger.
  • Watch Out For: Distortion around edges, which can be used creatively or corrected in post-processing.

2. Wide Angle (24-35mm)

  • Field of View: Wide but less extreme than ultra-wide.
  • Best For: Street photography, environmental portraits, group shots, landscapes.
  • Effects: Allows you to capture more context in your frame while still maintaining manageable distortion levels.
  • 35mm is a favorite among street photographers for its natural, slightly wide perspective.

3. Standard/Normal (35-70mm)

  • Field of View: Closely matches human eye perception.
  • Best For: Everyday photography, portraits, street, and travel.
  • Effects: Balanced perspective; minimal distortion.
  • 50mm (Nifty Fifty) is the classic “go-to” prime lens for beginners due to its versatility and affordability.

4. Short Telephoto (85-135mm)

  • Field of View: Narrower, offering moderate subject compression.
  • Best For: Portrait photography, event shooting, detail shots.
  • Effects: Flattering perspective for portraits, with shallow depth of field and soft background blur (bokeh).
  • 85mm lenses are widely considered the “portrait king” for their flattering facial proportions.

5. Medium to Super Telephoto (200mm and beyond)

  • Field of View: Very narrow, focusing tightly on distant subjects.
  • Best For: Wildlife, sports, birding, and distant subjects.
  • Effects: Strong subject compression, allowing distant objects to appear closer. Excellent for isolating subjects.
  • 300mm-600mm lenses are essential for serious wildlife photographers.

How Sensor Size Affects Focal Length (Crop Factor)

Camera sensor size affects how a lens’s focal length behaves. Full-frame cameras have sensors equivalent to a 35mm film frame, while APS-C and Micro Four Thirds (MFT) cameras have smaller sensors, which effectively “crop” the image.

  • APS-C sensors typically have a 1.5x (Nikon/Sony/Fujifilm) or 1.6x (Canon) crop factor.
  • MFT sensors have a 2x crop factor.

Example:

  • A 50mm lens on a full-frame camera behaves like a 50mm.
  • The same 50mm lens on an APS-C camera gives an effective field of view similar to 75mm-80mm.
  • On an MFT camera, it behaves like a 100mm lens.

This means APS-C and MFT shooters get more “reach” with telephoto lenses but lose width with wide-angle lenses.


Choosing the Right Focal Length for Your Photography

Here’s a quick guide to help you choose focal lengths based on what you want to shoot:

Photography TypeRecommended Focal Lengths
Landscapes16-35mm (wide to ultra-wide)
Architecture/Interiors10-24mm (ultra-wide)
Street Photography28mm, 35mm, 50mm
Portraits (Headshots)85mm, 105mm, 135mm
Events & Weddings24-70mm, 70-200mm
Sports & Wildlife300mm, 400mm, 600mm
Macro Photography90mm, 100mm, 105mm macro lenses
Astrophotography14mm, 24mm (ultra-wide with f/2.8 or wider)

Prime vs Zoom for Focal Length Needs

  • Prime lenses (fixed focal length) often have wider apertures (f/1.2, f/1.4, f/1.8) which are great for low light and creating a shallow depth of field.
  • Zoom lenses (variable focal length) provide versatility, especially useful for dynamic situations where you can’t move physically closer or farther.

24-70mm f/2.8 zoom is considered an essential workhorse lens for event photographers, while 70-200mm f/2.8 zooms are staples for sports and wedding photographers.


Focal Length and Depth of Field (DoF)

Focal length affects how blurred the background appears:

  • Longer focal lengths (85mm and up) naturally compress the background and enhance background blur (bokeh).
  • Shorter focal lengths (24mm-35mm) provide a wider depth of field, keeping more of the scene in focus.

If you’re aiming for creamy bokeh in portraits, an 85mm f/1.8 will give you far better subject separation than a 35mm f/2.8.


Focal Length Perspective Compression

  • Wide-angle lenses (24mm and below) exaggerate the distance between subjects, making foreground objects appear much larger relative to the background.
  • Telephoto lenses (85mm and up) compress the scene, making the background appear closer to the subject, which is flattering for portraiture and useful in wildlife photography to make distant objects appear larger.

Do You Need to “Match” the Focal Length to Your Genre?

Not necessarily. Some photographers love breaking the “rules”:

  • Wide-angle portraits create an edgy, environmental look.
  • Telephoto street photography allows capturing candid moments from a distance.
    The focal length should match the look and feel you want, not just the genre.

Conclusion

Understanding focal length is key to making informed decisions when buying lenses. It’s not just about how “zoomed in” your photos are—it affects composition, subject isolation, background compression, and the entire mood of your images.

Whether you’re shooting with a full-frame DSLR, a crop-sensor mirrorless camera, or diving into vintage lenses, knowing how focal length impacts your photography will help you choose the right lens for the job. The right focal length equips you to tell your story the way you envision it.

When lens shopping, don’t focus solely on the numbers—consider how you want your images to look and feel, and choose focal lengths that match your creative vision.

Posted on

How to Clean and Maintain Your Used Lens

Learn how to properly clean and maintain your used camera lenses. This guide covers essential tools, step-by-step cleaning methods, fungus prevention, and tips to keep your lenses in top condition.

How to Clean and Maintain Your Used Lens

Lenses are the heart of photography, and whether you’ve invested in a brand-new piece of glass or scored a bargain in the used market, proper cleaning and maintenance are key to keeping your gear in top condition. Used lenses, in particular, can accumulate dust, smudges, and even fungus if not cared for properly.

The good news? Cleaning and maintaining a used lens is simple with the right tools and techniques. Regular maintenance ensures optimal image quality, extends the lifespan of your equipment, and protects your investment.

In this guide, we’ll walk you through the best practices for cleaning and maintaining your used lenses, so you can enjoy clear, sharp images for years to come.


Why Proper Lens Care is Essential

Before diving into the how-to, let’s understand why lens maintenance matters:

  • Image Quality: Dust, fingerprints, and smudges can reduce contrast, introduce flares, and soften your images.
  • Longevity: Proper care prevents long-term damage such as fungus growth or mechanical wear.
  • Resale Value: A well-maintained lens retains its value better if you plan to resell it later.
  • Reliability: Clean, smoothly functioning lenses reduce the chance of missed shots due to mechanical issues.

Essential Tools for Lens Cleaning

To clean and maintain your used lenses effectively, you’ll need a few basic tools:

  1. Rocket Blower: For removing loose dust and debris.
  2. Soft Lens Brush: Helps dislodge stubborn particles gently.
  3. Microfiber Cleaning Cloth: For cleaning the lens glass without scratching.
  4. Lens Cleaning Solution: Specifically designed to clean optics safely.
  5. Lens Cleaning Tissues or Wipes: Pre-moistened or dry tissues for single-use cleaning.
  6. Lens Pen: Features a soft brush on one end and a cleaning tip on the other.
  7. UV/Protective Filter (Optional): Acts as a shield to protect the front element of your lens from dust and scratches.

Step-by-Step Guide to Cleaning a Used Lens

Step 1: Use a Rocket Blower

  • Start by holding the lens upside down.
  • Squeeze the blower to blow off loose dust and particles from the lens surface.
  • Focus on both the front and rear lens elements.

Tip: Never use compressed air cans as they can spray propellant and damage your lens.


Step 2: Brush Away Remaining Dust

  • Use a soft lens brush to gently sweep away dust that the blower couldn’t remove.
  • Make light, circular motions without applying pressure.

Step 3: Wipe with a Microfiber Cloth

  • Inspect the lens under a light source for smudges or fingerprints.
  • Using a clean microfiber cloth, wipe in gentle circular motions starting from the center of the glass outward.
  • Avoid using T-shirts, tissues, or paper towels as they can scratch the lens coating.

Step 4: Use Lens Cleaning Solution for Stubborn Marks

  • Apply a drop or two of lens cleaning solution to a microfiber cloth or lens tissue (never directly onto the lens).
  • Gently clean the glass surface with a circular motion.
  • Immediately wipe with a dry section of the cloth to prevent streaks.

Step 5: Clean the Lens Barrel

  • Use a slightly damp microfiber cloth to clean the exterior barrel of the lens.
  • Pay attention to control rings (zoom/focus) and seams where dust tends to accumulate.
  • If necessary, use a soft brush to clean textured areas or engraved markings.

Step 6: Inspect the Rear Element and Mount

  • Repeat steps 1–4 for the rear lens element.
  • Carefully clean the lens mount area to ensure a good connection with your camera body.

Step 7: Use a Lens Pen for Final Touches

  • Use the brush side to remove fine dust.
  • The carbon tip can be used for gentle, streak-free cleaning of any remaining smudges.

Preventative Maintenance Tips for Used Lenses

1. Always Use Lens Caps

  • Keep the front and rear lens caps on when not in use.
  • Caps protect against dust, scratches, and accidental knocks.

2. Store Lenses in a Dry, Clean Environment

  • Store lenses in a dry box or with silica gel packets to prevent moisture buildup.
  • Avoid leaving lenses in humid places to reduce the risk of fungus.

3. Avoid Touching Lens Elements

  • Handle the lens by its barrel, not the glass.
  • Finger oils can degrade lens coatings over time if not cleaned properly.

4. Use UV or Protective Filters

  • A UV filter acts as a sacrificial layer to protect the front element.
  • While it may slightly affect image quality, it’s a cheap layer of defense against scratches and dust.

5. Keep Lenses Away from Harsh Environments

  • If shooting in dusty, sandy, or wet environments, use lens hoods and weather-sealed accessories when possible.
  • Clean the lens immediately after exposure to harsh elements.

How to Deal with Lens Fungus

Fungus is a common issue in older or poorly stored lenses. If you spot faint cobweb-like patterns inside the lens glass, that’s a sign of fungal growth. Here’s what you can do:

  • Isolate the Lens: Keep it away from other gear to prevent contamination.
  • Expose to UV Light: Sunlight can help kill fungus but won’t remove damage already caused.
  • Professional Cleaning: For internal fungus, it’s best to send the lens to a professional repair technician.

How Often Should You Clean Your Lens?

  • Front and Rear Elements: Clean whenever you notice dust, smudges, or fingerprints.
  • Lens Barrel: Wipe down every few weeks or after shooting in dusty/wet environments.
  • Deep Clean: Every few months, give your lens a thorough clean, especially if used regularly outdoors.

Signs Your Lens Needs Maintenance

  • Smudges, streaks, or dust spots showing up in photos.
  • Grinding noise or stiffness in zoom/focus rings.
  • Visible mold/fungus growth inside.
  • Loose lens mount or rattling sounds.
    If any of these occur, address them promptly to avoid long-term damage.

When to Seek Professional Servicing

Some issues are best left to the pros:

  • Internal Dust or Fungus: Requires disassembly to clean.
  • AF/MF Mechanical Issues: If the autofocus becomes sluggish or manual focus feels rough.
  • Aperture Blade Problems: Sticky or slow-moving aperture blades need professional attention.
    Regular professional servicing can extend the life of high-end lenses significantly.

Conclusion

Cleaning and maintaining your used lenses is an essential habit for every photographer. With the right tools and simple routines, you can ensure that your lenses stay in top optical and mechanical condition, delivering sharp, high-quality images for years to come.

Whether you own a vintage manual focus gem or a modern autofocus workhorse, consistent care prevents costly repairs and keeps your photography gear performing at its best. Remember: a clean lens is a happy lens, and your images will thank you for it.

Posted on

What to Look for When Buying a Used Manual Focus Lens

Buying a used manual focus lens? This guide covers what to inspect—from focus rings and aperture blades to lens optics and mount condition—so you can avoid costly mistakes and get the best value.

What to Look for When Buying a Used Manual Focus Lens

In the era of lightning-fast autofocus systems and high-tech digital lenses, manual focus lenses might seem like a thing of the past. But for many photographers, especially enthusiasts and artists, manual focus lenses are a treasure trove of craftsmanship, optical character, and tactile shooting experience. Whether you’re interested in vintage glass for its unique rendering or modern manual lenses for precision control, buying used is an excellent way to expand your gear without spending a fortune.

However, buying a used manual focus lens is not as simple as grabbing the first good deal you see. Unlike autofocus lenses, which rely on motors and electronics, manual focus lenses depend entirely on the precision of their mechanical parts and optical integrity. This makes inspecting them thoroughly even more important.

In this article, we’ll guide you through what to look for when buying a used manual focus lens, so you can avoid costly mistakes and ensure you’re getting a reliable, high-quality lens that enhances your photography.


Why Manual Focus Lenses Are Still Worth Buying

Before diving into inspection tips, let’s quickly revisit why manual focus lenses still attract so much attention:

  • Superior Build Quality: Many manual lenses, especially vintage models, are constructed with durable metal parts designed to last decades.
  • Unique Optical Character: Older lenses often render images with distinct colors, flares, and bokeh that modern lenses can’t replicate.
  • Budget-Friendly: High-quality used manual lenses are often far cheaper than their autofocus counterparts.
  • Creative Control: Manual focusing encourages a more deliberate shooting style, which can be a creative advantage.
  • Adaptability: Manual lenses can easily be adapted to modern mirrorless systems, making them versatile tools even today.

Essential Factors to Check When Buying a Used Manual Focus Lens

1. Physical Condition of the Lens Body

Start by inspecting the exterior barrel of the lens.

  • Check for Dents, Cracks, or Heavy Scratches: While minor scuffs are expected, deep dents or cracks can indicate serious impacts that may have misaligned internal elements.
  • Loose or Missing Screws: Examine all screws and fittings to ensure they’re intact and not signs of a careless repair.
  • Check Mount Threads/Contacts: Ensure the lens mount is not stripped, bent, or excessively worn. A poor fit can cause mounting issues on your camera body.

2. Focus Ring Operation

Since you’ll be focusing manually, the focus ring’s performance is critical.

  • Smoothness: Rotate the focus ring slowly from end to end. It should feel smooth, without stiffness, grinding, or uneven resistance.
  • Consistency: Avoid lenses where the focus ring feels loose, wobbly, or has “dead zones” where the focus doesn’t respond.
  • Hard Stops: Check that the focus ring stops precisely at minimum focusing distance and infinity without overshooting.

3. Aperture Ring Functionality

  • Smooth Clicks: The aperture ring should click firmly into each stop with consistent resistance.
  • De-clicked Aperture (if applicable): Some lenses are designed for video and may have a smooth, stepless aperture—verify this is intentional.
  • Blade Movement: Move the aperture ring while looking through the lens to ensure the blades open and close uniformly.
  • Oil-Free Blades: Shine a light through the lens and look for oil or stickiness on the aperture blades, which can cause them to stick and malfunction.

4. Inspecting Lens Elements (Front & Rear)

  • Surface Scratches: Tiny cleaning marks or light scratches on the glass are often cosmetic and won’t affect image quality, but deep scratches are best avoided.
  • Lens Coating Condition: Ensure the anti-reflective coatings are intact; patches of wear can increase flare and reduce contrast.
  • Internal Haze: Check for foggy or cloudy areas inside the lens, which can severely impact image clarity.
  • Fungus: Look for web-like patterns of fungus, especially near the edges of lens elements. Minor fungus might be manageable, but severe cases can damage lens coatings permanently.
  • Balsam Separation: If you see rainbow-colored patterns or bubbles between elements, that’s a sign of cement separation, which is difficult to repair and affects image quality.

5. Internal Dust & Debris

  • A few dust particles inside a lens are normal, even in new lenses.
  • Large dust particles, hair, or floating debris can affect image contrast.
  • Excessive internal dust could also be a sign the lens was stored improperly, increasing the risk of fungus or haze.

6. Lens Mount & Compatibility

  • Mount Type: Confirm the lens mount is compatible with your camera system or check if a reliable adapter is available.
  • Mount Integrity: Inspect the lens mount for any signs of damage, wear, or loose fitting.
  • Adapter Fit: If possible, test the lens with the adapter you’ll be using to ensure a secure and wobble-free fit.

7. Test Image Quality (If Possible)

If you can mount the lens on a camera:

  • Test Focusing Accuracy: Focus at both close distances and infinity to see if the image snaps into sharp focus.
  • Check for Sharpness: Shoot at different apertures, especially wide open, and check sharpness across the frame.
  • Look at Bokeh Rendering: See how the lens renders out-of-focus areas—many manual lenses are known for their distinctive bokeh.
  • Test Flare & Contrast: Point the lens towards a bright light source to assess flare resistance and contrast handling.

8. Known Issues of Specific Lens Models

Some manual lenses are prone to certain design quirks or recurring issues. Before purchasing:

  • Research forums, user reviews, and technical resources about the specific lens.
  • Look for common complaints such as weak construction points, aperture blade issues, or known optical flaws.
    This knowledge can help you identify red flags during your inspection.

9. Assessing the Lens’s History

  • Ask the Seller About Storage Conditions: Lenses stored in humid environments are more likely to develop fungus.
  • Frequency of Use: A frequently used lens isn’t necessarily bad but should show signs of good maintenance.
  • Original Accessories: Presence of original caps, hoods, or cases often indicates a careful owner.

10. Market Price Research

Do a thorough price comparison across:

  • eBay sold listings
  • Online camera stores (KEH, B&H Used Department)
  • Local photography groups and forums
    Avoid deals that are “too good to be true”—they usually are.

Red Flags to Watch Out For

  • Fungus or haze inside the lens.
  • Stiff or grinding focus ring.
  • Sticky aperture blades or oily residues.
  • Deep scratches on front or rear elements.
  • Loose or bent mounts.
  • Sellers unwilling to provide detailed photos or answer questions.

Best Types of Manual Focus Lenses to Buy Used

  • Vintage Classics: Canon FD, Minolta Rokkor, Pentax Takumar, Nikon AI-S lenses.
  • Modern Manual Primes: Voigtländer Nokton, Zeiss Loxia, Samyang/Rokinon MF lenses.
  • Specialty Lenses: Helios 44-2 (famous for swirly bokeh), Meyer-Optik Trioplan (soap-bubble bokeh).

Conclusion

Buying a used manual focus lens can be incredibly rewarding, offering access to beautifully crafted optics with distinct character. However, it requires a careful and informed approach. By thoroughly inspecting the physical condition, mechanical operation, and optical integrity, you can avoid costly repairs and ensure you’re investing in a lens that delivers both reliability and artistic flair.

Take your time, do your research, and don’t hesitate to ask questions. When you find a gem of a manual focus lens in great condition, it will serve you for years to come—and likely at a fraction of the cost of modern autofocus lenses.

Posted on

Lens Mount Compatibility: What You Need to Know Before Buying

Confused about lens mount compatibility? This guide explains flange distance, adapter types, and key factors to check before buying used lenses, ensuring they fit and function with your camera system.

Lens Mount Compatibility: What You Need to Know Before Buying

When it comes to building a camera system, one of the most important—but often overlooked—considerations is lens mount compatibility. You might find an excellent deal on a used lens or dream of using vintage glass with your modern camera, but if the mount isn’t compatible, you could end up with an expensive paperweight—or face costly and cumbersome workarounds.

Lens mount compatibility determines whether a lens will physically and electronically connect to your camera body. With so many brands, mount types, and adapters available, understanding the basics of lens mounts is essential before making a purchase.

In this guide, we’ll break down everything you need to know about lens mount compatibility, including mount types, adapting lenses across systems, and tips for avoiding costly mistakes.


What is a Lens Mount?

lens mount is the interface where a lens attaches to a camera body. It ensures a secure physical connection and—on modern lenses—enables communication between the lens and the camera for functions like autofocus, aperture control, and image stabilization.

Lens mounts differ in:

  • Physical dimensions (diameter, flange distance)
  • Electronic communication protocols
  • Mechanical locking mechanisms

Each camera manufacturer typically has its proprietary mount system, although some third-party lens makers produce lenses in multiple mount options.


Flange Distance: The Key to Compatibility

One critical specification is flange focal distance (FFD)—the distance from the lens mount to the camera sensor.

  • Short flange distances allow more flexibility for adapting lenses.
  • Long flange distances limit adaptability, especially to mirrorless systems.

For example:

  • DSLRs (like Canon EF or Nikon F) have longer flange distances.
  • Mirrorless cameras (like Sony E, Canon RF, Nikon Z, Fujifilm X, Micro Four Thirds) have shorter flange distances.

Short flange distance cameras can adapt lenses with longer flange distances using simple mechanical adapters.


Common Lens Mount Systems

Canon EF and EF-S (DSLR)

  • EF: Full-frame DSLRs.
  • EF-S: Crop-sensor (APS-C) DSLRs.
  • EF lenses work on EF-S bodies, but EF-S lenses don’t mount on full-frame EF bodies.
  • Not natively compatible with Canon’s mirrorless RF mount without an adapter.

Canon RF (Mirrorless)

  • For Canon’s full-frame mirrorless cameras (EOS R series).
  • Adapters allow use of EF and EF-S lenses.

Nikon F (DSLR)

  • Long-standing mount used for decades.
  • Compatible with many older Nikon lenses (AI, AI-S), but some limitations with entry-level bodies (no in-body focus motor).

Nikon Z (Mirrorless)

  • For Nikon’s full-frame and APS-C mirrorless cameras.
  • FTZ adapters allow use of Nikon F-mount lenses with full functionality on higher-end Z bodies.

Sony E-Mount (Mirrorless)

  • E-mount is used across Sony’s APS-C and full-frame mirrorless cameras.
  • Flexible for adapting third-party lenses due to short flange distance.

Fujifilm X-Mount (Mirrorless)

  • For Fujifilm’s APS-C mirrorless cameras.
  • Lenses from other mounts require adapters; no native full-frame X-mount lenses.

Micro Four Thirds (MFT)

  • Shared by Olympus and Panasonic.
  • Smaller sensor size with 2x crop factor.
  • Very adaptable to legacy manual focus lenses.

Adapting Lenses: Mechanical vs Electronic Adapters

Mechanical Adapters

  • Simple metal rings with no electronic contacts.
  • Perfect for adapting manual focus lenses.
  • Focus and aperture are controlled manually.
  • Ideal for vintage lenses (e.g., M42, Leica M, Canon FD).

Electronic Adapters

  • Enable communication between lens and camera body.
  • Allow autofocus, aperture control, EXIF data transfer, and image stabilization (if supported).
  • Quality varies: some brands (e.g., Metabones, Sigma MC-11) produce reliable adapters; cheap no-brand adapters can be hit-or-miss.

Adapting DSLR Lenses to Mirrorless Bodies

One of the major advantages of mirrorless cameras is their adaptability. For example:

  • Canon EF lenses to Canon RF bodies (using Canon’s official EF-RF adapter).
  • Nikon F lenses to Nikon Z bodies (via Nikon FTZ adapter).
  • Canon EF or Nikon F lenses to Sony E-Mount bodies (via Metabones or Sigma MC-11 adapters).

Adapting DSLR lenses to mirrorless bodies generally works well because mirrorless cameras have a shorter flange distance, making room for adapters.


Limitations When Adapting Lenses

  1. Autofocus Speed & Accuracy: Adapting DSLR autofocus lenses to mirrorless can result in slower or less accurate autofocus.
  2. Electronic Features: Some features like lens-based image stabilization, aperture control, and EXIF data may not work with cheap adapters.
  3. Manual Focus Only: When adapting vintage lenses (e.g., Canon FD to Sony E-mount), you’ll be limited to manual focus and manual aperture control.
  4. Infinity Focus Issues: Poorly made adapters may prevent the lens from focusing to infinity.
  5. Vignetting or Sensor Coverage: Adapting full-frame lenses to crop sensors works fine, but using APS-C lenses on full-frame bodies may cause vignetting.

Lens Mount Compatibility: What to Double-Check Before Buying

1. Camera Body Mount Type

  • Know whether your camera is a DSLR or mirrorless, full-frame or APS-C.
  • Example: A Nikon F-mount lens won’t fit a Nikon Z body without an adapter.

2. Lens Mount Type

  • Identify the lens mount of the used lens you’re interested in.
  • Example: Canon FD (manual focus) lenses require an adapter to mount on modern Canon EF bodies or mirrorless cameras.

3. Adapter Availability & Cost

  • Ensure there’s a reliable adapter for the lens-camera combination.
  • Budget for high-quality adapters (brands like Metabones, Novoflex, Viltrox).

4. Functionality Expectations

  • Are you okay with manual focus only?
  • Do you need autofocus and aperture control?
  • Will you lose image stabilization?

5. Crop Factor Considerations

  • Using a full-frame lens on an APS-C body results in a narrower field of view.
  • Example: A 50mm lens becomes equivalent to a 75mm on a 1.5x crop sensor.

Popular Mount Combinations for Adaptation

  • Canon FD to Sony E-Mount (Manual Focus)
  • Nikon AI-S to Fuji X or Sony E-Mount
  • Canon EF to Sony E-Mount (with Metabones Speedbooster for full-frame equivalent)
  • M42 Screw Mount to Almost Any Mirrorless Camera

Future-Proofing Your Lens Purchases

If you plan to upgrade your camera body in the future, consider lenses that will still be compatible:

  • Lenses with a longer flange distance can be adapted to mirrorless cameras.
  • Modern mirrorless lenses (RF, Z, E-Mount) are less likely to be compatible with DSLR bodies.
  • Investing in high-quality manual focus lenses (e.g., Leica M, Zeiss, Voigtländer) ensures long-term versatility across systems.

Conclusion

Lens mount compatibility is a critical yet often overlooked factor when buying lenses—especially in the used market. Understanding flange distances, mount types, and the pros and cons of lens adapters can save you time, money, and frustration.

Before hitting that “Buy Now” button, make sure you’ve confirmed whether the lens will fit your camera natively or if an adapter is needed. More importantly, ensure you’re aware of any functionality trade-offs (like losing autofocus or stabilization).

A little research goes a long way. With the right knowledge, you can confidently expand your photography kit with used lenses that work seamlessly with your camera system—unlocking creative possibilities while staying on budget.

Posted on

Crop Sensor vs Full Frame: How It Affects Lens Choice

Wondering how crop sensors and full-frame cameras affect lens choice? Learn how sensor size impacts focal length, depth of field, compatibility, and which lenses are best for your photography needs.

Crop Sensor vs Full Frame: How It Affects Lens Choice

One of the most debated topics among photographers, especially those building or upgrading their camera gear, is the difference between crop sensor (APS-C) and full-frame cameras. While much has been said about image quality, dynamic range, and low-light performance, there’s another crucial factor that often gets overlooked: how sensor size affects lens choice.

Choosing the right lenses depends not just on focal length numbers but on how those numbers interact with the camera’s sensor size. Understanding this relationship is essential for making informed purchasing decisions, especially if you’re considering investing in used lenses.

In this article, we’ll break down the differences between crop sensors and full-frame cameras, explain how sensor size influences lens selection, and guide you on choosing the right lenses for your camera system.


Understanding Sensor Sizes: Crop Sensor vs Full Frame

Full-Frame Sensors

  • Equivalent to the traditional 35mm film frame size (36mm x 24mm).
  • Common in professional-grade DSLRs and mirrorless cameras (e.g., Canon R5, Nikon Z7, Sony A7 series).
  • Known for better dynamic range, low-light performance, and shallower depth of field.

Crop Sensors (APS-C)

  • Smaller sensors typically measuring around 22mm x 15mm.
  • Found in many consumer and enthusiast-level cameras (e.g., Canon EOS R7, Nikon Z50, Fujifilm X-T5).
  • Introduces a “crop factor” that magnifies the effective focal length of attached lenses.

Crop Factor Explained

The crop factor (typically 1.5x for Nikon/Fuji/Sony APS-C and 1.6x for Canon APS-C) refers to how much the field of view is reduced compared to a full-frame camera.

  • A 50mm lens on a full-frame camera gives a true 50mm field of view.
  • On an APS-C camera with a 1.5x crop factor, that same lens behaves like a 75mm lens in terms of framing.

How Sensor Size Affects Lens Choice

1. Focal Length Considerations

  • Wide-Angle Lenses: On a crop sensor, wide-angle lenses become less wide.
    • Example: A 24mm lens on a 1.5x APS-C camera gives a 36mm equivalent field of view.
    • For true wide-angle shots on APS-C, you’ll need lenses designed specifically for crop sensors or ultra-wide focal lengths.
  • Standard Lenses: The classic 50mm “nifty fifty” becomes a short telephoto (~75mm on APS-C), making it great for portraits but not for general-purpose use.
  • Telephoto Lenses: The crop factor can be beneficial here. A 200mm lens effectively becomes a 300mm equivalent on a 1.5x crop sensor, providing extra reach—ideal for wildlife and sports photography.

2. Lens Mount Compatibility

Most camera brands produce lenses specifically designed for their crop-sensor bodies:

  • Canon EF-S lenses (APS-C) are incompatible with full-frame EF mount cameras.
  • Nikon DX lenses (APS-C) can be mounted on full-frame FX bodies, but the camera will switch to a crop mode, reducing resolution.
  • Sony E-mount lenses come in APS-C (E) and full-frame (FE) variants.
  • Fujifilm X-Mount is exclusively APS-C; no full-frame cameras exist in Fuji’s X series.

If you plan to upgrade to a full-frame body in the future, investing in full-frame-compatible lenses now can save money long term.


3. Depth of Field Differences

Full-frame sensors naturally produce a shallower depth of field than crop sensors at the same aperture and framing.

  • A 50mm f/1.8 lens on a full-frame body will give creamier background blur than the same lens on an APS-C body.
  • To achieve similar background blur on APS-C, you’ll need to use wider apertures or longer focal lengths.

This depth of field difference is critical for portrait photographers who seek that smooth, creamy bokeh.


4. Lens Image Circle

Lenses are designed to project an image circle large enough to cover the sensor.

  • Full-frame lenses project a larger image circle to cover the entire full-frame sensor.
  • Crop sensor lenses (e.g., EF-S, DX) project a smaller image circle suited for APS-C sensors.
  • Mounting an APS-C lens on a full-frame body (when physically possible) often results in vignetting (dark edges) or the camera defaulting to a crop mode.

5. Size, Weight, and Cost of Lenses

Crop sensor lenses are generally smaller, lighter, and more affordable than their full-frame counterparts.

  • Travel & Street Photography: APS-C cameras paired with compact lenses are easier to carry around.
  • Full-frame Lenses: Offer superior optical performance but are often larger, heavier, and more expensive.

If portability is a priority, crop sensor systems with dedicated lenses are a smart choice.


Lens Buying Tips for Crop Sensor Users

  • Look for Lenses Designed for APS-C: Brands like Sigma and Tamron offer excellent APS-C-specific lenses that are sharp, compact, and budget-friendly.
  • Ultra-Wide Needs? APS-C users seeking wide-angle shots should consider lenses in the 10-20mm range to compensate for the crop factor.
  • Prime Lenses: Consider 35mm primes for a “normal” field of view (~50mm equivalent on APS-C).
  • Think About Future Upgrades: If you’re eyeing a future full-frame upgrade, investing in full-frame lenses might be worthwhile even on a crop sensor body.

Lens Buying Tips for Full-Frame Users

  • Choose Lenses That Maximize Full-Frame Potential: Don’t settle for APS-C lenses if you’ve invested in a full-frame body.
  • Wide-Angle Advantage: Full-frame bodies give you true wide-angle views with lenses like 16-35mm or 24mm primes.
  • Size and Weight Trade-offs: Be prepared for larger and heavier lenses, especially with zooms and fast-aperture primes.
  • High-Resolution Benefits: Full-frame sensors pair well with high-quality glass, enabling you to fully exploit high megapixel counts.

Using Full-Frame Lenses on Crop Sensors: Good Idea?

It’s common for APS-C users to buy full-frame lenses to “future-proof” their investment. While this works, there are considerations:

  • You lose the wide-angle field of view advantage.
  • Larger size may feel unbalanced on smaller APS-C bodies.
  • You’re carrying extra glass you’re not fully using.

However, if image quality is your priority, high-end full-frame lenses will often outperform APS-C-only lenses even on crop bodies.


Crop Sensor vs Full Frame: Who Should Choose What?

Choose Crop Sensor If:

  • You’re budget-conscious.
  • You prioritize portability and lightweight gear.
  • You often shoot wildlife, sports, or telephoto subjects where extra reach is beneficial.
  • You prefer a compact system for travel or street photography.

Choose Full Frame If:

  • You want the best image quality in dynamic range, depth of field, and low-light performance.
  • You shoot landscapes, portraits, or commercial work where detail and image quality are critical.
  • You don’t mind larger, heavier equipment.
  • You’re investing in a long-term, professional-grade system.

Conclusion

Understanding how crop sensor and full-frame cameras affect lens choice is vital for photographers who want to maximize image quality, usability, and value. Sensor size impacts everything from focal length perception and depth of field to lens size, compatibility, and future-proofing.

If you’re shopping for lenses, whether new or used, always consider how the lens will behave on your specific camera body. By understanding crop factors, mount compatibility, and optical characteristics, you’ll make smarter lens investments that serve your photographic needs now—and in the future.

Posted on

Behind the Scenes: How We Test and Grade Our Used Lenses

Discover how used lenses are professionally tested and graded before resale. Learn the step-by-step process that ensures optical quality, mechanical precision, and buyer confidence in every purchase.

Behind the Scenes: How We Test and Grade Our Used Lenses

In the ever-evolving world of photography, used camera gear has become an essential resource for enthusiasts and professionals alike. Buying pre-owned lenses is a smart way to expand your creative toolkit while saving money. However, not all used lenses are created equal. Hidden scratches, mechanical wear, or optical issues can turn a seemingly good deal into a frustrating experience. That’s why trusted camera stores and dealers follow strict procedures to test and grade used lenses before offering them for sale.

But have you ever wondered how lenses are actually tested and graded? What steps are involved to ensure a lens meets quality standards? In this article, we’ll take you behind the scenes and reveal the comprehensive process of inspecting, testing, and grading used lenses, giving you confidence in every purchase.


Step 1: Visual Exterior Inspection

The first thing technicians do when a used lens arrives is perform a thorough visual inspection of the exterior. This step helps determine the cosmetic condition and detect any signs of impact damage or excessive wear.

Key aspects checked:

  • Lens Barrel Condition: Scratches, dents, scuffs, or worn-out paint are noted.
  • Mount Integrity: The lens mount is examined for scratches, deformations, or loose fittings that could affect attachment to a camera.
  • Switches & Buttons: All external switches (AF/MF, IS/VR toggles, aperture rings) are tested for proper movement and responsiveness.
  • Filter Threads: Damaged or stripped filter threads are red flags, as they may prevent the use of filters.

Lenses with cosmetic flaws are documented carefully. Minor scratches may only affect the lens’s appearance, but deeper dents could indicate internal misalignment.


Step 2: Optical Glass Examination

Next, technicians examine the front and rear glass elements for imperfections that could impact image quality.

Inspections include:

  • Surface Scratches: Light cleaning marks are normal, but deep scratches—especially on the rear element—can affect sharpness and flare performance.
  • Coating Condition: Special attention is paid to the integrity of anti-reflective coatings, as worn coatings can degrade contrast.
  • Fungus Detection: Lenses are checked under bright light for web-like patterns that indicate fungus growth, which can spread if untreated.
  • Haze or Fogging: Internal haze is caused by moisture exposure and can scatter light, reducing image clarity.
  • Separation Issues: Also known as “balsam separation,” this defect shows as rainbow-like patterns due to separation between cemented elements.

Technicians use specialized LED lights and magnifying loupes to catch defects invisible under normal lighting conditions.


Step 3: Internal Dust & Debris Assessment

Virtually all lenses accumulate some dust inside over time. However, the amount and size of internal dust are important factors in grading.

  • Minor Dust: Common and typically does not impact image quality.
  • Heavy Dust or Debris: Excessive particles can reduce contrast or indicate improper storage conditions.
  • Hair or Large Particles: Suggests previous disassembly or poor maintenance.

If internal dust is accessible, the lens may undergo light cleaning. For sealed lenses, a high dust level might result in a lower grading even if image quality remains unaffected.


Step 4: Mechanical Function Testing

For manual focus lenses:

  • Focus Ring Smoothness: The ring should turn smoothly across its entire range without grinding, stiffness, or loose play.
  • Aperture Ring Functionality: Click stops should be firm and precise; aperture blades must open and close consistently.

For autofocus lenses:

  • Autofocus Motor Test: The lens is mounted on a compatible camera to test AF speed, accuracy, and noise level.
  • Stabilization System Check: Lenses with built-in image stabilization (IS/VR/OS) are checked for proper activation and effective performance.

Any mechanical stiffness, looseness, or malfunctioning parts are documented and affect the lens’s grade.


Step 5: Functional Mounting Test

The lens is mounted on an appropriate camera body to verify:

  • Mounting Fit: Ensures a secure and snug connection with no wobble.
  • Communication Protocols: Electronic lenses are tested to see if aperture, focus, and EXIF data are correctly transmitted to the camera.
  • Infinity Focus: Technicians verify that the lens can accurately focus to infinity, which can reveal misaligned optics.

Step 6: Optical Performance Testing

Beyond physical checks, real-world image testing is crucial to determine a lens’s optical performance.

Test procedures include:

  • Sharpness Test (Center & Edges): Images are taken at various apertures to evaluate sharpness performance.
  • Bokeh Quality Assessment: Out-of-focus rendering is examined, especially for portrait lenses.
  • Flare & Ghosting Test: Shots are taken against strong light sources to assess flare resistance.
  • Chromatic Aberration Check: High-contrast edges are inspected for color fringing.
  • Distortion Patterns: Wide-angle and zoom lenses are checked for barrel or pincushion distortion.

Test shots are reviewed on calibrated monitors to identify any optical flaws such as decentering or focus shift.


Step 7: Cleaning & Polishing

If a lens passes all functional tests, it undergoes a professional cleaning session:

  • Exterior Wiping: Lens barrels, rings, and mounts are cleaned of smudges and dirt.
  • Glass Polishing: Front and rear elements are gently cleaned with lens-safe solutions.
  • Dust Blowout: Internal dust that is reachable without disassembly is removed using air blowers.

This step ensures the lens not only functions well but also looks as presentable as possible.


Step 8: Grading the Lens

Based on its condition and test results, the lens is assigned a grade or condition rating. Though grading systems may vary by retailer, common categories include:

  1. Like New / Mint – Flawless, looks and performs as new.
  2. Excellent – Minor cosmetic marks, but flawless functionality.
  3. Very Good / Good – Noticeable cosmetic wear; fully functional.
  4. Fair – Heavy wear, may have minor optical or mechanical imperfections.
  5. As-Is / Parts – Defects present; sold at a discount without warranty.

Every grade comes with a detailed description highlighting specific cosmetic marks, functional quirks, or optical defects, if any.


Step 9: Documentation & Photography

Before listing the lens for sale, high-resolution product images are taken to accurately show its condition. Detailed descriptions are written to inform potential buyers of:

  • Cosmetic wear.
  • Functional performance.
  • Any minor issues found during testing.
  • Warranty and return policy.

Transparency at this stage is crucial to maintaining buyer trust and reducing post-sale disputes.


Step 10: Warranty & After-Sale Support

Reputable dealers often provide limited warranties on used lenses (30-180 days), covering unforeseen functional defects. This assurance gives buyers peace of mind, knowing they can return or exchange the product if it doesn’t perform as expected.


Why This Process Matters

When buying a used lens from a trusted retailer, you’re not just paying for the item itself. You’re investing in:

  • Thorough inspection.
  • Honest grading.
  • Functional testing.
  • Post-sale support and warranties.

This rigorous process ensures that buyers can shop for used lenses confidently, knowing they’re getting gear that’s been professionally vetted and accurately described.


Conclusion

Behind every “Used – Excellent Condition” listing lies a detailed and methodical inspection process. From the moment a used lens arrives, it undergoes a comprehensive series of tests—visual checks, mechanical assessments, optical performance evaluations—to ensure it meets strict quality standards.

Understanding how lenses are tested and graded helps buyers appreciate the value of buying from trusted sellers rather than taking risks in unverified marketplaces. When you buy a lens that’s been properly inspected, cleaned, and graded, you’re not just saving money—you’re making a reliable, informed investment in your photography gear.

Posted on

Customer Stories: Incredible Shots Taken With Our Used Lenses

Discover how photographers create stunning images using pre-owned lenses. Read inspiring customer stories showcasing incredible shots taken with affordable, high-quality used lenses from our collection.

Customer Stories: Incredible Shots Taken With Our Used Lenses

Photography is all about capturing a moment, telling a story, and seeing the world through a unique lens—literally. While many photographers dream of owning the latest and greatest gear, the truth is that you don’t need brand-new equipment to create stunning images. Some of the most breathtaking photos are taken with used lenses, proving that creativity and vision matter more than the age of your gear.

At [Your Camera Store Name], we’ve had countless customers share their amazing work captured using pre-owned lenses they purchased from us. These stories highlight not just the savings they enjoyed but also the incredible image quality and artistic potential of used glass. In this article, we’ll showcase inspiring customer stories and the used lenses behind their remarkable shots.


1. A Wildlife Photographer’s Dream Shot – Nikon 300mm f/4D AF-S

Mark, an avid wildlife photographer, had always wanted a super-telephoto lens but couldn’t justify the price of a brand-new model. After browsing our used inventory, he found a Nikon 300mm f/4D AF-S IF-ED lens in excellent condition.

Armed with his trusty Nikon D750 and the newly purchased used lens, Mark ventured to a nearby nature reserve. He captured a jaw-dropping image of a soaring bald eagle against a crystal-blue sky. The image was sharp, the background beautifully compressed, and the colors vibrant. Mark was thrilled with how the used lens delivered pro-level results at a fraction of the cost.

Mark’s Lesson: Don’t underestimate older professional-grade lenses. When well cared for, they’re capable of delivering spectacular wildlife images.


2. Street Photography Magic with a Canon EF 50mm f/1.4 USM

Samantha, a street photographer from Manila, always loved the classic look of 50mm lenses but didn’t want to splurge on Canon’s L-series prime. She picked up a used Canon EF 50mm f/1.4 USM from our store for half the retail price.

Using her Canon EOS 6D, Samantha roamed the city’s vibrant streets, capturing candid portraits and daily life scenes. One of her favorite shots is a portrait of an elderly vendor surrounded by colorful fruits, with the lens producing dreamy bokeh that made the subject pop. The image was later featured in a local exhibit about urban life.

Samantha’s Takeaway: Affordable primes from the used market can become your go-to lenses for creative street photography.


3. Vintage Lens, Modern Camera – Sony A7 III with a Minolta Rokkor 58mm f/1.2

James, a portrait photographer, loves experimenting with vintage lenses. He found a Minolta Rokkor 58mm f/1.2 in our vintage collection and paired it with his Sony A7 III using a simple adapter.

The lens, known for its dreamy rendering and unique character, helped James produce portraits with ethereal bokeh and soft highlights that modern lenses sometimes lack. His series of creative portraits using this lens gained traction on social media, with many people asking how he achieved the “film-like” look.

James’ Advice: Don’t be afraid to explore vintage lenses. They offer unique image qualities that can set your work apart.


4. Landscape Wonders with a Sigma 10-20mm f/4-5.6 EX DC HSM

Lucy, a travel and landscape photographer, was on a budget for her next hiking trip to New Zealand. She needed a wide-angle lens for her Canon 80D but didn’t want to overspend. After some research, she opted for a used Sigma 10-20mm f/4-5.6 lens.

The lens exceeded her expectations, allowing her to capture sweeping landscapes, towering mountains, and serene lakes. One of her photos, showcasing a mirror-like lake reflection of snow-capped peaks, was shortlisted in a national photography competition.

Lucy’s Realization: A good used ultra-wide lens can dramatically enhance landscape photography without draining your wallet.


5. Macro Photography on a Budget – Tamron 90mm f/2.8 Macro

Alex, an amateur macro photographer, had long admired close-up shots of insects and flowers but found macro lenses out of his budget. He discovered a used Tamron 90mm f/2.8 Macro lens listed as “Very Good” condition in our store.

With a bit of patience and experimentation, Alex captured incredible close-up images of bees pollinating flowers in his backyard. The level of detail—the fine textures of petals and the delicate hairs on the insects—was stunning. Alex’s work was later featured on a popular macro photography blog.

Alex’s Insight: A second-hand macro lens can open up an entirely new world of photography at a very reasonable price.


6. Wedding Storytelling with a Used Canon 24-70mm f/2.8L II USM

Emma, an up-and-coming wedding photographer, needed a versatile zoom lens but couldn’t afford a brand-new Canon L-series zoom. She invested in a used Canon 24-70mm f/2.8L II USM, which was rated in “Excellent” condition.

That lens became her workhorse for an entire wedding season, capturing everything from wide group shots to intimate candid moments. One of her favorite images was a spontaneous dance floor shot, where the fast aperture and reliable autofocus ensured she nailed the moment perfectly.

Emma’s Conclusion: Buying a used professional zoom lens can be a game-changer for photographers breaking into the event industry.


7. Urban Nightscapes with a Nikon 20mm f/2.8 AF-D

Carlos, an architectural and nightscape enthusiast, found a used Nikon 20mm f/2.8 AF-D lens in our inventory. He wanted a compact wide-angle lens to pair with his Nikon D750 for shooting cityscapes at night.

During a weekend trip to Tokyo, Carlos captured vibrant images of neon-lit streets and towering skyscrapers. The lens’s compact design made it ideal for handheld night shooting, and its sharpness wide open surprised him.

Carlos’ Verdict: Older wide-angle primes are a fantastic budget-friendly option for urban night photography.


8. Sports Action with a Sigma 70-200mm f/2.8 EX DG OS HSM

Mike, a sports photographer covering local football matches, needed a fast telephoto zoom but didn’t want to invest in a new lens. He scored a great deal on a used Sigma 70-200mm f/2.8 EX DG OS HSM.

Despite being a few years old, the lens delivered sharp, vibrant action shots. Its fast autofocus and stabilization allowed him to capture intense moments on the field with precision. One of his images of a decisive goal was later published in a regional sports magazine.

Mike’s Key Takeaway: Used third-party telephoto lenses offer excellent performance for action and sports photography without the hefty price tag.


Why These Stories Matter

These real-world examples prove a simple yet powerful point: It’s not always about having the newest gear—it’s about knowing how to use it. Used lenses can deliver professional-quality results when carefully selected and well maintained. Many photographers build their kits strategically by purchasing high-quality used lenses, maximizing their creative flexibility while staying within budget.

Whether you’re a beginner looking for your first prime lens, a pro seeking to add specialized optics, or an enthusiast experimenting with vintage glass, the used lens market is filled with opportunities to unlock your creative potential.


Conclusion

Behind every used lens is a story waiting to be told—whether it’s a sweeping landscape, a fleeting candid moment, or a meticulously crafted portrait. The photographers featured here are living proof that buying used gear doesn’t limit creativity. In fact, it can empower photographers to explore new genres, refine their skills, and capture stunning images without financial strain.

At [Your Camera Store Name], we take pride in the quality of the used lenses we offer, ensuring every piece is thoroughly inspected, tested, and graded for performance. But in the end, it’s the hands and vision of photographers like you that bring these lenses to life.