Posted on

The Incredible Change of the DSLR’s

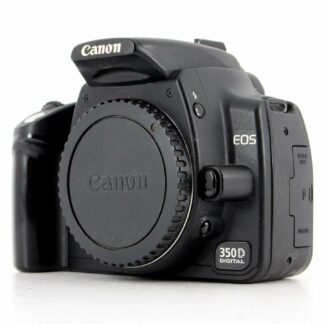
In late 1975, couple of people knew that the world’s very first digital camera had been successfully tested – even within Eastman Kodak Business, where Kodak engineer Steven Sasson spent the bulk of a year establishing an 8 pound model that was the size of a small toaster. The very first photo taken by this first digital cam in December 1975, was in black-and-white and contained only 10,000 pixels– one hundredth of a megapixel. Each image took 23 seconds to tape-record, and a similar quantity of time to pop up for evaluation on a television screen. The age of digital photography had actually started. Naturally, digital electronic cameras of the 1990s were costly, low-resolution gadgets appropriate for specialized applications such as quickie photos you could send out by email or post on a web page (at the “low” ₤ 800) to news pictures of breaking events you might transmit to the editorial staff in minutes (at the stratospheric ₤ 25000 price point). In 2003 and 2004, Canon and Nikon finally made interchangeable lens digital SLR electronic cameras budget friendly with the very first Canon EOS Digital Rebel and Nikon D70 models, which cost around ₤ 800– with lens. DSLRs had actually been offered for years– but now the typical professional photographer could manage to buy one.

■ Full frame is not just for experts anymore.
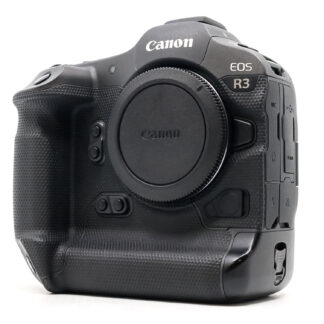
So-called “full-frame” video cameras– those with 24mm × 36mm sensors sized the like the traditional 35mm film format– are becoming more typical and affordable. Sony currently uses a 24.6 megapixel cam body for less than ₤ 1700, and during the life of this book I expect to see comparable low-priced full-frame designs from Nikon, Canon, and others. Full-frame DSLRs are also prized for their low noise attributes, specifically at greater ISOs, and the more comprehensive perspective they supply with traditional wide-angle lenses. I’ll cover the advantages of the full-frame format later in this chapter.

■ Resolution keeps increasing.
Vendors keep upping the resolution ante to please consumers’ understanding that more pixels are always much better. In practice, obviously, lower resolution electronic cameras often produce exceptional image quality at greater ISO settings, so the megapixel race has been controlled, to an extent, by the need to supply greater resolution, enhanced low-light performance, and extended dynamic variety (the ability to capture detail in dark shadows, intense highlights, and every tone inbetween). The leading resolution cameras will not remain stalled at 25 megapixels for very long (I anticipate 32MP to become the brand-new high-end standard), but we’re rapidly seeing all the mid-level and entry-level electronic cameras migrate to 16– 21MP sensing units. You won’t see numerous electronic cameras with less resolution presented in the future. Obviously, Canon has announced a 120MP 29.2 × 20.2 APS-H (roughly 1.3 X “crop” aspect– more on that later), and a humongous 205mm × 205mm sensor that is 40 times larger than Canon’s biggest business CMOS sensor. (Real resolution of this mega-sensor hasn’t been announced– it will depend on how big the specific pixels are.).


■ ISO sensitivity skyrocketing.
Larger and more sensitive pixels suggest better performance at high ISO settings. Do you truly require ISO 102,400 or ISO 204,800? Definitely, if those ludicrous scores suggest you can get appropriate image quality at ISO 25,600. For concerts and indoor sports events, I’ve standardized on ISO 6400, and have really little problem with visual noise. In tough lighting conditions, ISO 12,800 isn’t out of the question, and ISO 25,600 (which permits 1/1000th second at f/8 or f/11 in some of the gyms where I shoot) is practical.


■ Expert full HDTV video is possible with a DSLR.
The opening title series of Saturday Night Live were shot in HDTV with Canon dSLRs. Director/cinematographer Ross Hockrow shot his latest feature film with those cams. The HDTV abilities of the latest DSLRs aren’t simply a camcorder replacement. If you’re a wedding event professional photographer, you can use them to add video protection to your stills; photojournalists can shoot documentaries; amateur professional photographers can get home from their vacation with once-in-a-lifetime still images and movies that will not put next-door neighbors to sleep, too.

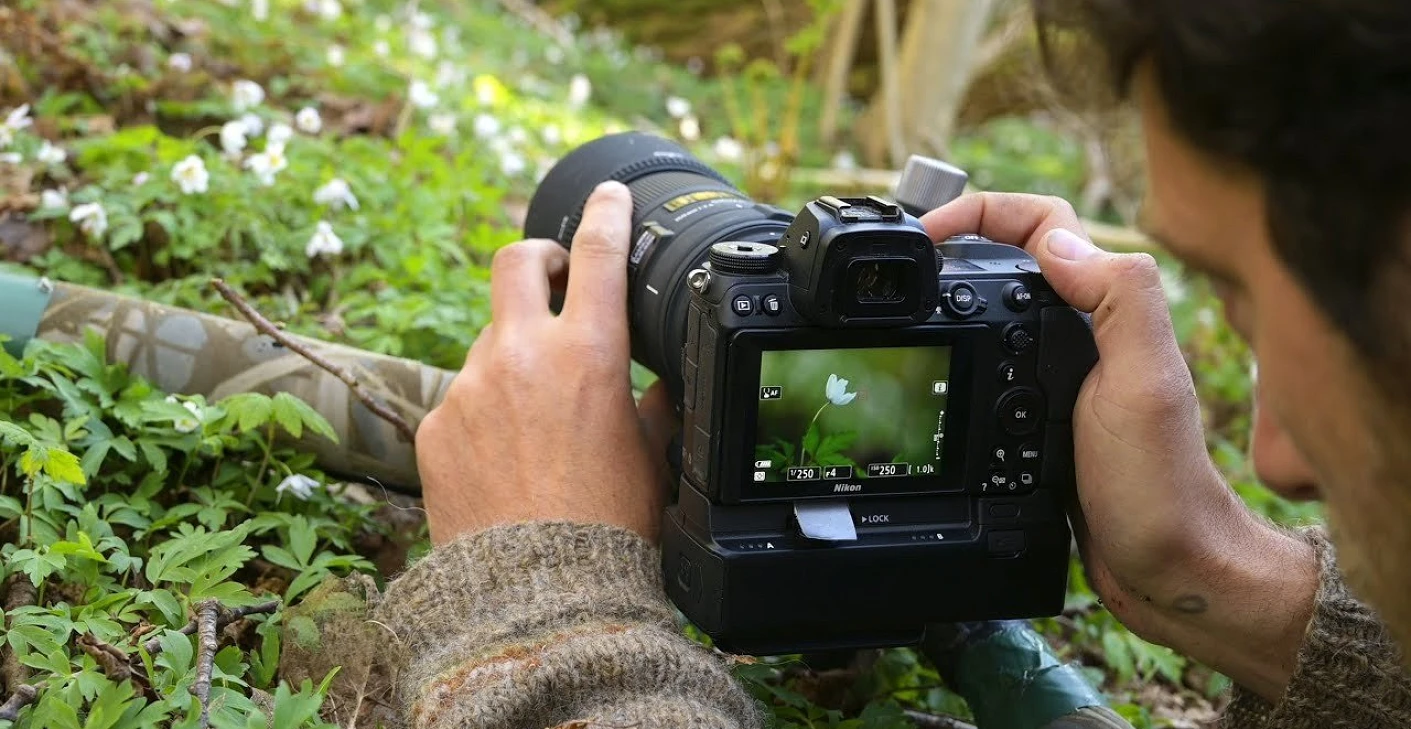
■ Live View has matured.
Just a few years earlier, the ability to sneak peek your images on an LCD screen was a point-and-shoot feature that most digital SLR users could see no requirement for. Today, of course, Live View is a vital part of motion picture shooting, but enhancements like “face detection” (the electronic camera discovers and focuses on the human beings in your image), “subject tracking” (the cam has the ability to follow focus specific subjects shown on the screen as they move), and zoom in (to improve manual concentrating on the LCD screen) can be indispensable in particular circumstances. Something as simple as the capability to focus at any point in the frame (rather than just at the few set focus points marked in the optical viewfinder) can be extremely useful.

■ Sensor cleansing that works.
Each time you change lenses on your dSLR, you permit dust to get in the video camera body and, potentially, make its way past the shutter and onto the sensing unit. Every digital SLR introduced in the past few years has a “shaker” system built into the sensing unit that does a respectable job of getting rid of dust and artifacts prior to it can appear on your images. You’ll still need to by hand clean your sensing unit from time to time, but the task can be carried out monthly (or less often), instead of daily or weekly.


■ Image stabilization.
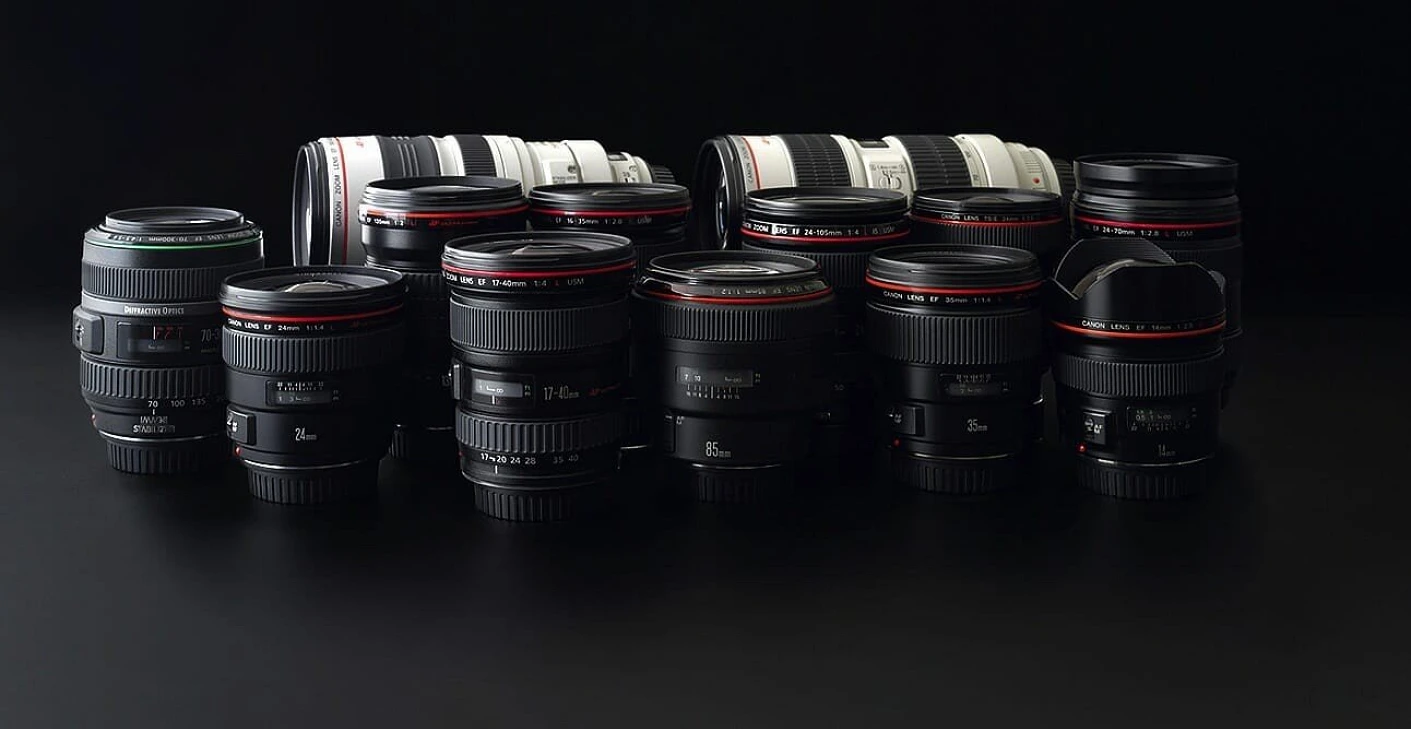
Camera motion contributes to fuzzy photos. Enhancing anti-shake settlement by developing it into a lens suggests you need to pay for image stabilization (IS) in every lens you buy. An increasing number of vendors are developing IS into the cam body in the form of a sensing unit that moves to counter cam motion. “one-size-fits-all” image stabilization does not work as well with every lens that can be installed on a camera, but suppliers are learning to change the amount/type of in-camera IS for various focal lengths.


■ Marginalia.
Other sensor enhancements have actually been talked about, and, in some cases, even implemented, without generating much enjoyment. Foveon continues to enhance its “direct image” sensors, with different red, green, and blue layers that enable each pixel to find among the primaries. (” Regular” sensors are segmented into a variety in which each pixel can detect either red, green, or blue, and the “missing” info for an offered photosite inserted mathematically.) But, couple of individuals are purchasing the Sigma cams that use these sensors. Suppliers continue to improve the small “microlenses” so they can focus assembling light rays on the photosites more effectively. CMOS sensors have basically replaced their CCD equivalents, for factors that no one appreciates any longer. None of these enhancements are as interesting as the others I have actually listed in this area.

Source: Fivercam.com

Posted on

Telephoto lens advice

What is a telephoto lens?

To put it simply, a telephoto lens is a lens that brings subjects up close. The focal length starts here at 80mm and has no real upper limit. Increasing the focal length changes the depth of an image significantly. The further the focal length moves into the telephoto range, the blurrier the background becomes and the larger the background becomes compared to the subject.

The area of ​​application

There are different areas of application for telephoto lenses, which depend somewhat on the actual focal length . A lot is possible between 80 and over 1000mm focal length .

Telephoto lens for portrait

The effect that telephoto lenses bring with them makes them great for portraits. They separate the person very well from the background and provide significantly more blurring in the background. You have to go a little farther away than you have to with a wide angle or normal lens , but you can clearly see the difference.

As you can see in the example images, increasing the focal length gives you significantly less background on the image. The second effect is the blurring. Although the picture was taken at 200mm with aperture 5, the background looks blurred and the subject stands out much better. However, since it is difficult to photograph a portrait at 200mm and there is often simply no space for this, a telephoto focal length between 80 and 130mm is often used in portrait photography .

Standard telephoto lens

The standard telephoto lens is in the focal length range up to 200mm and is used in travel, nature and sports photography. In this focal length range, you remain unnoticed as a photographer and can simply bring distant subjects closer. When buying, it is worth paying attention to a large open aperture and an image stabilizer, but more on that later.

Super telephoto lens

The super telephoto lens goes far beyond 200mm and is intended for large distances between the subject and the photographer. If something is very far away, it is worth using a super telephoto. The longer the focal length, of course, the stronger the effects that you get through the telephoto lens.

The cons / limitations

There is actually nothing in photography that has only advantages. It is of course the same with the telephoto lens.

Exposure time

The larger the focal length , the faster the exposure time has to be in order not to blur the image. In theory, as explained in the article on the exposure time , at 600mm, for example, 1/600 sec. That is extremely fast, especially in poor light situations, and naturally makes the picture dark. As a result, we usually have to go up with the ISO value or use a tripod.

An image stabilizer can of course also help here and so you can take photos with your free hand with 1/250 of a second, as in this example.

Weight

If you want to take photos from the free hand, you should be aware of one thing. Telephoto lenses are extremely heavy. Yes, not all of them, but you can quickly achieve a decent weight and of course a corresponding size that is not exactly easy to transport.

A tripod is extremely helpful here and you can take pictures of yourself in one place and from there. You can get close enough because of the long focal length .

Teleconverter

If you don’t feel like taking a huge telephoto lens everywhere with you, I have a tip for you. Use a teleconverter. With a telecoverter, the focal length can be extended, but this has disadvantages. I already said: everything has its disadvantages. Depending on the converter, the lens loses 1-2 stops of light intensity.

However, you can combine these and turn a fast 100mm lens into a 200 or even 400mm lens very quickly.

Posted on

Camera Hardware Improvements for DSLR’s

Naturally, the terrific strides forward in digital SLR innovation (and digital photography in general) aren’t restricted to sensor advancements. Other elements of the electronic cameras, including lenses and devices, have seen significant enhancements, too. Here are some of the most important:

Digital Signal Processing (DSP) chips

As sensors get more and much better information, advanced signal processing chips have actually to be developed to transform the analogue information caught to digital format, while enhancing it to produce much better images. Some cams have two DSP chips to improve throughput even more.

Built-in High Dynamic Range (HDR) photography

Among the limitations of digital sensors is their inability to tape-record details in both the brightest highlights and darkest shadows at the same time. Some suppliers, consisting of Sony, are pioneering electronic cameras with the capability to snap off several exposures in a row, and after that integrate them to produce an optimized, “HDR” image. Within a few years, I expect that either sensing units will improve to the point where built-in HDR isn’t needed or, if not, this will end up being a basic feature in all DSLRs.

Global positioning system (GPS) tagging

Almost any DSLR can be fitted with some sort of GPS tagging device. There are a lot of reasons marking each picture with information on where and when it was taken is useful that GPS tagging need to be a basic feature within five years, also.

More common WiFi assistance

Anticipate to see more cameras with assistance for WiFi, either constructed right into the electronic camera, or, as is now the case, in the form of menu setup options (discovered in numerous Canon and Nikon DSLRs) readily available to anyone who inserts an Eye-Fi card in their video camera (The Eye-Fi company ceased business in 2016, yet, there are other alternatives). Today, you can upload your images immediately to any social media, immediately, as you shoot, if you lie near a WiFi hotspot. When “tethering” becomes more prevalent, your camera will piggyback onto the instant WiFi hotspots that will be offered by your iPad/tablet computer system, smart device, MiFi gizmo, or other gadget no matter where you are.

Storage innovations

More cams have double memory card slots, enabling you to shoot longer (utilizing “overflow” mode); replicate your images onto two cards for security or instant sharing (in “backup” mode); or do even more effective backup by saving RAW files on one card, and a JPEG variation on the other. Some electronic cameras allow you to choose which of your 2 cards will be utilized for, state, movies, which benefit from storage on “faster” memory cards (if the pair in your cam are unequal in speed). Naturally, capacities and speeds of the cards themselves are enhancing: 64GB Compact Flash and Secure Digital cards have actually lastly become budget-friendly, and new requirements with higher capacities and faster speeds, like SDXC have promise when more video cameras (and other gadgets) support them. Nikon, SanDisk, and Sony have unveiled specifications for a much faster type of Compact Flash sd card, too, with transfer rates of as much as 500MB/s, instead of the 167MB/s limit of the most current Compact Flash 6.0 requirement.

3D photography

Now we’re seeing 3D tv sets, and cameras from vendors like Sony that can produce 3D images using a single optical system (although you may have to view them in the electronic camera, doing not have an easy alternative playback system). My opinion is that 3D imaging will peak as soon as again really soon and then die away up until the next hardware innovation comes along that makes it slightly less impractical than today.

Other Bits and Pieces

Digital SLRs are ending up being smaller in size, particularly in the area of Four Thirds format cameras. More cameras have rotating LCDs that let you adjust your angle of view for Live View shooting or image evaluation.

Rise of the anti-DSLR

So-called electronic-viewfinder/interchangeable lens (EVIL) video cameras are changing DSLRs for some applications where compact size is valued. These cams do not have a mirror. Sony has already introduced slightly bulkier cameras that do have a mirror, but which use the non-moving, semi-transparent mirror to bounce part of the light to an auto-focusing part instead of to a watching system.

Posted on

DSLR camera purchase advice

Buying DSLR: What to Look For Are you considering buying a digital single lens reflex (DSLR) camera? Are you looking for the answer for most important questions, you need comprehensive advice and reveal what to look out for when buying – from the equipment to the manufacturer?

Our DSLR buying guide will help you find the right SLR camera.

Digital single-lens reflex cameras (DSLR) deliver the best image quality of all camera types and can be used most flexibly – even if their lead over mirrorless system cameras is shrinking. That’s why more and more amateur photographers are swapping their compact cameras for a DSLR. But which DSLR model is the right one? And which one is right for you?

When buying a DSLR, you choose a system

All SLR camera manufacturers try to retain customers in the long term with inexpensive entry-level DSLRs. Because the fact is: Once you have decided on a brand, you not only buy a camera, but also commit yourself to a system – and later buy suitable lenses, flash units and accessories.

Even if photographic skills and technical requirements for the camera develop further, most photographers remain loyal to the system they have chosen, even as advanced or professional users. Accordingly, you should plan your entry into the world of digital SLR photography carefully.

What does DSLR stand for?

The abbreviation DSLR stands for Digital Single Lens Reflex. In terms of price, the cheapest and most expensive DSLR models easily differ by a factor of 10 – the differences in equipment are correspondingly large.

In this article our team has put together and answered the most important questions for you. So you are well prepared for the purchase of a DSLR camera.

What is the difference between DSLRs and other cameras?

Single-lens reflex cameras offer  two major advantages over compact cameras:

The sensors that record the image are significantly larger. This enables a considerably better image quality.

Instead of permanently installed optics, there are interchangeable lenses. In this way, the camera can be optimally adapted to every imaginable task.

The so-called bridge cameras (also known as megazoomers) play a special role. In size and appearance, they are reminiscent of a DSLR, but in fact they are classic compact cameras with a small sensor and built-in lens that covers a very large range of focal lengths from wide-angle to strong telephoto. In addition, they often offer setting options similar to those of a single lens reflex cameras.

In terms of size and weight, the mirrorless system cameras are between compact cameras and DSLRs. They are still equipped with large sensors and interchangeable lenses and are now equal to DSLRs in terms of image quality.

In general, if you don’t want to worry about camera settings when taking photos, a compact camera that makes all the important settings automatically is ideal for you. However, if you already have a basic knowledge of photography and now attach more importance to high image quality and many setting options, you cannot avoid a SLR model.

What are the advantages of DSLRs?

If it is only the image quality that counts and the purchase price only plays a subordinate role, then SLR cameras are best suited for everything, because they deliver better image quality than a compact camera in all shooting situations.

The less light is available, the greater the quality advantage the DSLR has. They score particularly well in atmospheric twilight or when taking pictures indoors without a flash unit.

A DSLR can be used flexibly thanks to interchangeable lenses (example Canon EOS-1D X Mark II with EF 400mm F2.8 lens).

In addition, DSLRs can be used universally. If you want to take photos carefree, with a suitable zoom lens and the automatic setting you can take photos as carefree as with a compact one. Conversely, thanks to the large number of different lenses and the ability to manually set all recording parameters such as sensitivity, shutter speed and aperture, you are equipped for every conceivable photographic task.

Another advantage that is often overlooked is the excellent ergonomics. The shape and weight of an SLR camera make it easy to hold and the large buttons and wheels make it easy to operate. The small compacts are often fiddly to use the buttons and difficult to hold because of the smooth (because pretty) surface. Compared to DSLRs, compact cameras are smaller, lighter and easier to use.

What are the disadvantages of DSLRs?

Of course there are also disadvantages. Size and weight score points in terms of ergonomics, but the DSLR does not fit in a jacket pocket, but is hung around the neck or carried in the hand. Neither of us does that all the time, so we miss some interesting motifs. And the purchase price of a DSLR with a few additional lenses can quickly be many times that of a compact camera.

Last but not least: Even the otherwise incredibly practical interchangeable lenses can be a disadvantage. If you don’t have the right lens with you or if you change the lens in bad weather, moisture or dirt get into the camera interior and cause problems there.

How do DSLR systems from different manufacturers differ?

Since every manufacturer cooks its own porridge, you are already determined when you start. Let’s say you start with an entry-level housing and two lenses. Then you can later buy a higher quality housing from the same manufacturer and continue to use the lenses without any problems. With a few exceptions, however, the lenses do not fit the bodies of other manufacturers.

Third-party lens manufacturers such as Sigma or Tamron offer their lenses with connections for the models of several camera manufacturers, but a lens built for Canon only fits a Canon and a lens built for Nikon only fits a Nikon.

Flash units are connected via a standardized hot shoe and look as if they can be used across systems, but they are not. Due to the complex automatic functions, you also have to replace the flash unit later when changing the system. In contrast, only simple accessories such as filters or memory cards are completely independent of the camera manufacturer.

Which DSLR systems are there? An overview:

Canon and Nikon are the top dogs in the field of large DSLRs with mirrors. They have most models and cover the entire range from entry-level ( e.g. Canon EOS 1300D , Nikon D3400 ) to professional models ( e.g. Nikon D5 , Canon EOS 5DS and 5DS R ). In addition, they score with the most extensive range of lenses and accessories.

Sony has clearly caught up in terms of depth and breadth of the range in recent years and impresses with many innovations. In addition to classic DSLRs with a fixed mirror (e.g. Sony Alpha 77 II ), they developed there. This construction principle offers a number of advantages, especially when the camera is also used for video filming. However, Sony is focusing more and more on mirrorless system cameras.

Leica, Hasselblad and Pentax with their medium format models serve the professional sector – prices in the high four-digit or five-digit range ensure that. Pentax also has a number of amateur and mid-range models in various categories, from the entry-level K-S2 to the full-frame DSLR1 .

Olympus now completely relies on the more compact models without mirrors, as do Panasonic, Fujifilm and Samsung. Sony, Canon and Nikon now also have such cameras in their ranges

The best SLR cameras with APS-C sensors

Canon, Nikon, Sony and Co: In our gallery we present the currently best DSLRs with APS-C sensors.

Are there DSLRs for specific purposes?

No. The area of ​​application of a DSLR is determined much more by the lens than by the camera itself. And here too, not only the focal length range is decisive, but also the initial opening. It determines the amount of light on the sensor and the depth of field and thus makes a significant contribution to image design.

Special DSLR properties are only required in exceptional cases. This includes:

Sports photography: In addition to a bright and long-focal length telephoto lens, a fast camera is required that can also create longer series with fast image sequences while maintaining sharpness. Professional devices such as the Canon EOS 1Dx or the Nikon D5 can do this.

Video: The top models from Canon and Nikon, on the other hand, are hardly usable for good videos in HD quality. Here, mirrorless system cameras are now more than a nose’s length ahead of DSLRs. The lens must also be optimized for video and quickly adjust the focus without overshooting the target.

Outdoor: If you use the camera in places where sand, water and dirt clog it, it should be a more robust model. They can be found primarily in the professional class with steep prices, but more and more semi-professional DSLRs also offer dust and splash protection.

I still have old lenses from the analog era – is that a purchase criterion?

Some people would say “Under no circumstance!”. New manufacturing techniques make better lenses possible, which is why modern lenses are superior to any “oldie” in terms of imaging performance. If you buy a DSLR because you want to get better pictures, working with old lenses often makes no sense. However, this is not always the true. There are some old vintage lenses that have a good quality and they are most of the time chap too.

Yet, it worths to mention: Even with suitable connections within a system, not all functions are transferred from the housing to the lens and vice versa (compatibility issues). So you lose a considerable part of the automatic functions of a camera.

What trends can be observed?

Buy your DSLR when you need it. The quality has once again improved significantly in recent years and it will remain so in the future. In addition to the trend towards larger sensors – i.e. more full-format cameras – their increasing resolution can also be observed. Faster processors also manage to store more images in less time and with better quality.

In the long term, the trend is increasingly towards mirrorless system cameras . Classic DSLRs are therefore far from being on the “Red List”. Anyone entering the DSLR world today can be sure that they will still be able to access a top quality system in many years’ time.

Posted on

15 tips to Learn to take photos

Are you looking for tips for better pictures? Do you want to learn photography and take better photos? Here I have 15 tips for cool photo tips for you. This makes learning photography child’s play.

Well, maybe I am a bit over the top. Because learning to take photos above all requires a lot of practice. But there are already a few tips that will help you on the way to better photos – basically the basics of photography or a great overview for beginners.

And one more word about your path into photography. We do almost everything out of habit. So when you think about your goal: I WANT TO LEARN TO PHOTOGRAPHY, then above all you should work on your habits! Make your vision or goal a habit – keep your camera on hand, daily or at least weekly. Try out new things but also get a routine in camera technology..

In this photography article for beginners, we will teach you some basic step by step important photography basics about aperture, ISO, focus, exposure time and light meter. You will learn how your camera takes a picture, regardless of whether it is a single lens reflex camera, system camera or compact camera.

1. Every photo needs a foreground

Bring depth to your photo. They also say: Every photo needs a foreground. So look for objects in the foreground of your photo. It can be a rock, a stone, a fence or a bush. That opens your picture and guides the gaze. Foreground is the portion of the frame that is closest to the camera. The foreground space in an image can be utilized to draw attention to a subject located further into the frame

A railing can be a perfect foreground, even if it’s only partially visible!

2. Give your photo a frame

A natural frame helps your composition. This can be an archway, a hedge or a group of people. So frame your photo! This also gives your photo depth. I also have a great photo task for you on the subject of “Give your photo a frame” !

A frame increases the depth of your photo


3. Get close!

Dare to approach your subject. Your photo wins by being close. Unimportant picture elements are eliminated and the view of the essentials increases.

Get close! Proximity increases the effect of the picture.


4. Zoom in with your feet

Wow, I can zoom in on it super cool. Nice to pull up the photo in the mobile phone. Huh, everything out of focus?! Remember that every zoom and telephoto effect often always has a loss of quality. So zoom in with your feet. Because then the quality is retained!

Too far away? Then get closer – instead of always zooming!


5. Pay attention to the direction

The eye always wants to follow the direction. No matter whether in the run, in the flight path or something similar. So your photographed object should always leave room for direction. For example, let the person walk into the picture, not out.

I tried to pay attention to the running direction in the running photos. Leave room!


6. In the dark with a tripod

Photos in the dark should generally always be taken with a tripod. Because in long exposure it is not possible for you to hold the camera without shaking. Nowadays, of course, many cameras can achieve infinitely high ISO values, but as a rule, the lower the ISO value, the lower the image noise. And above all, you can compose great photos in the long exposure with the remote release.

Better to use a tripod in the dark!


7. Do not cut off the feet

I often (only) pay attention to the face when photographing people. But in the full body portrait you should develop a view of the big picture of the subject. So do not accidentally cut off your feet, arms or legs.

If you’re taking full body shots, don’t cut off their feet!


8. Hard light and soft light

You should teach yourself to control the light. Because then you have learned one of the most important rules. Soft light gives your photo a natural mood, but hard light can also be totally exciting. Also you can use a flash diffuser.


9. Create tension and curiosity

If you don’t show everything, then you leave the viewer room for speculation. Much is completed in the head. But that is exactly what can create tension and curiosity.

A clever cut in particular can create a lot of tension.


10. Focus on the eyes

The eyes often determine the portrait. That’s why I always focus on the eyes in portrait photography. I also often choose a large aperture in order to have a lot of blurring in the background and thus additionally emphasize the eyes.A focus on the eyes combined with a large aperture and blurring can create tension.


11. Check the sharpness

Nothing is more annoying than blurry images when you have planned it differently. Consistent sharpness is particularly desirable in landscape photography or architectural photography. So check the sharpness during and immediately after the photo. Otherwise, vary the aperture to achieve a greater depth of field.


12. Go at eye level

Go on eye level with your subject. This is especially true for children, animals and flowers. The result is much more authentic images!

Go at eye level. This gives your photo a much more natural look!


13. Get out of the middle

Avoid placing them in the center of the picture. Better to take photos according to the rule of thirds. Visual balance is always important.

The eye perceives a placement according to the rule of thirds as very pleasant and exciting.


14. Use natural light

Light composes your photo. And if you want a natural, authentic photo here, then try to get as much natural light as possible.

It’s all about natural light


15. Pay attention to shapes

There are shapes everywhere. You can find circles, rectangles, triangles and much more everywhere. Even if you don’t recognize it right away, develop an eye for shapes in your photo. This will help you.

Posted on

6 tips for creative photo ideas: the extraordinary from the ordinary

I really take pleasure in writing about imaginative motivation for new picture ideas. Specifically on the method to learn photography, it is constantly important to me that you don’t have to travel to a unique place to take excellent photos – rather the opposite. Just walk and find the wonder around you!

Content

– Discover the beauty in everyday life

– Discover the wonder around you

6 tips for more extraordinary in the ordinary

  1. The ordinary everyday life
  2. Observe light and shadow
  3. Take notice of the alignment
  4. Have fun with props
  5. Fascination in the background
  6. Take note of your corners and edges

Discover the beauty in daily life

It’s extremely delightful to take powerful, amazing images of everyday life. What can you do when you live in what you think is a truly dull place and you do not see any beauty in the everyday? The concern is of course not meant extremely seriously. Because it has to do with making something remarkable unusual. Let’s get going and try to find beauty in everyday life.

The reflection on a bonnet provides fantastic themes – and very simple to embed in scene.

Discover the wonder around you

It is a bit difficult not to wait for the big travel photography trip, but to discover the beauty – or at least the aesthetically spectacular fascination – in the everyday. But again and again I show you a lot of ideas that it is now very easy to summon something photogenic out of everything. Would you like some examples?

The view from the window with the focus on the rain-soaked pane.

Practical suggestion: Concern selective understanding

Question your perception and alter your viewpoint every now and then.

We call selective perception the psychological phenomenon that only certain elements of the environment are signed up throughout perception and others tend to be neglected. If you perceive something as allegedly uninteresting or regular, question it and attempt to look at it anew, with different eyes.

6 suggestions for more extraordinary in the ordinary

1. The ordinary everyday life

Take photos of street signs, the supermarket or simply the shopping carts in front of the door. Remember the details and nearness ideas, along with the pointers to clean up your scene:

Common obstacles in our theme search

– If the subject is too little, the viewer of your images may not recognize it as the main topic.

– Are there a lot of (unimportant) things in the picture? Oh dear, then the significance of your picture may be lost.

A completely typical theme can look really remarkable in the right image section!

2. Observe light and shadow

Observe the light and also the shadow cast. How can light and shadow assist your scene? You can find more about photographing shadows here.

Having fun with shadows is a great creative photo idea.

3. Take notice of the positioning

Viewpoint and direction are important for the wow element. As quickly as you photograph a banal pedestrian tunnel in ideal balance, the suction result mesmerizes everybody. Frequently it is only a few steps to the left or right that alter the impact of the picture.

A lot of proportion in the Soviet memorial in Berlin Treptow

4. Have fun with props

I put props in my photo. Are you interested by the texture of the wooden table in the hall? How about the glass on the table including your arm and hand in the picture? Much more alive than without!

Such a basic image idea: the hand brings life to the scene.

5. Fascination in the background

Keep an eye out for amazing patterns and textures. When you have a terrific pattern, your great image is not far away.

The background emphasizes the subject – even if it is small and put on the edge.

6. Take notice of your corners and edges

Keep in mind the pointers about the edges and corners of your photo. Notice what takes place there. Let out whatever

Posted on

Fixed focal length vs. Zoom?

I often get the question what is actually better now, I would like to explain the difference between fixed focal lengths and zoom lenses. Neither of the two is really better, it depends on what you want to photograph.

Zoom lens

A zoom lens makes life a lot easier for the photographer. We can easily zoom in on objects without moving. Of course, this zoom mechanism needs space. The lenses in the lens have to be able to move and this is usually at the expense of lens performance.

Disadvantages of the zoom lens

Due to the zoom mechanism, the lens is missing in other places. Most zoom lenses are very limited in terms of aperture . That is of course logical. The space that the zoom takes up in the lens is at the expense of the other elements. In the affordable price range, the lenses have a maximum open aperture of 3.5 – 6.3. It all depends on the lens and the zoom level.

Advantage of the zoom lens

Of course, the number one advantage is zooming. You don’t have to change the lens if you want a different focal length . However, this can quickly become a disadvantage. I’ve learned more from prime lenses than I could ever have learned from a zoom lens. You think a lot more about the point of view and the perspective and don’t just zoom in on your subject.

Prime lenses

A fixed focal length is a lens without a zoom function. I cannot change the focal length of the lens and have to walk to get closer to my subject.

Advantages of the prime lens

Of course, the lack of a zoom saves space. This space can be used for a large aperture or to make a lens smaller and more manageable. Fixed focal lengths already offer open apertures of 1.8 in a lower price segment.

Disadvantages of the prime lens

The photographer has to think & move. He has no possibility to zoom but can only change the image section by moving (sneaker zoom).

I don’t really see that as a disadvantage myself. It has boosted my creativity enormously and fundamentally changed my thinking in photography.

Conclusion

My recommendation: Get a fixed focal length and only force yourself to take pictures with this for a certain time. It will give you a whole new view of things. You will know when you need a prime lens and when you don’t. You will think differently and adjust your point of view and perspective on the prime lens. You learn to take photos in a completely different way and don’t just zoom in on the subject lazily.

Posted on

Normal lens advice

In photography and cinematography, a normal lens is a lens that reproduces a field of view that appears “natural” to a human observer. The normal lens is a lens with a normal angle of view. This is approximately in the range of 40 to 50 ° or 40 – 60mm. But what is a normal angle of view? Think about how you perceive the world. Now try to transfer it to the camera. You don’t see the world very far, but you don’t see the world very narrowly either. You perceive your world as “normal”. This is exactly what a normal lens should be, but let me go into a little more detail here.

Normal lens vs. human eye

Theoretically, a normal person perceives approx. 180 ° diagonally. That’s an incredible amount. There are also lenses that can depict this, but this causes extreme distortion (fisheye). So we do not perceive the world with our full 180 ° field of view, but always concentrate on one area. You are probably reading this text on a monitor and concentrating on it. What happens in the corner of your eye is blurred.

So it is difficult to get two movable eyes into the field of view of a photo, but it works best with an angle of view between 40 & 50 °. The image doesn’t look too wide (wide-angle lens ), but also not too narrow (telephoto lens)

In all of the sample images in this post, it looks like the person is standing in front of you. That is exactly the effect of a normal lens. Everything looks normal 😉

Use of normal lenses

Normal lenses are most commonly used in portrait photography. Of course you can also photograph other subjects with the focal length range, but they are best suited for portraits due to their natural effect.

Fixed focal length for beginners

I recommend a prime lens for beginners in this area. It gives a better feeling for perception and you neither get too much nor too little on the picture. It is best to use a 50mm lens here. Thanks to their almost symmetrical construction, these lenses are inexpensive, light and powerful, and perfect for beginners in photography.

With this lens you are forced to concentrate on your subject and the composition of your picture and you cannot “zoom in” on the world.

Buy recommendation 50mm fixed focal length

Canon: EF 50mm F / 1.8 STM *
Nikon: NIKKOR 50mm 1: 1.8G
Sony: SEL-50F18F 50mm F / 1.8 *

Photo with the 50mm 1.8 from Canon

Special feature of CROP sensors

There is a special feature with CROP sensors (APS-C or Micro 4/3). These sensors are significantly smaller than full format. Full frame sensors are used as an output for calculating the focal length . The actual focal length does not change with an image sensor, but the effect of the image and the relation between camera, subject and background do.

That’s why I recommend a wider focal length when using an APS-C camera. Almost all entry-level cameras have an APS-C sensor

That’s why I used a 35mm on an APS-C camera very quickly in my early days.

Of course, I also have a few recommendations for your APS-C camera.

Canon * – Nikon * – Sony *

PS Even with full format, 35mm sometimes work much better than 50mm, even if it is actually too angular to pass as a normal lens. Just give it a try 😉

Posted on

Photo tips for successful macro photography

Beetles and crawlers, flowers and leaves, everywhere and in every season: the world of small things fascinates with its incredible wealth of colors and shapes. The fascination of macro photography is due, among other things, to the fact that we cannot perceive the tiny natural wonders with the naked eye, or only to a very limited extent. Fortunately, photography offers a variety of optical options. We have some tips for special macro photos.

1. Calm background, brilliant foreground

The more reduced and plain the background, the clearer the main motif appears.

Background plays an important role in macro photography. Small, colorful, sharply depicted objects such as insects and butterflies are particularly effective in front of a uniformly colored, blurred surface. The photographic “laws of nature” help: A long or large focal length and an open aperture ensure perfect blurring in the background. Speaking of lenses: The best close-up images are created with a special macro lens, for example with a 100 millimeter focal length.

2. Thin sections, bright images

Light from behind makes thin slices of onions, citrus fruits and other fruits and vegetables shine wonderfully.

Fruit, vegetables and Co. can be wonderfully staged as macro motifs. The basic principle is simple: Everything that can be cut very thinly and which then has a certain degree of light permeability is suitable for these recordings. Examples are the onion and especially citrus fruits like lemons and oranges. In addition to a tripod, all you need is a surface that is illuminated from below to place the panes on – for example a glass table. Incidentally, such images are also possible with high-quality smartphones.

3. Optical accents, drop by drop

Drops of water on a colored leaf create an interesting “structure on the structure”.

Drops of water bring life to every macro photo and make the surfaces of leaves and flowers that are already interesting in themselves appear even more interesting. Because the drops act like small magnifying glasses that partially enlarge the leaf structure and thus provide an additional image layer. You can take such macro pictures outdoors as well as easily stage them yourself at home. A lamp and, if necessary, a professional brightener in the form of a photo reflector are usually sufficient for lighting.

4. Action photos with butterfly, bee and Co.

Photographing insects in flight is not easy, but practice makes perfect. Just experimenting is a lot of fun.

A butterfly or a bumblebee on the flower – this classic photo can often be seen. It is more exciting to photograph the small flying objects in action. You definitely need a telephoto lens for this. The autofocus should be set to the so-called tracking mode, in which the focus adjustment constantly readjusts the subject. In addition, set the exposure time to at least 1 / 2000th of a second or less. And now it’s time to go out into the garden, park or forest: there you will find what you need for a great macro action shot – a small, colorful, flying main subject. We wish you every success.

Posted on

Find your main subject: 5 secrets of fascinating photos

What is the secret of fascinating photos? Think about it, I am always asked which camera, lens or setting I used to take this or that photo. Seldom does anyone ask: “How did you come up with this motive?” The subject is always important to me – no matter which camera I use to take my picture. Therefore, I would like to familiarize you with the search for the main subject, one of my most important lessons in composition – what you really want to put in scene. Because this way your photos will be even better!

Who is the main actor in your photo?

Shortly after buying my first SLR camera, I bought a cool 10-20 mm wide-angle lens from Sigma. Wow what a dimension. Now I could get the whole world in one photo. But when I look back today, this visual excess has overwhelmed me. What should I focus on? Photos are like a good film: there is a leading actor. The audience will recognize it, and everything in your composition will help to set it perfectly in scene: light, perspective, focus, design elements and, last but not least, the plot.

Make what is unique in your photo and in the situation visible – go very close and throw out everything that is unimportant. Here I only photographed the reflection of the tree.

What do you see that fascinates you as a motive?

Who should be the main protagonist of your photo? I would like to share with you some tips and techniques that will help you sharpen your focus on the main actor. But the first impulse has to come from you. Who or what do you want to show – how and in what way?

Typical challenges in our subject search

  • If the subject is too small, the viewer of your photos may not recognize it as the main subject.
  • Are there too many (unimportant) things in the picture? Oh dear, then the meaning of your photo may be lost.

Do whatever you can to find your subject. Your eyes and your brain don’t make it easy for you. They are the perfect combination for an exciting deception. Because if you see the subject, your head takes over the image processing without being asked. Everything that is not important is cut away. But your camera can’t! Your eyepiece is merciless. It shows everything that you depict in the frame and in the four corners of your photo. Stay tuned and keep practicing the technique!


Here I have 5 tips for you to find your main subject

5 tips to find your main subject

  1. Find what fascinates you

What made you stop before considering taking this picture? That should become your main subject. A great light situation? An exciting face?

  • How can you show the fascination in the picture?

Is the subject clear enough in the picture? Is something disturbing the effect? From now on your mission is: Make the uniqueness of the situation visible!

  • Separate yourself from the unimportant

Before you doubt your technique or your inability, there is usually too much of what you have in the photo. We’re still learning how to clean up your photo. Because less is more and exactly the little and the emptiness emphasizes your main motive.

  • What can you show and what not?

If the subject is personal – the mood of the evening or the pet that means a lot to you – that’s okay. But the connection to you cannot always be shown in the photo. Be critical, think about the effect when a stranger looks at your photos. Good photos work without explanation.

  • Have perseverance

Many of my photos that didn’t turn out so well were just not good because of my impatience. Stay tuned to your idea and your motive. Take one more photo and try a new perspective. Don’t give up so quickly!

Posted on

Photographing in the fireworks is easy

Fireworks are relatively easy to photograph. It should be clear that something like this cannot simply be photographed by hand. With a little luck you can even use compact cameras. If you want more, you should use a manually operated camera. Also recommend a safe stand with a tripod or center punch cushion. In the simplest case, the camera can also be positioned reasonably firmly on a “grain cushion”. The most important thing when photographing fireworks is that the camera is safely and securely installed throughout the exposure. Because the principle is as follows: The camera exposes for several seconds and captures everything that is going on in the sky. In other words, we’re doing a long exposure .


I always take such night shots with a stable tripod. However, simple tripods are also suitable for lighter cameras, especially if you only need something like this for New Year’s Eve. From around 10 € you can get a simple tripod. Another possibility is the so-called “grain pillow”. To do this, you simply fill z. B. rice or peas in a bag, closes this and thus receives an individual base on which you can align the camera firmly. Disadvantage: Of course, something like this only works on a raised surface such as a table. But if you want to photograph the fireworks outside on New Year’s Eve and not from the balcony, you cannot avoid a tripod.

What must be set on the camera for fireworks?

The very simple way: no manual mode available

I already mentioned it at the beginning: The best thing is that the camera has a manual mode (“M”). If you cannot take photos manually with your camera, you can try the following:

The camera sits firmly on a tripod or something similar. Set the camera’s programmer knob to either AV mode (for Nikon A) or TV mode (for Nikon “S”). Or you simply select the program mode “P”.
However, it must be possible to switch off the flash!
With such compact cameras, however, make sure that you actually only have the sky in the picture and not a brightly lit object or a house wall!

Press the camera’s shutter button. The autofocus won’t find anything (it’s all black) and will eventually adjust to “infinity” – just right for fireworks in the distance. Now the camera initially only sees black and exposed and exposed (hopefully long enough). During this time, however, the fireworks are ignited and wander through the image, so to speak, or leave information on the camera’s chip, which is shown as the tail that you know from other photos or that you want to photograph yourself.

At some point the exposure will end automatically. With luck, you will be as a sufficient number of “tails” of fireworks recorded have. If your camera breaks the exposure immediately after a second even in the dark, it is unfortunately not suitable for this technique. You can easily try it out in a dark room at first.

The camera has a manual mode “M”

Here it gets a lot more interesting. In manual mode, fireworks can be photographed much better at night! After the camera has been placed on the tripod, it starts:

Set the M mode and deactivate the built-in flash here (or leave it folded in).

First manually set the ISO value to 100, at least to the lowest number that is possible.

Set the aperture to 8 or 11.

Set an exposure time of approx. 30 seconds on the camera.

Set the white balance so that the camera yellow light which awaits: So you select “sun” or better yet “light bulb”. Otherwise the photo will be too yellowish.

Manually set the focus to infinity.

If possible, take photos in “RAW mode” so that you can process the images better later.

Wait for the fireworks to really go off and press the trigger!

I put my Nikon on my Triopo tripod and exposed the longest time I could set with the Nikon DSLR: 30 seconds. I continued to work with the settings above: ISO 100 and aperture 8. However, I made a mistake with the white balance: I chose neutral light or “flash”. The light of the fireworks is not white but already very yellowish to red. In addition, the fog scattered the yellowish-reddish light all around.

I used an old analog Nikon wide angle with manual focus, which can easily be connected to modern digital cameras . Due to the long exposure time, I was able to photograph several fireworks following one another on just one picture!

Taking pictures in fog

Actually, I’m only semi-happy with my fireworks photos. For me they are far too red-tinged and not clear / brilliant enough. On the other hand, they are a good example of what fog can do and an incorrect white balance on the camera.
Due to the prevailing fog, all the lights of the city (all the street lighting and also a lot of fireworks that took place on the ground) were reflected and thus also visible in the sky. You have to imagine fog or haze as billions of tiny mirrors that “float” in the air and reflect (unfavorable) light towards the camera. That is simply unfavorable for brilliant images! It’s just like stargazing. The lights of the city are just as annoying there as they are in the haze in the sky.


I will also use a white balance on my camera next time, which corrects tones that are too yellow / too red. The white balance program “incandescent lamp” or “artificial light” would be ideal here. We don’t see it, because our brain automatically corrects something like this: The light from the incandescent lamp is similar to the yellow light from the street lighting, which is disturbing here. But the camera relentlessly reproduces something like that. Without white balance, the photos would get too strong a yellow cast, especially with such long exposure times.

“Catch” the fireworks even longer with long exposure

You don’t necessarily have to rely on e.g. B. Limit 30 seconds. If you have a remote release for your camera (unfortunately I don’t have something like this for my Nikon [yet “]), you can theoretically expose the whole night or capture the entire fireworks display in just one single picture.
The exposure time on the camera is set to “B”. “B” means bulb. This term comes from the old days of photography, in which a small balloon was screwed to the shutter release of the camera using a thin hose and an air pressure was generated by applying pressure, which activated the shutter release. With modern cameras this happens either via a cable or even via radio.
In any case, the camera now exposes exactly until you press the shutter release again. At 100 ISO and over 30 seconds, however, I would close the aperture of the lens further, otherwise the sky will be too bright: From 30 seconds I use aperture 11; from 60 seconds f-stop 16 and from 2 minutes fireworks f-stop 22.

If you want to expose even longer, we recommend using an ND filter . Then, however, it may be that the individual lights of the fireworks get too dark, because they only act on the camera’s chip for a few seconds. It may be possible to make them brighter again later in the image processing by changing the so-called “gradation curve” or by increasing the contrast.

A tip on composition

When photographing fireworks, I always make sure that not only sky + rockets are shown. Personally, that’s a bit too arbitrary for me. I always try to take pictures of other picture elements: trees, for example, or houses that are beautifully illuminated by the colorful fireworks.

If you want to be very colorful, in addition to the long exposure of the actual fireworks, you can manually flash the surrounding houses in the picture with a flash and a weak color filter in front of it during the long exposure. But don’t overdo it here. Because if you only flash very subtly, you will get the impression that this colored light is coming from the fireworks themselves! With such a trick you create an illusion or an even greater expressiveness of the image.

This tip does not always make sense, but it is definitely worth a try for motifs with nearby (up to approx. 20 meters) houses, walls, trees, etc.

Pay attention to the battery consumption

If you have installed your camera on a tripod outside (e.g. on a small hill) and are now waiting for the fireworks to be lit, you have a spare battery for the camera in your pocket as a precaution! The camera quickly drains the battery during long exposures! At least my Nikon DSLR does.

The trick with the black box

Finally, a tip that I already gave in my article about long exposure times: If you have longer exposure times, have a black box with you!
I swing the box in front of the lens in the empty phasesi.e. when a certain time elapses between the individual fireworks (of course so that I don’t touch it). With this shadowing I achieve the following:

The sky is not brightened unnecessarily and the contrast between the sky and the fireworks is increased significantly: the images become more brilliant!

In this way I prevent continuously illuminated elements in the picture from being unnecessarily overexposed (e.g. street lamps).

If someone walks through the picture with a sparkler, it leaves an unwanted tail. I quickly hold the box in front of the lens and then pull it away again just as quickly.

After the aforementioned empty phases, i.e. when new rockets are just rising up in the sky, I release the lens again. Curious looks are guaranteed when you use this technique to photograph the next fireworks display together with other photographers.

Or does your digital camera have a (as real as possible) multiple exposure function? Then you can record several sequences of the fireworks in one picture by double exposures and do not have to expose in a whole piece but several times (shorter) one after the other. Of course, a tripod is also essential here.

Posted on

Quality criteria for lenses

How do you find the perfect lens? To be honest: I have no answer to that. But I can show you how to find the right lens. I have a couple of criteria that are crucial for this.

uality of the lens

With lenses, of course, the first impression counts. What material was used for the lens? There are lenses that are made from 100% plastic; even the glasses. Now it depends on your requirements. It is not bad to use a cheap lens, but if you want to take photos in the rainforest, I would advise against such a lens.

For beginners, I recommend a cheap zoom lens or a fixed focal length. If you are in the advanced field or even in the professional field, you should rely on first-class workmanship and weatherproof lenses, especially when it comes to sharpness and strong weather influences.

Most manufacturers have special series for this, such as the Sigma ART series, the Canon L series or the Nikon series with the golden ring on the lens. These are built in such a way that they can withstand dust, dirt, moisture and temperature fluctuations much better.

Focal length

The focal length is not decisive for the quality of a lens, but you should definitely include it when planning your lens purchase. This should match the area and the way you are photographing. There is no point in buying a lens that covers every focal length . On the one hand it makes a lazy photographer and on the other hand the quality drops. If the lens can cover a larger focal length range, you usually have a dull picture and a lower light intensity.

Extreme focal lengths also have an impact on quality. If the focal length is in the extreme wide-angle or telephoto range, the lenses are often very expensive or quality losses can be expected. This can be blurring or distortion.

Light intensity or maximum aperture

The light intensity is decisive for many when it comes to lenses. With a high light intensity, you can open the aperture wider and get significantly more light on the image sensor. This makes it possible to take pictures in dark light situations without increasing the ISO value .

So if you often take photos in such situations or if you have a blurry background (i.e. you need a shallow depth of field) you should pay attention to an appropriate aperture .

The aperture can be opened much wider, especially with fixed focal lengths . With zoom lenses, a corresponding revelation is usually associated with a higher price.

Sharpness

From my point of view, this is extremely important. If the lens is sharp, you get completely different images. This cannot really be copied with image processing.

With different glasses and significantly better processing, a completely different sharpness and a completely different contrast can be achieved.

I can promise you that here, of course, but what do you think if I just show you. The following images are both unprocessed and not sharpened. One was made with a € 100 prime lens and the other was made with a € 750 prime lens.

Optical resolution

Let me elaborate on the previous part. Because what we perceive as sharpness is called optical resolution. This optical resolution indicates how many lines the lens can display. It’s kind of like an eye test at an ophthalmologist. The finer the lines that can be displayed, the higher the optical resolution.

I have the following opinion on this: The lens should match the camera. It is much more beneficial to use a high-quality lens on a cheap camera than the other way around. Sure, 50 megapixels sound great in a camera, but if the lens can’t reproduce it, they won’t do anything. The many pixels on your camera are then just mud.

But don’t just rely on laboratory tests. Try lenses for yourself.

Bokeh

Bokeh not always back. Anyone who thinks that this is just a blurry background will quickly be taught better. Because depending on the lens, you get a completely different blur in the background. But let me show you more in the following example.

In this picture you can see the 50mm 1.8 from Canon and the 50mm 1.2 from Canon. Both set to f / 1.8. If you pay close attention, you will see that the 50mm 1.2 has a much softer background. Of course there is about 1000 € between the two lenses, but I wanted to demonstrate that you get a completely different bokeh .

If you can’t really see that difference now, then you don’t really need to worry about a more expensive lens. At least as far as the bokeh is concerned 😉

Close focus limit

This is interesting for all macro photographers.

Every lens has a close focus limit. This unit describes the minimum distance between the subject and the image sensor. If the subject is closer to the sensor, the lens can no longer focus and the image becomes blurred. Incidentally, it does not matter whether you focus manually or automatically.

So if you like to get close to your subject, you should pay attention to this value and combine it with the correct focal length . A minimum distance of 2.2 meters sounds a lot, unless you use a focal length of 600mm. It all depends on the right combination.

Autofocus

Auto focus is very important with a lens. Of course, otherwise, all images would be out of focus, but what exactly makes a good autofocus?

Speed

Faster is better? In any case, it should also be precise. It’s not just up to the camera how fast your autofocus is, the lens also has a part in it. Because the glass elements in a lens have to be moved in order to change the focus. A more powerful engine or a more sophisticated system can change a lot here and be decisive for a sharp photo.

Precision

What good is a great lens if it is often wrong? Well, it’s not normal for lenses to be wrong, but there’s a moment when they do. This is due to the back or front focus. With DSLR cameras, this is to blame for the fact that your subject can be blurred. This can often be adjusted with cameras, but it is laborious and not possible with every camera model.

Balance front or back focus

Video player

00:00

15:38

Incidentally, this problem does not exist with DSLM cameras. Due to their design, these are not prone to this error.

But why am I addressing this topic? With third-party manufacturers in particular, it can often happen that the focus is far off. This became known especially at Sigma with the 35mm 1.4. This lens is only half the price of the Canon original, but many have complained that the autofocus failed and went wrong far too often. Once calibrated and the lens is just awesome…

Noise

Probably less important for most people, but if you want to film or take photos in an environment in which you should avoid loud noises, this point is important. I recommend an ultrasonic motor  here. This technology ensures almost silent focusing.

Image stabilizer

The image stabilizer is a great tool that offers great support, especially in low light or high focal lengths. But it is not only there to avoid blurring with the free hand, but also to be able to expose longer. You may still remember the rule of thumb from the exposure time . If we apply this, we can only expose for a certain time. What if we want to expose longer? Then an image stabilizer can help 🙂

A good image stabilizer can give you a buffer of 2, 3 or even 4 f-stops in exposure time . If we apply the reciprocal shutter speed rule, in which the exposure time corresponds at least to the focal length , we come to the following result.

Focal lengthmin. timeStabi 2 panelsStabi 4 panels
25mm1/251/81/2
100mm1/1001/251/6
200mm1/2001/501/13
400mm1/4001/1001/25

So if you often shoot in situations where you are photographing still subjects on your free hand, you should definitely consider using an image stabilizer. It is helpful in many other situations as well. You will almost always benefit from an image stabilizer and if not, it can simply be switched off 😉

Distortion

Most lens distortion occurs in the wide-angle range. Then the edges of the picture are shown distorted and your motifs are unreal. If you like to photograph architecture, that’s something extremely annoying and the photo quickly looks unprofessional and ugly.

Even if these errors can often be corrected easily in image processing, it doesn’t do any harm to have a lens that does not allow such errors in the first place. Above a certain price range, the distortion becomes less and less and sometimes disappears completely. But remember: The whole thing is based on physics. This can only be tricked to a certain extent. This means that from a certain focal length it does not matter how expensive your lens is, such distortions occur.

The extreme example with an 11mm fisheye lens

Vignetting

In addition to the optical distortion, it can happen with lenses that the edges of the image are darkened or blurred. The darkening is something that I actually really like. In portrait photography in particular, this effect ensures that the viewer’s gaze focuses more on the center of the picture and the subject. If you want to place the motif in a different place, that is again unfavorable. However, at least the dark edges of the image can be easily removed in image processing.

Stray light

Have you ever photographed in the sun with your mobile phone and the picture was simply outshone and nothing really visible? That’s a different matter with high-quality lenses. Extreme light situations and backlighting in particular ensure significantly less reflection and a natural contrast with the appropriate compensation and value .

Chromatic aberration

Chromatic aberration is a color fringing that can appear on contours. But don’t worry, you can get a grip on this quite easily in image processing.

Now what’s a good lens?

Unfortunately, I can’t tell you that, because this feeling is completely subjective. Everyone has different demands on their lenses and different ideas about a good lens. However, I have a few tips on how to use the previous points to find exactly what you are looking for. Even if the last points sounded like everything could easily be corrected while editing, it is definitely not so. A good lens can make a difference like day and night. You don’t believe me

Borrow lenses before you buy them!

Borrow a lens before you buy it. But not just any run-of-the-mill lens. Also take a high quality one. My world and my understanding of good pictures changed completely when I tested the Canon 50mm 1.2. I didn’t buy it and went for a Sigma lens, but it’s worth it just to find out what’s possible.