Discover the best used lenses for wildlife and nature photography. Explore affordable telephoto and wide-angle lens options for Canon, Nikon, Sony, Sigma, and Tamron that deliver stunning results on a budget.
The Best Used Lenses for Wildlife and Nature Photography
Wildlife and nature photography demand specialized gear to capture subjects that are often distant, elusive, and in constant motion. Telephoto reach, fast autofocus, and sharp optics are essential for bringing the beauty of the natural world into stunning focus. However, new professional-grade lenses can be prohibitively expensive, especially for hobbyists and aspiring photographers.
The good news is that the used lens market is filled with excellent options that deliver professional-level performance at a fraction of the original price. Whether you’re shooting birds, mammals, or scenic landscapes, investing in used lenses for wildlife and nature photography is a smart and budget-friendly approach.
In this article, we’ll explore the best used lenses across popular brands—Canon, Nikon, Sony, and more—that excel in capturing wildlife and nature in all their glory.
What to Look for in a Wildlife/Nature Lens
Before diving into specific lens recommendations, it’s important to understand the key features that matter most in wildlife and nature photography:
- Focal Length (Reach): A long focal length (300mm and above) is crucial for photographing distant subjects without disturbing them.
- Aperture: Wide apertures (f/2.8–f/5.6) allow for faster shutter speeds and better low-light performance.
- Autofocus Speed & Accuracy: Fast-moving subjects require lenses with reliable autofocus tracking.
- Image Stabilization (IS/VR/OSS): Helps in reducing camera shake when shooting handheld, especially with long telephoto lenses.
- Build Quality & Weather Sealing: Nature photographers often shoot in harsh environments, so robust construction is a plus.
Best Used Canon Lenses for Wildlife Photography
1. Canon EF 100-400mm f/4.5-5.6L IS USM (Version I)
- Focal Length: 100-400mm
- Why it’s great: A versatile telephoto zoom with excellent reach, solid image quality, and built like a tank.
- Image Stabilization: Yes (2-stop IS)
- Used Price Range: $600–$900
- Ideal For: Bird photography, safaris, and general wildlife shooting.
2. Canon EF 400mm f/5.6L USM
- Focal Length: 400mm prime
- Why it’s great: Lightweight, razor-sharp, and fast-focusing. While it lacks IS, its optical performance is outstanding for its price.
- Image Stabilization: No
- Used Price Range: $800–$1000
- Ideal For: Birds in flight, wildlife in good lighting conditions.
Best Used Nikon Lenses for Wildlife Photography
3. Nikon AF-S 300mm f/4D IF-ED
- Focal Length: 300mm prime
- Why it’s great: A sharp and compact telephoto prime known for its excellent optical performance.
- Image Stabilization: No (but sharp enough to compensate)
- Used Price Range: $500–$700
- Ideal For: Wildlife in controlled or good light settings.
4. Nikon AF-S 200-500mm f/5.6E ED VR
- Focal Length: 200-500mm
- Why it’s great: A budget wildlife photography powerhouse, offering incredible reach and sharpness with VR.
- Image Stabilization: Yes (VR)
- Used Price Range: $900–$1200
- Ideal For: Bird photography, wildlife at a distance, safaris.
Best Used Sony Lenses for Wildlife Photography
5. Sony FE 100-400mm f/4.5-5.6 GM OSS
- Focal Length: 100-400mm
- Why it’s great: Professional-grade zoom with lightning-fast autofocus, optical excellence, and OSS stabilization.
- Image Stabilization: Yes (OSS)
- Used Price Range: $1600–$2000
- Ideal For: Wildlife, sports, nature photography with Sony mirrorless cameras.
6. Sony FE 70-300mm f/4.5-5.6 G OSS
- Focal Length: 70-300mm
- Why it’s great: A more budget-friendly zoom for Sony users, offering solid reach and stabilization.
- Image Stabilization: Yes (OSS)
- Used Price Range: $900–$1200
- Ideal For: Wildlife enthusiasts who need a versatile, lightweight telephoto option.
Best Used Third-Party Lenses for Wildlife
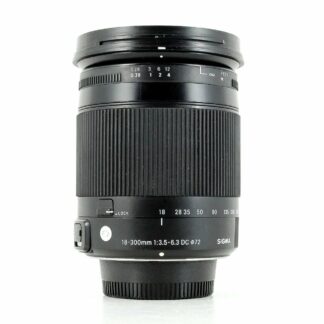
7. Sigma 150-600mm f/5-6.3 DG OS HSM Contemporary
- Mounts: Canon EF, Nikon F
- Focal Length: 150-600mm
- Why it’s great: Exceptional reach with reliable autofocus, lightweight compared to its “Sports” sibling, and excellent value.
- Image Stabilization: Yes (OS)
- Used Price Range: $800–$1000
- Ideal For: Birders and wildlife photographers needing extra focal length without breaking the bank.
8. Tamron SP 150-600mm f/5-6.3 Di VC USD (G1)
- Mounts: Canon EF, Nikon F
- Focal Length: 150-600mm
- Why it’s great: Tamron’s first-generation ultra-telephoto zoom, offering solid sharpness and effective stabilization.
- Image Stabilization: Yes (VC)
- Used Price Range: $700–$900
- Ideal For: Beginners and hobbyists looking to get into wildlife photography.
Great Used Lenses for Nature & Landscape Photography
While wildlife photographers often seek telephoto lenses, nature and landscape shooters benefit from wide-angle and mid-range zooms to capture vast scenic views.
9. Canon EF 17-40mm f/4L USM
- Focal Length: 17-40mm
- Why it’s great: An affordable wide-angle L-series lens perfect for landscapes, with robust weather sealing.
- Used Price Range: $350–$500
- Ideal For: Nature landscapes, wide scenic shots, waterfalls.
10. Nikon AF-S 16-35mm f/4G ED VR
- Focal Length: 16-35mm
- Why it’s great: Sharp, stabilized wide-angle zoom ideal for landscape and nature photography.
- Used Price Range: $600–$800
- Ideal For: Handheld landscape shooting, wide nature scenes.
11. Sony FE 16-35mm f/4 ZA OSS Vario-Tessar T*
- Focal Length: 16-35mm
- Why it’s great: High-quality wide-angle zoom with OSS, perfect for landscape and nature photography.
- Used Price Range: $800–$1000
- Ideal For: Travel, landscapes, forest photography.
Why Buy Used Lenses for Wildlife and Nature Photography?
- Significant Cost Savings: Used lenses can save you 30–50% compared to new models, especially in the telephoto range where prices are steep.
- High-Quality Optics Age Well: Lenses, especially professional-grade telephotos, are built to last and deliver consistent optical performance for years.
- Access to Specialized Lenses: You can afford specialty lenses (like a 600mm zoom) that might be out of reach if bought new.
- Expand Your Kit Faster: With the money saved, you can invest in accessories like sturdy tripods, gimbals, and camouflage covers.
Tips for Buying Used Wildlife Lenses
- Inspect for Wear and Tear: Check the lens barrel, mount, and filter threads for signs of damage.
- Test Autofocus Performance: Ensure the lens locks focus quickly and accurately.
- Check Image Stabilization Functionality: For lenses with IS/VR/OSS, verify that stabilization is operational.
- Inspect Optics for Dust and Fungus: Shine a flashlight through the lens to spot any internal issues.
- Buy from Reputable Sellers: Opt for camera stores with return policies or warranty options when possible.
Conclusion
Capturing breathtaking images of wildlife and nature doesn’t require the latest and most expensive gear. The used lens market is filled with exceptional telephoto and wide-angle lenses that can meet the demands of serious photographers while being gentle on your budget.
Whether you need the reach of a Sigma 150-600mm for bird photography or the wide, sweeping views of a Canon 17-40mm for landscapes, there are numerous used lenses that deliver professional results without the premium price tag.
With thoughtful research and careful inspection, you can build a wildlife and nature photography kit that allows you to explore the great outdoors and bring home images that do justice to its beauty.