Posted on

The Digital single lens mirrorless camera (DSLM) purchase guide

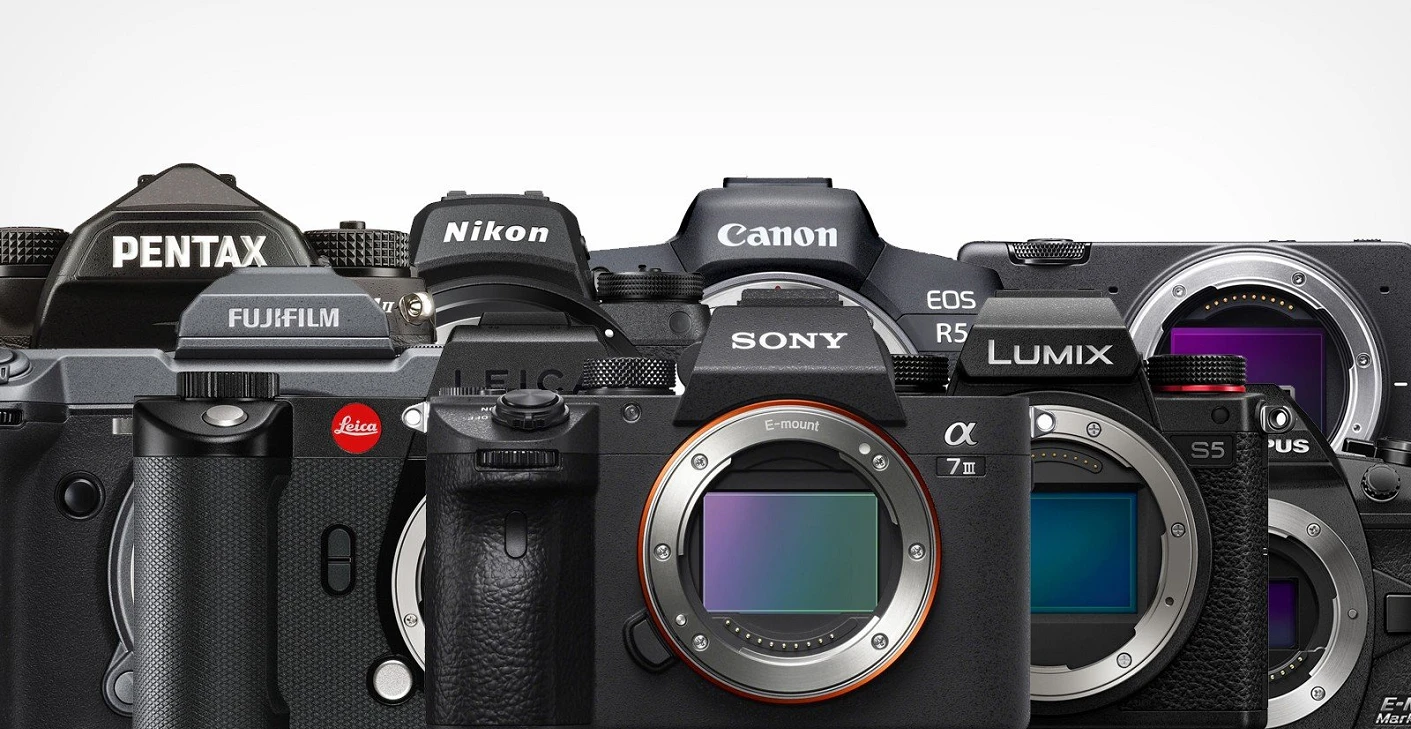
The DSLM; for a couple of years it has been changing the photography market. What started out as a poor SLT attempt developed into a completely new and booming market? The market for DSLMs (D igital S ingle L ens M irrorless) or system cameras. These are now available for every budget and many manufacturers now have a mirrorless camera in their portfolio. But should you buy a mirrorless camera? Does it have any advantages over DSLRs ? That and much more is the content of this page and finally I will show you a few models that I would recommend.

What is a system camera / DSLM?

There are two types of system cameras, with and without mirrors. The system cameras with mirrors are called SLRs and those without are called mirrorless. Sounds logical, doesn’t it? The mirror in the DSLR is historical and comes from a time without image sensors. The system has been perfected over decades. But for a few years now, DSLMs have been picking up. Teething problems are being eradicated more and more and many photographers are seeing a new alternative that offers many advantages over the old DSLR cameras.

The mirrorless camera / DSLM in detail

Height and weight

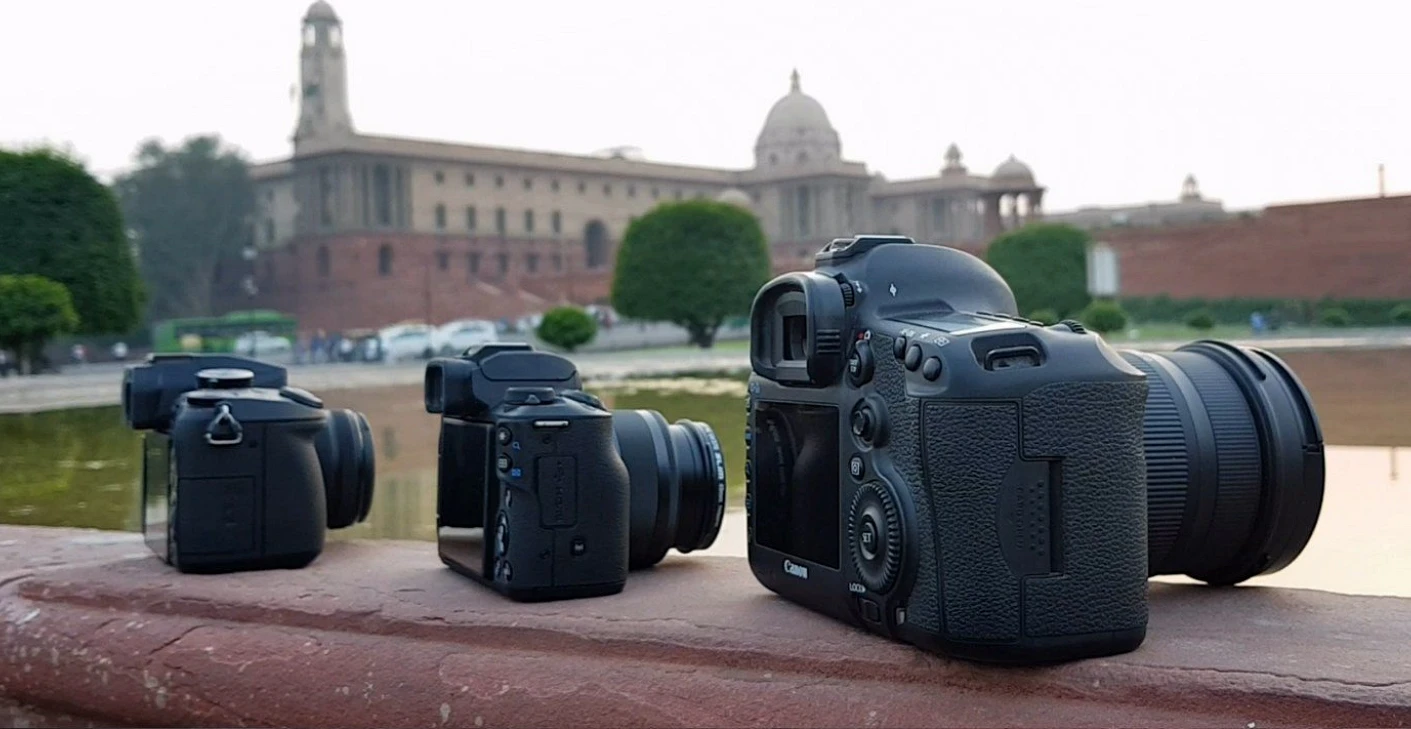
Many see an enormous advantage here. The DSLM lacks the mirror and as you can see in the example above, this saves space and of course weight. That is why the mirrorless cameras are much smaller and lighter. But they are still bound by certain limits. They are not as small as compact cameras. This is simply not possible with interchangeable lenses and large sensors. But they are still smaller than the DSLRs and therefore more mobile and inconspicuous.
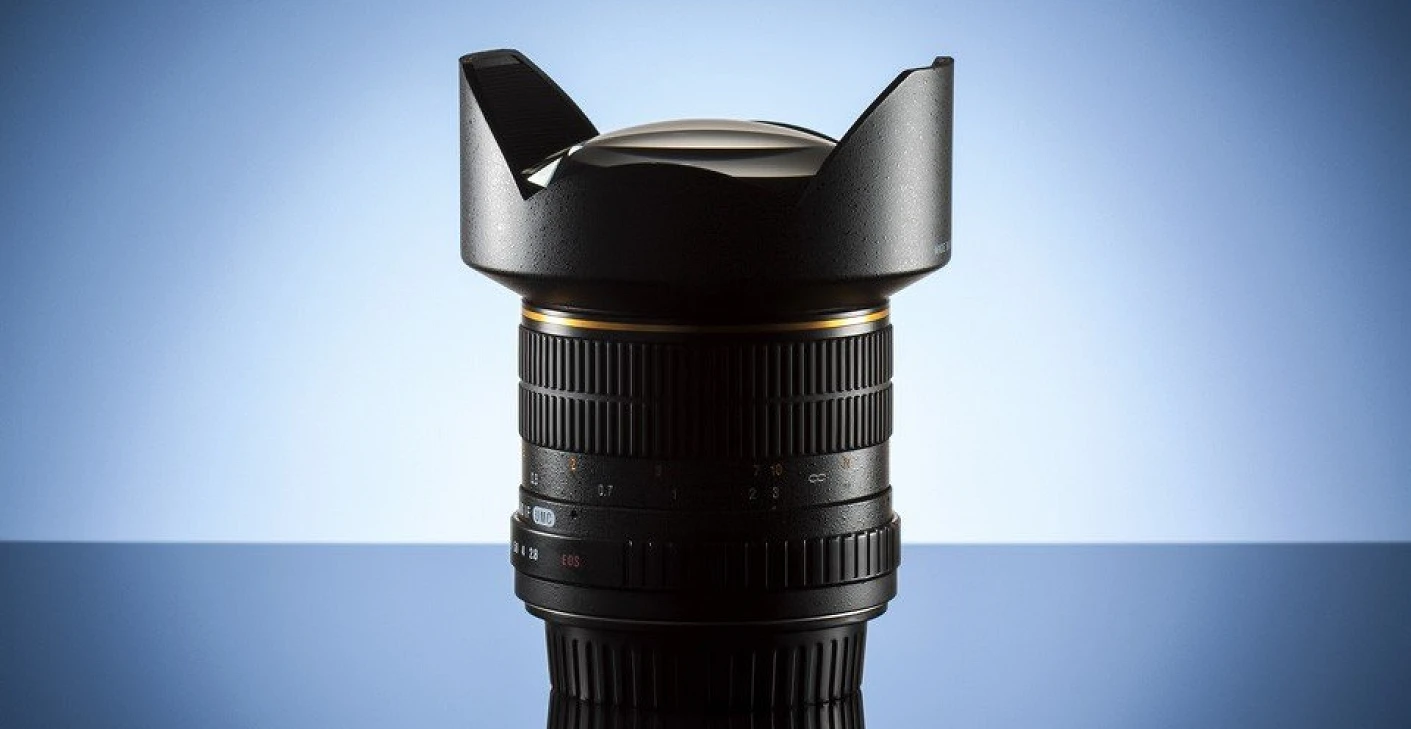
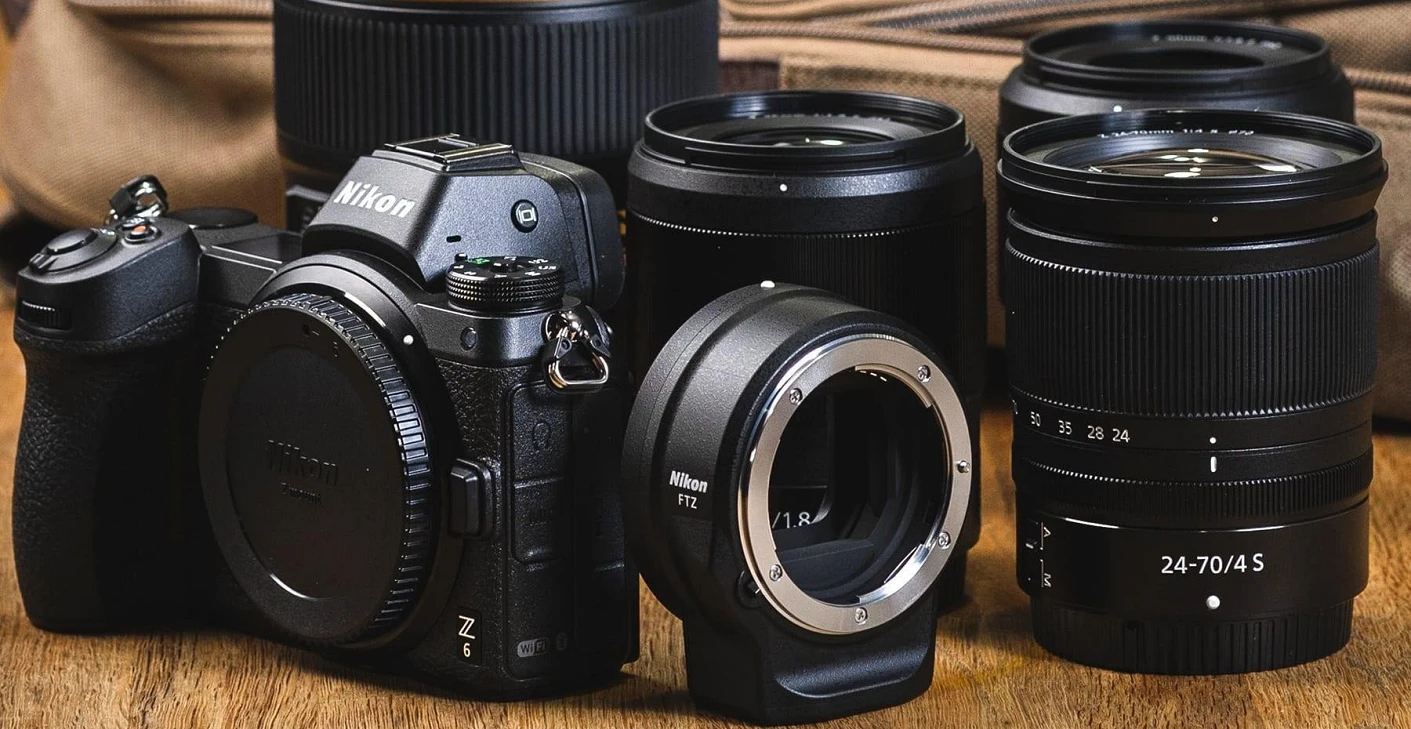
Lenses

This is a special feature of DSLMs that you should definitely not forget. Other lens connections are used that allow smaller lenses, but they are not that small. There are certain limits that are physically given and specify a certain size. If you only buy these cameras because you want something as small and portable as possible, you should look around for a bridge or compact camera .

Ergonomics

Ergonomics is probably the first thing anyone who is switching from a DSLR to a DSLM should notice. The manufacturers try to make this as similar as possible, but it is simply a different feeling that can seem strange, especially with long-term DSLR users. In direct comparison to an SLR camera, I find the DSLMs to get used to at first. They are just small and lie better in the hand of one than the other. In my opinion, many manufacturers simply have too many buttons on the small housing, which makes operation a challenge.

There is only one option here: try it out. I recommend that anyway before you buy a new camera. DSLM cameras come in different forms. Very large, such as the Sony A3 or Canon EOS R, but also very small such as the Sony A6000 or Canon EOS M50. Depending on the model, you have an electronic viewfinder or just the display to look at your pictures. In any case, try out what suits you and what suits your type of photography.

Electronic viewfinder

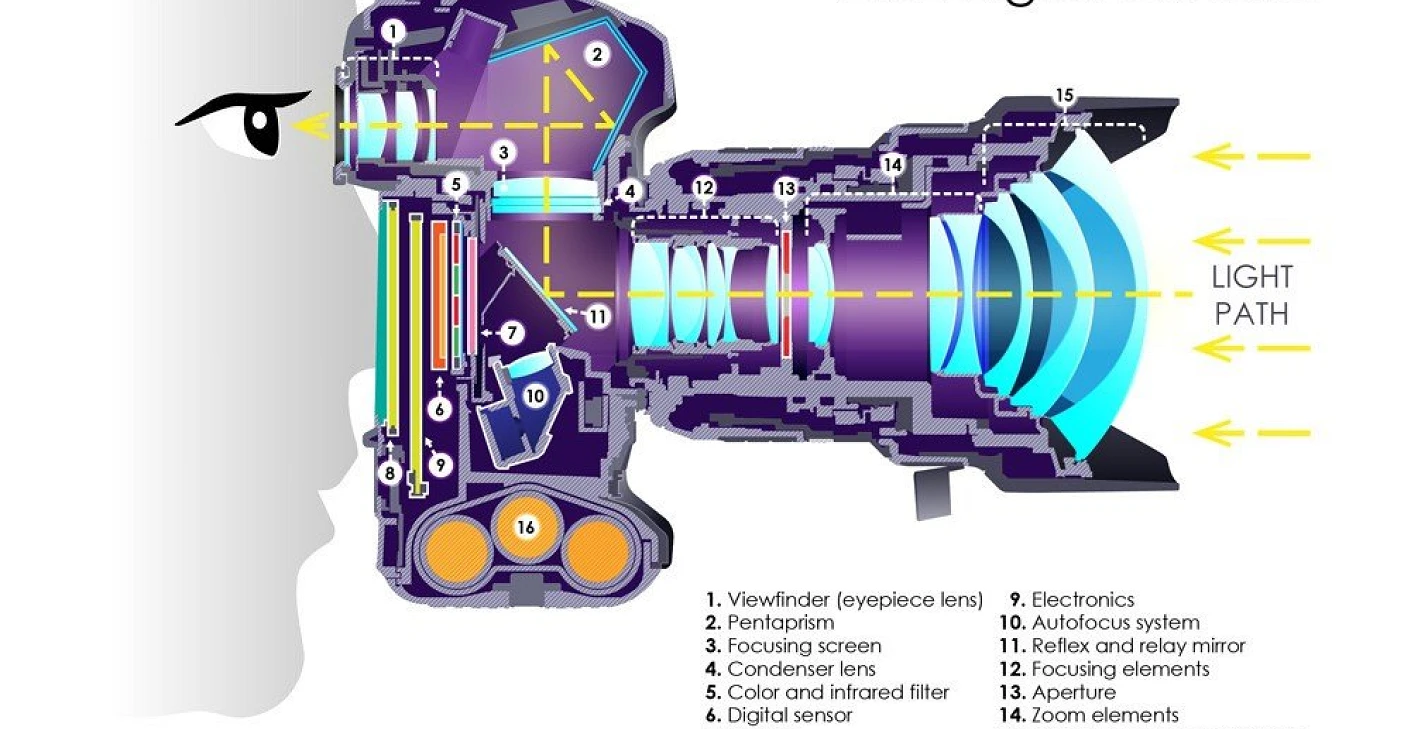
A DSLM or system camera takes photos with an electronic viewfinder or the display. This means that the viewfinder does not have a direct optical connection to the subject like the DSLR, but a display. It is like looking at the finished image through the viewfinder.

The electronic viewfinder offers several advantages:

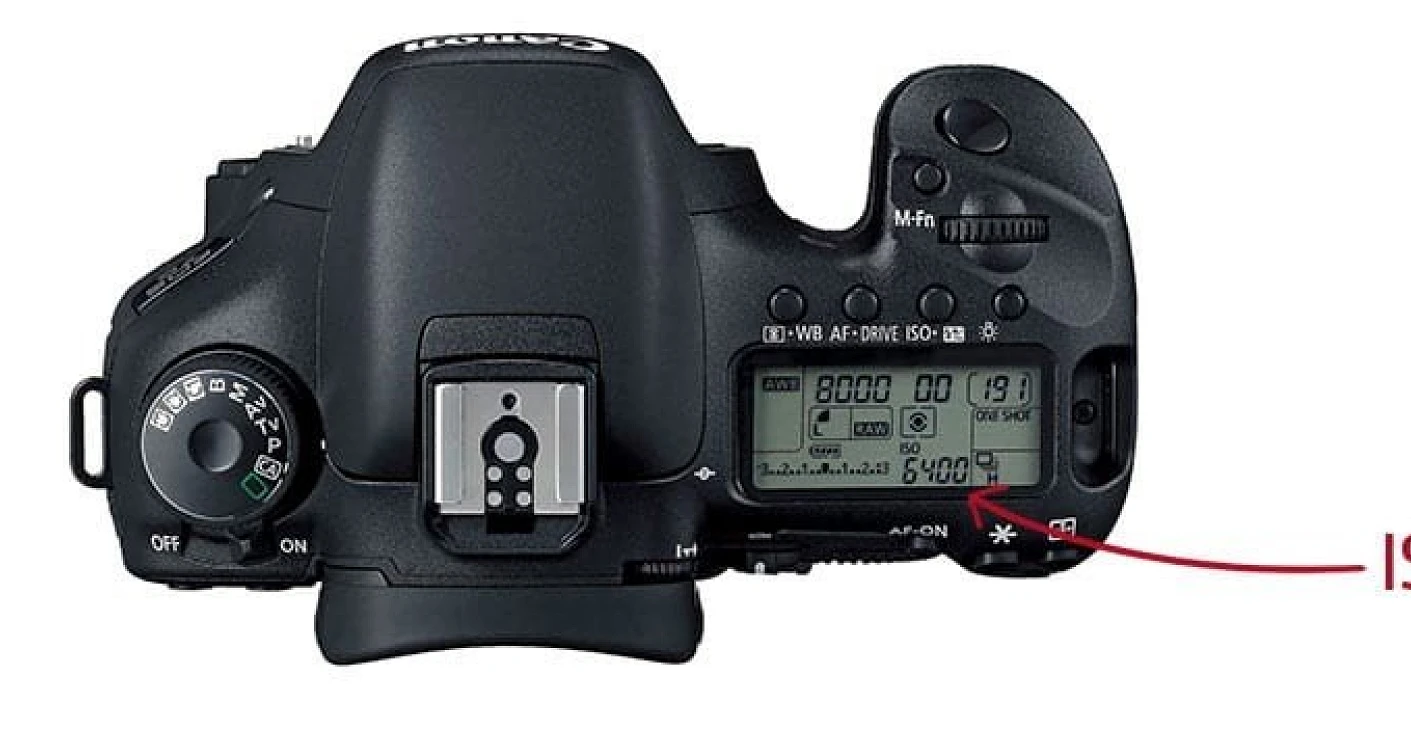
  • Image preview: You get a direct idea of ​​your photo and actually see the finished image before you press the shutter release. If you now change the settings on your camera: for example , closing the aperture or increasing the ISO value , the image changes immediately and you can judge whether you like the photo or not. You can also see the picture in the viewfinder after you’ve taken it. So it’s a second display that works just like your large camera display. The advantage, however, is that you can use it without being distracted by the sun.
  • Exposure aids: Because our EVF is a display, we can use many aids that the optical viewfinder cannot offer us. We can show a histogram , use an overexposure warning and much more … You can see immediately if your camera is not doing something the way you want.
  • Manual focus: With manual focus, we can use the focus peaking to see where our focus is and even zoom into the image. A real help for manual focusing.
  • Much more: Since you can show almost everything in the displays, there are no limits to the manufacturers. Water cars, grids for image creation, image styles and much more is possible.

Now I’ve written so many great things about the electronic viewfinder that I would of course like to point out a few negative points. Because the electronic viewfinder naturally always has to be supplied with power. This should not be ignored with some models and some cameras have extreme problems with high power consumption and thus a short battery life. Also, for many photographers it is not pleasant to constantly look at a display (myself included). It’s a completely different feeling to actually see the subject instead of just being shown it. The cameras are getting better and better here, but sometimes they are lagging behind due to delayed display (the display is delayed compared to reality).

I would like to add one point for those who like to take photos at night (long exposure ). If you take a picture with the DSLR, you have the light intensity of your own eye available. With the DSLM, the display in the viewfinder depends on the power of the camera. That may not sound too bad, but there are a few moments when I would have wished for my DSLR…

If you are not sure which viewfinder is right for you, I recommend that you test both of them once and take a closer look. I find the DSLR to be much more pleasant, especially in series pictures and when photographing fast subjects, but something different suits everyone.

Autofocus

There are several options when focusing with a mirrorless camera (DSLM). You may be familiar with the first option from the DSLR. If you switch to live view here (i.e. using the display), the autofocus becomes significantly slower. This is because the camera is using the contrast AF. This simply shifts the focus until the image has the highest possible contrast has. This is very precise, but unfortunately a lot of time is lost in trying out and “pumping” the focus. That’s why there is still phase autofocus, which was reserved for DSLRs for a long time. Here, two sensors compare the light (phase) falling into the lens from different angles and thus know from the first measurement what needs to be changed on the lens to focus. Cool right?

Most modern DSLM cameras use a combination of these two methods in order to be able to focus both quickly and precisely. If you use a modern DSLM camera, you should make sure that it supports phase or hybrid autofocus.

Picture quality

We come to the last point, and in my opinion the most important point. The image quality. In terms of image quality, the system camera is in no way inferior to the SLR. Of course, not all cameras are the same here, but in most cases you don’t have to worry that you have something worse just because you are using a different system. Most cameras even have the same image sensors installed (Sony makes sensors for some Nikon cameras and Canon has installed the same sensor in the 5D4 & R and the 6D2 & Rp). There is only one real way you can be sure that the quality will meet your expectations. Test the camera 🙂

Choice of lenses

From my point of view, this is a major negative point. It is not the case with all manufacturers that the newer the manufacturer is in the DSLM market, the more likely it is that the choice of lenses is limited. For decades it took a long time to develop a wide variety of lenses for DSLR cameras. This has only just begun with DSLMs and although lenses are already on the market, one only starts with the most important ones at the beginning. One or the other special lens may not be found here yet. Of course there are adapters that allow the use of DSLR lenses, but I have made the experience that it often leads to problems (slow autofocus etc.).

There are always new lenses on the market, but keep in mind that you may not find everything here and that you have to expect limitations.

Is the mirrorless camera or system camera right for you?

This is of course a question that cannot be answered easily. I always recommend trying out the camera beforehand. But I would like to give you a little support along the way that should help you with your decision.

The DSLM is interesting for you if the following points apply:

  • You’re used to smaller cameras – that  was the first thing I didn’t like about the DSLM cameras. The size. Ok, I also come from the DSLR segment and am used to large cameras with battery handles. However, if you’ve been taking photos with a compact camera or mobile phone the whole time, then the size of the DSLM is perfect for you.
  • You can handle the digital viewfinder – the electronic viewfinder is not for everyone. Some have problems seeing everything on a display / digital viewfinder. If that is not a problem for you, then you can use the mirrorless camera.
  • You want to try something new – that was one of the reasons why I keep getting a DSLM for different jobs. It’s just fun to use a different camera. Maybe it fits better than the current one? Just keep in mind that you don’t need a new camera straight away because it can do one thing a little better than the current one.
  • Video – Yes, the site is actually called Learn Photography, but especially when it comes to video I would prefer the DSLM to the DSLR and any other camera. They’re small, they’re incredibly powerful, and you can’t beat the autofocus when filming.

Buy recommendations

Entry level DSLM

Canon EOS M50 * – Sony Alpha 5000 * – Olympus PEN E-PL9 * – Panasonic LUMIX G *

Advanced DSLM

Sony Alpha 6300 * – Olympus OM-D E-M10 Mark II *

Professional DSLM with full format sensor

Canon EOS R * – Nikon Z6 * – Sony A7 III *

Otherwise, make sure that you try your camera before buying and that you do not justify the purchase with the one feature that the new camera can do better. You take the photos and not your camera 🙂

Posted on

The compact camera – camera purchase advice

Which camera should I buy? One of the most frequently asked questions in the beginning of a photographer and beyond. On this page I’ll show you why compact cameras are the right choice for you; or not. Let’s go 😉

1 What is a compact camera?

2 The advantages of a compact camera

3 disadvantages of compact cameras

4 Who is the compact camera for?

What is a compact camera?

The compact camera is, as its name suggests, compact, i.e. very small and handy. All components are designed to be as small and light as possible. A small flash is usually built into the camera housing and the lenses are specially developed for the smaller cameras and are also smaller. They are mostly designed to turn them on and just get started. For this reason, the lens, which cannot always be changed, is designed to simply photograph everything. Some cameras offer further setting options, but the primary focus is often the simple “point and shoot”. Hold on and release.

The advantages of a compact camera

Mobility

Regardless of whether it is a pocket, a backpack or simply in the hand the compact camera simply fits everywhere. You can just take them with you wherever you go. Due to its small size and hardly any weight, it is extremely mobile and no problem even on long journeys. This is a real advantage compared to a SLR camera 🙂

Service

These cameras are designed to be operated by laypeople and are therefore extremely easy and intuitive to use. They are entry-level cameras and although you can control aperture , ISO and exposure time in some models , you will look in vain for one or the other professional function. But that’s not bad, because it makes operation easier and one must not forget: the cameras are not made for this.

Universal

A compact camera with its fixed lens can be used universally in all situations. With a DSLR or DSLM you would have to take several lenses with you, such as a macro lens, a wide angle lens, a telephoto lens, etc … The compact camera combines all of this in one lens. Super zoom and macro are functions that can be found with these cameras. So you are prepared for every situation and it is not necessary to change the lens.

Depth of field

Now it’s getting a bit technical. Compact cameras have a very small sensor. The size of the image sensor has an influence on the focus area. This means that with a small image sensor you can get a large area of ​​focus. If you want to have as much sharpness as possible in the pictures, you need a small image sensor. Architecture and landscapes can be reproduced very well, while cameras with a larger image sensor would have to close the aperture significantly and therefore need more light.

Price

We’re still with the small image sensor. Because small sensors are cheaper to manufacture. There are also devices in the field of compact cameras that exceed £ 2000, but these also have a large image sensor. The purchase and entry into photography is extremely cheap with these cameras, and the enormous spread of smartphones further lowers the price.

Disadvantages of compact cameras

Of course the world is not perfect. Everything has its disadvantages and so of course compact cameras too. Below I have listed the most important ones for you.

Limited image quality

Compact cameras are all-rounders. They can do anything, but that also means they are not really good at anything. Anyone who can do a lot, offers everything and that at a reasonable price has to compromise somewhere. In this case, the small image sensor is to blame. Compared to DSLR / DSLM cameras, you have to compromise on sharpness, dynamic range and the ability to take photos in the dark ( ISO noise). Especially in demanding situations it is very difficult to achieve useful results for these small karmas. Taking photos freehand in the dark? Not a very good idea.

Limited quality of the lens

I already said that you always have to cut corners with an all-rounder. The same goes for the lens. The size of the lens and the usually enormous zoom result in a loss of sharpness, vignetting and chromatic aberration. In addition, every light reflex is reflected across the lens and makes photography almost impossible in some situations. Of course, I am comparing € 1,000 lenses with a £100 camera-lens combination, but you should know what you’re getting yourself into … It gets better (it always gets better)

Handling

A problem that I’ve had with many DSLM and bring cameras: They are simply too small. That makes it very mobile, but it is also demanding to use the small buttons and it happens again and again that you press 3 buttons at the same time. The cameras also have no eyepiece and you have to rely completely on the display. This can work, but in strong sunlight this display is almost useless.

Lens change

There are compact cameras in the higher-priced segment that offer the option of changing the lens. However, I now assume that you are using a device that does not offer this functionality. A lens that is permanently installed has advantages, but an upgrade or a change is simply not possible here. As a photographer you always want to adapt the camera to the given situation and that only works semi-well here.

Who is the compact camera for?

I can answer this question very easily. For everyone who wants a camera that just works. You don’t want to deal with many setting options? Just hold on, pull the trigger and receive a photo as a memento? Then this type of camera is perfect for you. It is small, light, universally applicable and also inexpensive. However, if you now expect the ultimate camera that perfectly photographs every situation at the push of a button, then you will be more likely to be disappointed. These cameras have technical limitations and are perfect for someone who just wants to capture memories.

Posted on

The Digital single-lens reflex (DSLR) camera purchase advice

The camera with the most widespread use is the single-lens reflex camera or DSLR. It is suitable for a large number of photographers and can be used both in the beginner area and in the professional environment. In this article we will clarify whether a SLR camera is worthwhile for you or not. Finally, I would like to recommend a few DSLRs that are particularly suitable for beginners, but also for advanced users and professionals. But remember: a better camera doesn’t make a better photographer. It doesn’t hurt to start small and adapt your equipment to your experience. Your driving school car didn’t have 800PS either 😉

How does a DSLR work?

The mirror reflex camera is a camera that works with a mirror. DSLR stands for D igital S ingle- L ens R eflex. The mirror comes from the analog era, because back then you had to be able to look through the lens without exposing the film. The mirror is thus the switch between the optical viewfinder and the image sensor.

If the DSLR camera is switched off (or has nothing to do), the mirror is also folded down and we can look through the lens through our viewfinder. The moment we take a photo, the mirror folds up, covers the viewfinder and releases the image sensor. Then it folds down again. That is the reason why you sometimes see nothing with DSLRs while taking pictures.

Tips for taking photos with the DSLR

I would definitely advise you to use the viewfinder, although many cameras can also show the image live on the display thanks to digital technology. The disadvantage of the display, however, is that it is reflective and sometimes makes it difficult to see something. Of course, we don’t have that with the viewfinder 😉 these cameras are also built to take photos with the viewfinder. The complete autofocus and the power of these cameras are in here and it is definitely worth keeping the display outside.

 Advantages of the SLR camera

high image quality

To put it simply, a larger image sensor often results in better image quality. Well, the smallest image sensor in a DSLR is an APS-C sensor. These sensors are far superior to those of compact cameras. Due to their large size, they have a higher resolution or can handle more megapixels much better than their smaller colleagues from the compact camera. The reason for this is that with a larger sensor, more light per pixel arrives and that ensures a significantly better quality, especially in poor lighting conditions.

In good situations, all cameras can deliver a good result, but in every one? This is something demanding, which usually requires appropriate equipment.

Versatility of the DSLR

An SLR can do everything. Due to the possibility of interchangeable lenses and the almost endless setting options, we can use them in every area, which is also the reason that they can be found in every area. By screwing on another lens, we can bring distant subjects closer or capture gigantic landscapes in a single photo. The setting options of the DSLR are not only aperture , ISO and exposure time , but also white balance , autofocus and so much more. As a result, they are definitely superior to compact cameras, which were made for everything, but which cannot be specialized in one particular area.

Battery life

I still compare the subject with compact cameras, because DSLRs and DSLMs represent the next step after a compact camera or smartphone. The battery life is definitely enormous. How long can your cell phone or compact camera run before you need a new one? For me it is 7-8 hours (with two rechargeable batteries in the battery grip) and up to 4000 photos. The whole thing depends a bit on the situation, but many should realize that it is significantly more than what is possible with cheap cameras. So a big plus for the DSLR.

Speed

Probably the most important point from my point of view. So as a professional you have completely different demands on the camera. But even for beginners it is a huge advantage if the camera does not have to think for 1-2 seconds after triggering before we can look at a picture, but if everything is displayed immediately and live. I’m not talking about as many pictures as possible in the serial picture, but about general handling. Do you always want to wait a moment for a picture to appear? Or until the camera has finally written the image to the memory card? Probably not … But there is more, because the autofocus is of course much faster and more reliable. Setting the focus in milliseconds ensures that you really don’t miss any more moments!

Lenses

Maybe someone knows this well-known picture, which shows Canon’s lens park. This gigantic mass of lenses also gives us an incredible number of possibilities. There is a suitable lens for every situation, so nothing is left to be desired. What is often solved with an extreme zoom lens in compact cameras can now be solved with a variety of specialized lenses. But of course you don’t always have to go to the actual manufacturer of the camera if you want the right lens. You can also work with third-party manufacturers such as Tamron or Sigma. These offer a wonderful and, above all, often cheaper alternative.

Disadvantages of the DSLR

Nothing is perfect. Of course, the SLR camera also has disadvantages and I’ll show you a few reasons why you shouldn’t use DLSRs right away.

Weight and height

Please do not get me wrong. There are also small lenses and small DSLR cameras, but for many this factor is crucial. Imagine you are planning a vacation and you have to prevent a camera with 3 lenses in your luggage … A compact camera would be tempting. For example: a good full frame DSLR with a standard lens.

  • Canon 700d + KIT: approx. 800g
  • Canon 6d II + 50 1.2 + 35 1.4 + 24-70 2.8: 2.8 kg

These are all exemplary values ​​now, but larger cameras and lenses ensure that they take up more space and of course additional weight. It doesn’t really matter whether you use the DSLR or a system camera (DSLM). The DSLM is slightly ahead here, but in the end that doesn’t mean much. You have to be aware that you have a big and heavy camera with you.

Your own claim

This is something that I noticed again and again on my photo trips. When I travel with a DSLR, I need to take good photos. Over time you start to professionalize everything and look for the perfect photo. After all, a huge camera was dragged around with you all the time that cost several thousand yours. So why should you photograph something that you could have photographed with your mobile phone? Maybe it’s just me, but it can happen to you that you develop too high demands on your pictures and start to forget the actual memories and just stop taking those typical mobile phone photos.

Who should buy a DSLR?

A DLSR is not for everyone. If you are looking for a point and shoot camera, you should go for a compact camera. We are in an area where our purchase was unnecessary if we did not capitalize on the potential of this camera. So who is an SLR camera for?

  • Ambitious beginners who want a lot of performance for little money should use a DSLR or DSLM.
  • If you want a camera system that you can upgrade easily. (with new lenses or purchased lenses fit on new cameras again)
  • You are looking for an extremely wide range of accessories. Because the DSLR / DSLM market is extremely large and there is actually nothing that does not exist 😉
  • You want to rely on reliability and speed.

Some buy recommendations

Entry-level DSLRs

If you are looking for a cheap entry into DSLRs, the three-digit models from Canon or Nikon are very well served. Here you can get the models even cheaper if you buy older used ones. Canon’s 650d is still a good camera today!

Canon cameras with KIT lens: Canon 2000D * – Canon 1300D *  – Canon 800D *

Nikon cameras with KIT lens: Nikon D5300 * – Nikon D5100 *

Sony cameras with KIT lens: Sony Alpha 68 *

Advanced DSLRS

Canon camera with KIT lens: Canon 77D *

Nikon camera with KIT lens: Nikon D7200 *

Professional DSLRs with full frame sensors

Canon full format entry: 6D II + kit lens *

Nikon full frame entry: D750 *

Posted on

The exposure time in photography

The exposure time or the shutter speed defines how long the shutter of the camera remains open. This has several influences on our image, such as brightness and motion blur.

Basics of exposure time

The exposure time defines how long light falls into the camera. This happens either through a mechanical lock that releases the image sensor when triggered, or it is electronically simulated. That depends on the type of camera.

As a photographer, you can control the exposure time and use this both to expose a photo correctly and to create creative effects in the images. Depending on whether you expose long or short.

The exposure time is usually given in fractions of a second (e.g. 1/125) or in whole seconds (2 ″ for two seconds) if this is necessary. But when do we speak of a short and when of a long exposure time ?

Normal cameras can expose between 30 seconds and 1/4000 of a second. If your camera can’t, don’t worry. These are extreme values ​​that are rarely used. You can orientate yourself on a value from the film industry. These use 1/48 of a second to expose the individual frames of a film. Applied to photography, this is a more normal guideline. It’s not very fast, but neither is it very slow. This exposure time ensures that, although motion blur can be perceived, i.e. motion in the image can be blurred, the motionless is mostly frozen.

Influence on the picture

Brightness

The exposure time has two influences on the image. On the one hand, it controls the brightness.
This means that with a long exposure time you let a lot of light fall into the camera and the picture becomes brighter. With a short one, less light falls into the camera and the picture becomes dark.
Beginners usually don’t notice much of this, as time is only one of three values ​​that control the brightness of a photo. However, you can also turn it around. If I want a short exposure time I need a lot of light. If I want to take long exposures, this is often not possible with lots of light. Too much light falls into the camera and the image would be too bright.

Motion blur

Everyone has probably blurred a picture at some point. This is motion blur. This occurs when something moves too fast for the currently set exposure time . That can be our subject as well as the camera itself. The motion blur depends on the speed of our subject. Everyone moves. You can’t sit 100% still. But these movements are not as fast as a car, an animal or a bird. We have to adjust our attitude in order to keep up with our motive.

Fast exposure time

If we want to expose quickly, we speak of exposure times over 1/60 sec. Usually 1/200, 1/1000 or even shorter. This short time is necessary to either compensate for too much light (when it is very bright outside) or to freeze a fast subject. When we capture a fast movement that we cannot really perceive even with the human eye, we speak of freezing. It looks like time has stood still and a very short moment has been captured on a photo. For this we need a very short exposure time and have to adapt it to the speed of our subject. The faster the subject moves, the faster we have to expose.

Long exposure time

Long exposure is a great way to get creative, but be careful. Long exposure is not all that easy. We have a few things to consider.

We usually speak of a long exposure time when we expose longer than 1/50 of a second. These are usually values ​​in the seconds range, i.e. half a second, a whole or several seconds.

Use a tripod

By using a tripod, we avoid blurring. You can reduce or completely avoid the motion blur caused by your hand and the movement of the camera. There is a rule of thumb from when you should use a tripod.

Focal length / 1 = minimum exposure time

Your focal length is crucial for this. It can be compared to binoculars. It is often difficult to hold binoculars steady without a tripod, and so it is in photography. The further your lens is in the partial area, the more likely you are to blur your image. The phrase can now be transferred to the different focal lengths.

For example:

  • 30mm = 1/30 sec. Or faster
  • 50mm = 1/50 sec. Or faster
  • 200mm = 1/200 sec. Or faster

In addition to the tripod, you can also use this value further by holding your camera correctly or using an image stabilizer.

The long exposure effect

A long exposure time now ensures that we have more light available, for example, that we can take photos at night. On the other hand, it naturally creates motion blur, which we can use skillfully to blur elements of our image or even to make them disappear. Because everything that happens while our shutter is open is also recorded on the image sensor.

Set exposure time

The exposure time you can set in your camera with two options. On the one hand there is the manual mode. This is quite demanding for photography beginners, as all values ​​have to be set manually and of course it does not forgive any mistakes. The second option is the Av or S mode. With this you can set the exposure time and your camera takes care of the other values, such as aperture and ISO . You can first concentrate on one value and then go into the other setting options.

Posted on

The ISO value of your camera

ou must have already found a button or an ad with the label ISO on your camera. If you press it, you see a lot of numbers and maybe you don’t know what to set here. Don’t worry, that’s what today is about!

In addition to the exposure time and the aperture, the ISO value is probably the most important value in the exposure of your photo. It controls the brightness of your pictures, but also has other influences.

Origin & functionality

Originally, the ISO value comes from the sensitivity of analog films (ASA). This sensitivity was due to the different sizes of crystals used on the film. Large crystals could absorb more light, but created a so-called grain (noise). If small crystals were used, the film could absorb less light, but the grain became finer and finer and less visible to the eye.

But how does it work digitally now? After all, we can’t make the pixels on our image sensor bigger or smaller. Therefore there is a digital possibility to increase the ISO value. Usually every single pixel sends information to the camera. If this signal is too weak, the light received is too dark. Now we have to increase the sensitivity (the ISO value), which amplifies this signal. This allows the camera to perceive light much better, but unfortunately not only the light is amplified, but also the interference with the sensor and the electronics. We will see this later in the picture as image noise.

How does ISO affect our images?

This can be compared to the human eye. This can also see in the dark, but is then blinded by bright lights. It’s the same with your camera. If you have set the ISO value very high, every light, no matter how small, looks incredibly bright, but you can see with your camera in the dark.

Originally, the ISO value comes from the sensitivity of analog films (ASA). This sensitivity was due to the different sizes of the crystals used on the film. Large crystals could absorb more light, but created a so-called grain (noise). If small crystals were used, the film could absorb less light, but the grain became finer and finer and less visible to the eye.

But how does it work digitally now? After all, we can’t make the pixels on our image sensor bigger or smaller. Therefore there is a digital possibility to increase the ISO value. Usually every single pixel sends information to the camera. If this signal is too weak, the light received is too dark. Now we have to increase the sensitivity (the ISO value), which amplifies this signal. This allows the camera to perceive light much better, but unfortunately not only the light is amplified, but also the interferences of the sensor and the electronics. We will see this later in the picture as image noise.

With the ISO value this is the noise. Noise looks like someone has placed the smoking of a television picture over your photo. This effect is also known from many smartphone cameras that only show muddy pictures without sharpness in the dark.

This is because we perceive sharpness as micro-contrast. So as a small difference between light and dark. However, the edges between these areas are destroyed by noise, which is also a difference between light and dark.

The high ISO value (6400) ensures that you can see the stars, but the details in the grass are completely lost in the noise

How do I set the ISO value?

To set this value on the camera, simply press the ISO button . Then you can use the corresponding adjusting wheel to check how high or low the value should be set.

Like exposure time and aperture , the ISO value is based on aperture steps. In addition, it is based on the power of 2, which doesn’t make it all that easy. But I have an example that might make it easier.

Every step to the right (higher value) makes the picture twice as bright as before and every step to the left makes it half as bright. Got it? Well! Because there are also third steps that allow you to fine-tune the value.

So if you still have intermediate values ​​on your camera, do not worry: this is only for fine adjustment.

When do I use which ISO value

This is now a subject that a lot of completely misunderstand. Because the ISO value is nothing worse. It doesn’t always have to be kept so low that we avoid any noise. The ISO value should support you in your photography and with modern cameras the noise is also less and less.

My tip: Try to find out on your camera when the ISO noise is so strong that you can no longer use an image and when you don’t notice any differences. 

For me, it’s pretty easy with all my cameras: You can actually always use ISO 100-800 without seeing any noise anywhere. From ISO3200 everything should be treated with caution. This example can work for you, but it doesn’t have to.

Avoid image noise

Noise does not have to be a bad thing either – although this image is very noisy, you can still see enough details and can forgive the noise.

Do you now have to take photos in the dark and want to avoid the noise? Then I now have a few tips for you. First of all, a larger image sensor always ensures less noise, as the pixels on the sensor have significantly more space and can therefore absorb more light. But a new camera is not the universal solution. Better take a look at what can still be extracted from the other values. We have exposure time and aperture , which can possibly be set a little brighter and thus relieve the ISO value.

But be careful: it is better to take a noisy picture than a blurred or blurred one. Viewers of the picture are more forgiving of noise than blurred or even blurred pictures.

An alternative would be to take the photo in RAW and remove noise from the image. There are many image processing programs for this that can pick up the noise in the image. There are many possibilities here, you can find your own way.

Posted on

The perfect setting for couple photo shooting

Time stands still for a couple in love – ideal when this moment is captured photographically. For couple photographers, it is a nice challenge to capture the affection of two people for one another through a professional shoot.

The recordings are not as intimate as with a selfie, but a photographer can perceive even more and has completely different technical possibilities.
And the couple can concentrate on the most important thing: their love.

Every couple who wants a photographer to capture their love for one another is unique. The challenge for a couple photographer is to depict this uniqueness and to tease it out with the design of the shoot. In one moment, as in storytelling, a whole story can be told – the same goes for the relationship between two people.

Giving away couple photo shoots


in the time of the greatest bond between two partners, both feel like they are in abundance. So it makes sense to give away photos of the couple in love together. With such a couple shoot, there are many different ways to perfectly reflect the happiness of the two.

Giving away a photo shoot is a highly analogous affair. And so the region in which the couple lives is sometimes the most important selection criterion. Next, a couple has to decide which style they prefer: romantic, elegant or rather crazy and unusual? In order to implement this, the shooting location, the couple’s outfit and the posing are adjusted accordingly. There are no limits to your imagination. Is there a special occasion for the gift, such as an anniversary or wedding anniversary? A very special quality or a hobby that the couple share? The ideas for designing the shoot are diverse and make the decisive difference.

What are the ingredients for successful couple photos?


The inner image of a couple of themselves is captured in the best case in the most beautiful facets and colors in the photos. In order for a couple shoot to deliver exactly the images that a couple wants of each other, it is important that the ingredients are precisely coordinated. Before the shoot begins, a photographer should discuss the details with the couple so that the right preparations can be made.

The right location:


The photo location is selected depending on what a couple wants. Probably the best lighting conditions can be created in the studio, but maybe it should be an outdoor location that best characterizes the couple or where they feel particularly comfortable?
Is it supposed to rain confetti or have a crazy lifting figure built in? Then the location must offer the opportunity to implement these ideas.

The right outfit and appearance


the picture is about a natural expression, but it can look flawless. In order for both to make the best possible impression, it is an advantage to be able to offer make-up or hair styling during the shoot. It probably makes the couple feel more confident about getting professionally styled beforehand. The outfit should also be designed in such a way that it can withstand years of observation. In the case of a wedding or engagement, a couple may want to have their valuable outfits or accessories properly staged.

Posing


Of course, a photo shoot is a posed situation. However, it must not look like this in the subsequent photos. For photographers as well as for couples, it is a challenge to create poses that are as natural as possible in a photo shoot and positions that appear authentic and unsteady. All tips that help the couple to come across as relaxed and relaxed are helpful: For example, the wish whispered in the ear for dinner or the instruction from the photographer to think about the most beautiful moment in their life. Keeping an eye on the couple outside of the official photo shoot can also make a great picture.

Proper Technique


Photographic equipment and shooting techniques should be professional and appropriate. The photographer should know what his strengths are or what technique he thinks works best to portray the couple and the situation. However, technology should never be more important than capturing the special moment between the couple or makcalendar, the former competitive swimmer is not only causing a sensation with his customers with his wedding photos. In just five years as a wedding photographer,  Steven Herrschaft has already received over 100 awards for his pictures: Masters of Wedding Photography,  Fearless Award , Editor’s Choice Award – the list of honors doesn’t seem to end.

How does this young photographer do it? Soft focus is not his method of choice. Striking shadows and unusual perspectives, in which the groom’s bare feet come into focus, are more of a technical description of his style. But what sets him apart is his experimental and intuitive approach. In the style of a street photographer, he throws himself into the action and follows his instinct. He also regularly celebrates at the weddings until the end – every weekend anew. His finding: the chemistry with the couple has to be right, then emotions can best be captured.

To capture the right snapshots of a couple, you need to be imaginative and spontaneous. This is especially true for the photographer, because then he can still get a lot out of an initially self-conscious couple. In the best case scenario, the photo shoot turns into a romantic experience or a happening that the subsequent photos are only too happy to remind of.

Posted on

Wide angle lens – lens advice

What is a wide angle lens? All lenses with a very short focal length are called wide-angle . The focal length here is roughly between 10mm & 40mm. But what does that mean? Such a short focal length has a significantly larger angle of view than the human eye. We would have to turn our heads to capture the entire scene (or use both eyes 😉) The camera can capture all of this in one picture. So we can easily get a very large subject or a normal subject with little space in one picture.

What can I use a wide angle lens for?

Wide-angle lenses are very popular in landscape photography, but can be used in all areas. Whenever you have a large subject or there is not much space available, a wide angle is used. It can now be a gigantic landscape, a large building, or a small apartment that is to be rented out. Yes, it is also great to use a wide-angle lens in a small apartment, because it not only makes the apartment look bigger, but is also the only way to get the entire space in the picture.

In which areas is a wide angle still used?

Actually, whenever I want to show a lot of the surroundings. This can of course also be the case with a portrait. As you can see in this example, you can see the details in the picture as well as an incredible amount of the background. If I go more into the partial area and use a 35mm lens instead of a 17mm, we still have a lot of background in the picture, but significantly less than before.

Wide angle shot at 35mm

Wide angle shot at 17mm

The wide angle effect

Taking pictures with one has a certain effect on your pictures. First of all, everything seems bigger. The distance between the individual elements in your photo looks like there are several meters between them. The smaller the focal length, the stronger this effect is.

Subjects that are very close to the camera appear very large and puffed up and the further you are away from the camera, the smaller everything looks. I have the following example for you.

The arm in the picture looks huge, but the head is almost normal

Wide angle distortion

The extreme angle of view that a wide-angle lens brings with it not only results in the wide-angle effect, but also other distortions that cannot be avoided.

Here one speaks of a perspective distortion. The shorter the focal length , the closer the subject and the greater the angle of inclination, the stronger this effect becomes.

A perfect example of this is supportive lines. If you photograph lines (for example of high-rise buildings) from below or from above, it looks as if the lines are falling over. This can also happen if the lines are on the edge of the image.

This effect can be avoided by photographing the building from the front on the same level as possible. However, this is not always necessary, because it sometimes looks great when you integrate the effect of the “falling lines” in your subject and intensify it even further with a deep perspective.

The lanterns on the side lean slightly towards the centre as the picture was photographed from a deep perspective

No crashing lines as the picture was just photographed from a higher perspective

Focus range with the wide-angle lens

If you want to work a lot with a low focus range, it is difficult with a wide angle. Because the shorter the focal length , the larger the focus area. A diaphragm 4 on a wide angle therefore has a significantly larger field of focus than on a telephoto lens. You should definitely keep this in mind when buying a wide-angle lens. If you like to take photos with blurring, you should either pay attention to a large revelation when buying or use the normal lens. Because an aperture 1.8 on a 50mm, for example, cannot be compared with a 1.8 on a wide-angle lens e.g. B. 18mm.

Posted on

The white balance

Do you know what the white balance is? But you should, because after the three exposure values ​​( exposure time , aperture , ISO ), white balance is the most important in photography. The other values ​​deal with the brightness of the picture, this deals with the color.

1 The white balance in digital cameras

2 Shoot RAW for better white balance

3 Adjust the white balance manually

4 When do I hire something?

5 The gray card

We need the white balance to compensate for the different light colors. You have probably already noticed yourself, the sunset or a lightbulb is very orange, we go into the cellar and turn on the neon tube, the light is very cold. Our brains can do that and that color difference doesn’t look that extreme.

The white balance is supposed to compensate for this and the aim of the white balance is to make white look white.

This color temperature is given in Kelvin and is very easy to remember with fire. The hotter the fire, the more bluish it becomes. Same with white balance. The hotter / higher I set the Kelvin number, the bluer the picture becomes.

The white balance in digital cameras

At the same time we had to change the camera film to change the white balance. Today a simple adjustment of the camera is sufficient. In many situations, the camera should give a good result with an automatic white balance. It automatically searches for the whitest (most color-neutral point). The camera finds this in most situations and can, if necessary, switch to the brightest point of the image if no suitable neutral point can be found. This point is then used as a reference to correct the color of the image.

Of course there are situations in which the automatic white balance just cannot work. If you photograph sophisticated subjects that do not offer neutral colors, for example, a color cast occurs. This is the case, for example, at night or with a picture that only consists of bright colors.

In all normal situations, the automatic white balance (also AWB) delivers great results. At least for normal demands. But I’ll get to that in a moment 🙂

Shoot RAW for better white balance

The RAW format offers something incredible. Because your camera does not apply color correction until after the photo has been created, we can change it in RAW format. The RAW format is a file that, uncompressed and unchanged, contains all of the information that the camera can capture. The white balance is set, but can be changed without loss in image processing with a RAW file. This does not work with a JPG (except for minimal changes).

Is RAW the solution

Isn’t the solution just to always shoot in RAW and do everything in image processing? Definitely NO. Although I have this option, I almost exclusively take photos using completely manual white balance. The pictures already look good in the camera and I can assess them directly and show them to the customer without editing them beforehand. Everyone gets a much better idea of ​​the result.

Adjust the white balance manually

Like the exposure, the white balance can of course also be set manually. I already said that the automatic does a great job, so why a manual white balance? This is especially important if you want to keep a constant visual style in a report. All images always have the same color scheme and do not change constantly because the camera is of the opinion that the color should now be 1000 K colder.

Furthermore, the coloring can be controlled much more finely. Each camera has its own color scheme. With 100 cameras, different models and manufacturers, you can set everything exactly the same (same exposure / AWB) and still get different results. This can be counteracted by manually setting the white balance. An example: If I take photos in a park at sunset and use the AWB, my pictures are significantly more yellow than with manual 5500 K. That’s why I take photos on 5500K to make the pictures look the way I would like them to. The closer I get to this result, while taking pictures, the less work I have in image processing.

When do I post something?

  1. If you are at the beginning of your photography and have not yet understood the concept, put the Karma on AWB and you will get 90% good results.
  2. As soon as you already know something better and want to experiment a little, you can apply the defaults or the completely manual value to different situations.
  3. If you want to film, you should definitely work with a manual white balance so as not to change the color in the middle of the film.
  4. If you want to get the most out of your pictures, deal with white balance in the long term and learn how to apply it to different situations.

The gray card

Now it is getting more professional, because with a gray card we offer the camera a neutral surface with which it can determine the white balance much better. We can say how the white balance should be measured and from where, and get a much more precise result.

Some write that you can have a sheet of white paper or just any white surface. I advise against that. Every surface has a specific color. The wall was painted in eggshell and not in white and it doesn’t work anymore. Who tells you that the sheet of paper is 100% white? Your own eye may even be wrong here. A gray card can help here, but the result will only be perfect with experience and you can get it by trying out 😉

Posted on

Full Frame vs. APS-C vs. Micro Four Thirds Camera Sensors

What’s the difference between full-frame vs APS-C vs Micro Four Thirds sensors? And how do these sensor distinctions affect your images? Thinking about video camera sensors can get pretty confusing. That’s why I break all of it down for you in this article– and I provide plenty of examples to show the electronic camera sensor impacts. If you want to know, when and for all, how sensor type impacts your images, then let’s get started.

What is a full-frame vs an APS-C (crop) vs a Micro Four Thirds (MFT) cam?


The sensor is the part of a camera that really catches an image. It takes in light, which it then converts to image information.
Now, different camera types provide different-sized sensing units, which’s the basic difference between full-frame, APS-C, and Micro Four Thirds video cameras.
A full-frame video camera contains a sensor size equivalent to 35mm movie (36 mm x 24 mm). This is the biggest sensor size marketed to photography consumers.
An APS-C camera, on the other hand, has a smaller sized sensor. The specifics depend upon the electronic camera brand, but the sensing unit size is generally around 23 mm x 15 mm.
There are Micro 4 Thirds cams, which consist of Micro Four Thirds sensors; these are even smaller than APS-C sensors, clocking in at just 17.3 mm x 13 mm.
Now, apart from the physical sizes, there are a number of important distinctions between full-frame, APS-C, and Micro 4 Thirds sensing units.
So let’s take a look at the factors impacted by sensing unit size, starting with:

Crop Factor

State you mount a 50mm lens on a full-frame video camera. When you press the shutter button, it catches a 50mm image.
Makes sense, right? A 50mm lens captures a 50mm image. Simple.
But what if you install a 50mm lens on an APS-C electronic camera? Will it capture a 50mm image?
The answer is no.
Because an APS-C sensing unit is smaller than the full-frame sensor, the sensor crops the frame, giving you an outcome that looks zoomed in-as if you took the image with a 75mm lens instead of a 50mm lens.
The effect is similar to taking an image with a 50mm lens, then heading house and cropping the image on your computer system. You’ll get a tighter shot, one that looks like it was taken with a longer lens.).
And that is what the term crop factor implies. It refers to the various crop results produced by different sensor sizes. A full-frame cam is the requirement; it has no crop element. An APS-C sensor (also known as a crop sensing unit), has a crop factor of 1.5 x (on Nikon and Sony video cameras) or 1.6 x (on Canon cams). The Micro Four Thirds crop element is even stronger: 2x.

Focal length

A crop element has a predictable affect on your lens’s focal length.
You see, the focal length measurement of any provided lens is based on the basic 35mm movie format. And since an APS-C video camera (and a Micro Four Thirds video camera) crop out the edges of the frame, you wind up with an “efficient” focal length that corresponds straight to the initial focal length increased by the crop element.
A crop-sensor cam such as the Nikon D5600 has a crop factor of 1.5 x. Thus, if I install a 35mm lens on my Nikon D5600, it would multiply the focal length by 1.5 x, efficiently offering me a focal length output of around 52.5 mm.
( But if you mount the same lens on a full-frame Nikon body such as the D850, it provides an output of 35mm.).
Likewise, if you install a 35mm lens on a Micro 4 Thirds camera– which has a crop factor of 2x– it efficiently doubles the focal length to around 70mm.

Depth of field

As with focal length, a multiplier effect gets applied to the aperture when using APS-C and MFT electronic cameras.
The aperture or f-stop is among a number of factors determining the depth of field. Thus, a Micro 4 Thirds camera offers us more depth of field when compared to a full-frame camera, assuming both video cameras are utilizing equivalent reliable focal lengths. Exact same with an APS-C cam compared to a full-frame electronic camera; you get more depth of field using the APS-C cam, assuming the effective focal length on both video cameras equals.
An image shot at f/1.8 on a Micro 4 Thirds video camera offers an output comparable to an image shot at f/3.6 on a full-frame electronic camera and f/2.7 on a crop-sensor video camera. This is assuming that the efficient focal length and other shooting conditions remain the exact same.


Full-frame sensing units are larger than APS-C and Micro Four Thirds sensing units.
As you can probably guess, full-frame video cameras tend to be far larger and much heavier than their APS-C and MFT equivalents.
For some professional photographers, this won’t matter much; if you shoot in the studio every day, a smaller sized Micro 4 Thirds cam will not use much of an advantage.
If you’re a travel photographer who needs to keep your gear as light-weight and compact as possible, a Micro Four Thirds body is a wonderful choice.
Plus, APS-C and MFT video cameras are more convenient. You can hang them on your neck or keep them in a knapsack throughout the day without seeming like you’re bring a brick.

Low-light Performance


Generally, full-frame cameras include superior low-light and high-ISO performance. This results in much better image quality than crop-sensor (or Micro 4 Thirds) electronic cameras can accomplish.
But why do full-frame cameras carry out much better in low light?
Full-frame cams have bigger sensing units and are therefore efficient in catching more light than their smaller-sensor equivalents, which lessens unwanted sound.
Micro Four Thirds video cameras do not perform well under low-light conditions where the ISO needs to be cranked up to, say, above 1600.
( Note that full-frame cameras likewise provide superior dynamic variety, which permits you to record more information in a single shot.).
For these factors, while full-frame cams can be costly, bulky, and frustrating to carry around, they are still the industry requirement and the preferred cams for nearly all expert photography work.

Full frame vs APS-C vs Micro Four Thirds: conclusion

Now that you’ve completed this article, you must hopefully have a grasp on the distinctions in between these sensing unit types– and why you may wish to choose one sensor over another.
Simply keep in mind:.
All three sensors– complete frame, APS-C, and MFT– are very capable of capturing spectacular photos.
Don’t worry too much about the distinctions.
Do you have a preferred sensor type? Which of these three sensors does your camera use? Share your ideas in the comments below!

Posted on

Shooting Action Shots in Low Light Conditions

I enjoy getting out to sporting events both indoors and outdoors with my digital electronic camera. Just recently I went to view tennis and took a couple of hundred shots over the day.

Recently I have been getting a few demands to please help with quick action shots inside your home. I remember when I too was frustrated with not having the ability to get a reaction from expert photographers about this situation. They were constantly so elusive with how they conducted themselves out on the field and what they did to get a certain result.

Now I’m going to tell you about how to master this. Do you want to hear the good news or the bad news?

Okay, the good news is that yes, it is possible. Bad news is that you do require a good electronic camera with manual controls to do it. Now because you have currently read this I am assuming that you have either a point and shoot camera or a DSLR. In either case, it’s better than an inexpensive electronic camera that does nothing.

Okay good, so we got that developed.

The trick is this: the factor fast action shots look blurred is generally because they are taken in level of low light, such as an indoor basketball arena for instance. What occurs is the electronic camera, if left on automobile, instantly changes itself to low light levels, which means a slower shutter speed. A slower shutter speed takes place the cam requires time to get in as much light as possible due to this low level of light. Its great from the electronic cameras point of view, but really, it’s annoying and frustrating.

So what can be done about it?

Well firstly, boost that shutter speed. You may observe a boost in digital sound however it will only be slight so do not worry about it. After all it’s most likely worth it for that ‘golden’ picture you are trying to get.

It’s going to be hard getting more light into the cam, since usually you’ll be too far for the flash to work properly anyhow. This is why your shutter is the very first factor to consider.

Something that might help further is this: Shot one, take the shutter at a specific speed, then shot the second, increase the shutter speed one notch, shot third time then increase it again, and so on and so forth. If you have the persistence and inclination, write down on a note pad exactly what shutter speed shot 1 was at, what shot 2 was at, and so on.

So unwind and deal with what you’ve got. Increase the shutter speed or increase the light.

Posted on

The Differences between Snappers and Photographers

On the one hand, this article is not intended to be a doctrine set in stone. On the other hand, it should be more about the technical details in photography that the snappers may not even know about, but which are valuable techniques for the careful photographer when it comes to the photographic implementation of an idea. What are the classic differences?

Table of Contents

•        My friend, the clicker

• The best image quality of a lens

•        Do not stop down too much: diffraction blur

•        Do not choose the ISO value too high

•        Use a tripod

•        Types of light in photography

•        Turn off the autofocus, avoid a blurry foreground

•        Correct exposure: expose on the shadows

• Use the measured value memory of the camera

•        Use the white balance correctly

• Distortions and Converging Lines

•        Use of artificial light

• Develop a concept

My friend, the snappers

The expression  “camera snappers” (following from the German designation of “knipster” means someone who just presses the shutter release without any great consideration), yet often pretend to be a “serious photographer”

I have a good friend who has been the owner of a modern digital single-lens reflex camera that is quite usable in terms of quality. Since the 1980s, such cameras have had a “P function” (automatic program) or, even better, an “auto function”. You don’t have to worry about anything anymore, the camera will fix it. At first I think that’s really good! Because how cumbersome is dealing with physics when you just want to make good pictures. The snappers have a clear advantage here. In detail, however – and by “detail” I mean looking at a large print and not the preview on a small screen and on the other hand reproducibility – you will not infrequently be able to detect certain technical errors that can be circumvented by mere specialist knowledge. Specialist knowledge, which, for example, do not acquire professional photographers for free and initially spend a lot of time on a certain degree. There are some classic differences here with regard to the operation of the photographic apparatus.

In any case, my friend, the snappers, works as follows: He points his camera at the subject and looks at the display of his digital camera via live view. Now he turns any cogs until the displayed “live image” appears as he imagines it and then clicks. When I observe this way of working, the hair on the back of my neck easily stands on end. It’s almost as if a cook simply added sugar to the pot if the finger test was too salty. Concretely screwing maybe if there is an insufficient shadow drawing (I don’t think he knows what this is) he simply high the ISO value or opens the aperture without being aware of the consequences. If he is happy with it – very much! I certainly don’t want to take the fun away from him. But there is another way. And with a view to reproducibility and attention to detail, you should know a few basic things about photography:

The best image quality of a lens depends on you

A lens is a light collector: a lens system absorbs all the ambient light that it “sees” and bundles it into a focal point. The aperture can be used to “sort out” the area of ​​the light rays that hit the technically most unfavorable surfaces of the lenses – and these are their outer areas. Consequently, you should go for the best possible picture dim.

Every lens achieves the best image quality technically if it is stopped down by two to three values ​​(English “stops”). A stop is a doubling or halving of the amount of light let in when taking a photo.

For the most precise representation you should use a lens whose light intensity 1: 2 is stopping down to approx. F / 5.6, provided that you do not get into trouble with too high a depth of field or too long an exposure time, if the ambient light is already too dark for a correct exposure or if there is blurring threatens (here the photographer naturally uses a tripod).

Especially zoom lenses and especially the cheap “kit lenses” I would always stop down by at least two f-stops. However, high-quality and correspondingly expensive lenses often leave no questions asked when it comes to precise imaging performance in the corners of the image and with a 100% crop view.

My friend, the snappers, will never know at which aperture he is taking pictures. However, consciously working photographers know that, on the one hand, they naturally control the depth of field with the aperture (this is well known even under snaps) and, on the other hand, they can use the maximum image quality of their lens.

Do not stop down too much: diffraction blurs

However, if you stop down too far, a phenomenon called “diffraction blur” occurs in full format do not stop down to aperture 22, because here the aperture is already closed so far that the incoming light has to squeeze through the aperture blades – like through the doors of a Japanese subway or just bends over: There is a uniform blurring. So this is where  dog chasing its tail. Photographs can supposedly depict all the details from front to back, but there is the problem of diffraction blur. On a 30 × 40 cm print, such images will lack a certain degree of sharpness, whereas everything still looked okay on the small laptop screen. If necessary, I stop the lens of my crop DSLR camera (smaller sensor than the full format) down to a maximum of f/11. Then there is a visible diffraction blur.

Do not choose the ISO value too high

Digital cameras have a notable advantage over analog cameras: You can adjust the ISO value (i.e. the sensitivity) for each picture. With an analog camera, this can only be changed by changing the type of film (i.e. by inserting a different film).

Basically, the lower the ISO value, the finer the detail will be. I myself always work at 100 ISO whenever possible. This is how I achieve the maximum image quality in this regard. Above I briefly mentioned the auto function of the digital camera. In this mode there is no way to intervene with regard to the two factors influencing image quality, aperture and ISO value. The best imaging quality is obtained by choosing the lowest possible ISO value and stopping down the lens by about three f-stops.

Use a tripod

I just mentioned the tripod briefly. I almost always use such a device as long as I can transport my tripod according to the situation, because:

Every photo from the hand is blurred – the only question is whether you can still see it.

Imagine you are exposing at a fast shutter speed (exposure time) of 1/250 second. It is really a very short moment. Do you think you can shoot such pictures out of your hand with confidence? Maybe nothing seems to be blurred because the photos are all sharply focused on the small display of the digital camera. Yet, this is a mistake mistake! Because even within this 1/250 second there is hand movement while taking the picture, even if only a slight one. But the more you enlarge the corresponding images, the more you enlarge even the smallest of blurring – and at some point they become visible. However, I want maximum quality and therefore always use a tripod if possible, even with the short exposure times. Even a simple cord tripod can increase the sharpness of the images.

Imagine you are photographing a big balloon: This picture has no so-called “edges”. It will also be shown in focus with a very slight blurring.
However, photograph a single hair and enlarge it to 18 × 24 cm Even a minimal motion blur will affect the image sharpness. Because the edge of the hair will only be shown sharply by using a tripod, because the camera must be positioned absolutely rigid for an optimal result.

This is one of the reasons (maximum sharpness) why some photographers look wander even in broad daylight with heavy tripod-monsters. While on the snappers shoulder a full-format camera swings on their shoulders to their hand and simply again in auto mode clicks are made, without having to think too much.

Of course, such a tripod is also mandatory for a very conscious image composition that is well thought out to the millimeter, as well as for the absolutely vertical alignment of the camera in order to avoid falling lines (see a little further below).

Types of light in photography

The most important factor in photography is – the light. No, it’s not the camera, not the lens. Just imagine: A hundred years ago, carpenters built cameras, not technology companies. These people had little knowledge of photography (because they mainly dealt with tables and massive cupboards): They only had to make light-tight wooden boxes with gear screws and leather bellows. These were very simple devices. Why are we still fascinated by the pictures that were made with such anachronisms? Certainly: there is some romance when looking at these pictures. However, at that time the photographers knew how to concentrate on the most essential thing in photography: the light. (Because quite a few came from academic painting,

No camera can vary the character of light.

Light exists in many different ways. Now imagine you want to photograph a woolen sweater under an overcast sky: The image will clearly show such a piece of clothing. Now the sky breaks up and the sun comes out: This sun alone creates a prompt hard light: Suddenly every fibre of the sweater becomes visible! Consider the following picture:

 
The snappers simply take photos. The consciously acting photographer only takes photos when the light is favorable according to his imagination – if of course possible. I myself have often returned home frustrated when suddenly bright sunshine prevailed, when I needed a very diffuse and uniformly illuminating one of my plan. Here I wanted to be professional and prefer not to take a picture at all than one that did not meet my expectations. How good it is for the snappers in their modesty.

Turn off the autofocus, avoid a blurry foreground

A particularly noticeable mistake is the ignored foreground. I allow myself to speak of a mistake at this point. Because it can of course also be the case that this should be deliberately set. The snappers focus on the subject. The consciously acting photographer, on the other hand, thinks about from where to, where the focus area should extend and deliberately adjusts the focus point and aperture accordingly. Most of the time this cannot be done automatically.

Correct exposure: expose for the shadows

There is a phrase: Expose on the shadows. Develop according to the lights. This means: Give the camera enough light so that even the darkest picture elements still show detail, but make sure that the brightest picture elements do not appear “eroded” and pure white.

My buddy, the snappers, doesn’t pay attention to anything like that, because he looks at his subject (on the small screen) globally. However, he risks that, for example, the shadows under the trees in the background of his subject lose their richness of detail, because he relies on the simple exposure metering on his digital camera. The result: monotonous black surfaces. A purely technically well-made photography is alive on the other hand, from shades  creates the impression of three-dimensionality. Therefore, one should expose in such a way that even the darkest areas of the image still have a hint of drawing (visual arguments e.g. From Anders Petersen, however, prove the opposite). I myself work basically by constantly looking at the camera’s histogram and checking the brightness of the image. So I also look at my photographs locally (in details and not globally).

The most important control tool of a DSLR: the histogram . Based on this, I can see whether all areas in the subject still have drawings. This can hardly be read correctly from a preview image on the small display of the digital camera, especially not in bright ambient light.

Use the measured value memory of the camera

I prefer to take photos in mode “A” (or AV with Canon): Here I preselect the aperture and the camera automatically determines the “correct” exposure time. It usually does this quite well – thanks to “matrix measurement”. For subjects with a high proportion of very bright areas, however, even the most intelligent metering method tends to be underexposed.

Use the white balance correctly

Often the so-called white balance is set to “Auto”. That’s a good thing, because in most cases the colors are reproduced realistically

Distortions and Converging Lines

This point is mostly only relevant when taking pictures of houses or tall buildings. What photographers know: If you move the camera out of the absolutely vertical position, all vertical lines (e.g. buildings) narrow upwards. In concrete terms, this means: Buildings are depicted like houses of cards that appear to tilt backwards.  There are two remedies: On the one hand, you can of course use a real shift lens. On the other hand, the photo can be later be rectified on the computer with image processing. Here, however, there is a problem: The rectification on the computer is always accompanied by a certain amount of cropping. So you lose a bit of resolution. You have to take this crop into account when taking the picture and consequently move a little further away from the subject or use a slightly shorter focal length or zoom setting of the lens so that you will have enough margin on the photo, which later has to be partially cut off again.

The photos of “snappers” are often marked by restlessness, which is expressed by converging lines, careless areas of blur and unfavorable light.

Use of artificial light

Even with the built-in flash, you can skillfully create subtle effects.

Flash units seem to be rather inconvenient for most snappers. They are only used as an emergency solution if it is too dark and a flash would destroy the natural light mood of the picture. That’s true at first, but only if you don’t know how to deal with it.

Have you ever wondered why a dedicated wedding photographer wouldn’t want to part with his flash on the camera even in the most beautiful sunshine? It’s bright enough here. Correct. However, the wedding photographer does not use artificial light as the primary light source (this remains the sun). He uses the flash as a so-called fill light or “fill flash”.
Because what does the sun cause? Well shadow! The high-lying sun creates dark shadows under people’s eyes and creates high and disturbing contrasts within clothing. With a flash, however, such shadows can easily be brightened in such a way that the inexperienced viewer does not even notice that an additional flash has been used. The flash unit also creates a slight brightening effect (people stand out slightly from the background) and a so-called “catch light” in the eyes (a sparkle). The photographer almost always uses a simple clip-on flash, but its light output is somewhat more subtle. As a result, he easily gets exempted people. This effect is not noticeable as “over-flashed”, but provides a certain brilliance in the foreground (well, sometimes it doesn’t quite succeed).

It is clear that the intensity of the additional artificial light source must never be set too high for this! Otherwise it will look as if portrayed people are standing in front of a photo wallpaper.

Develop a concept

So far, I’ve only ever written about techniques with which the tool (the camera) can be operated precisely so that the image results can exactly match the ideas.
But what kind of ideas do you have about photography? An elementary component of “conscious” photography is to think about it beforehand (instead of just snapping around wildly). I often work in series. So I dedicate myself to a very specific topic with my pictures and always prepare the pictures with this idea in mind. Of course, it is important to me that the parameters (a type of light, depth of field, color saturation …) remain the same as possible for all individual photographs. So I keep my handwriting, so to speak at and don’t change anything here.
The photographic topic itself is a broad field: You can deal with documentaries or with a certain milieu, with landscape shots at a very specific time of the day, with interior portraits, etc. The only important thing here is that you don’t snap randomly.

Posted on

Do you know what is inside Your DSLR?

You do not require to know anything about internal combustion to run a car, and you truly don’t need to comprehend digital innovation to use a point-and-shoot digital cam, either. Both gadgets are so automated nowadays that there’s not a lot for the driver/shooter to do besides the point the machinery in the best instructions and press the gas pedal or shutter release. Even if you choose to utilize manual controls on a non DSLR, the only things you should comprehend are that this button makes the picture lighter or darker, that one assists freeze action, and this other button alters the method the camera focuses.

If you truly desire to master a digital SLR, you can benefit from understanding precisely how the video camera’s components provide you with a much finer degree of control over your images than the common point-and-shoot video camera. Unlike digital photo photography, where it’s practically impossible to adjust depth-of-field, and usable ISO scores range from ISO 100 to ISO 100 (simply kidding!), the technology constructed into a DSLR does permit you to make a distinction artistically and technically, if you know what you’re doing. And for the average serious professional photographer, that’s what taking photos is all about.

With a DSLR, it’s simple to use depth-of-field to manipulate your images, but you need to understand how digital video cameras work with lenses and their apertures. Like the size of the sensing unit, the sensitivity setting you’re utilizing, and what kind of noise reduction technology is constructed into your electronic camera, and how you select to use it. When you actually dive into how your electronic camera works, you’ll understand that sound decrease can rob your image of sharpness and information.

You’d better comprehend the difference between front-sync and rear-sync shutter settings. Intrigued in utilizing a very long telephoto lens without a tripod or changing to high shutter speeds?

If you’re who I believe you are, you don’t see comprehending digital SLR innovation as an overwhelming job, but as an interesting difficulty. By the time somebody is ready to use all the features of their digital DSLR, he or she is anticipating taking greater control over every element of the picture-taking procedure.

The most soothing thing about digital SLR innovation is that, for the most part, these cameras were developed by engineers who understand photography. Much of the point-and-shoot digital electronic cameras I have used appear to have been designed by a techie who was creating mobile phone or PDAs recently, and then moved over to digital electronic cameras this week. They run like computer systems instead of cams, have functions that no one in their right mind in fact requires, and typically are totally unusable for the kinds of photography for which they are meant. One worrying pattern is towards pocket-sized digital electronic camera that have no optical viewfinder at all. For most of the latest models, it’s essential to frame every image utilizing the back-panel LCD, which, regrettably, washes out in brilliant sunshine, and nearly forces you to hold the video camera at arm’s length, ensuring that powerful image stabilization features are going to be needed to nullify cam shake.

In contrast, digital SLRs are created by individuals who understand your needs. They have, for example, big, brilliant optical viewfinders that provide a reasonable screen of approximate depth-of-field, and which can be utilized under a range of lighting and viewing conditions. The designers of DSLR designs have been developing such video cameras for several years and know from the feedback they get what professional photographers want. Learning DSLR technology will be rewarding for you, because you’ll come to understand exactly how to utilize features that have been created to assist you be a much better and more imaginative photographer.