Posted on

5 good reasons why you must buy a prime lens

Canon EF 100mm f/2 USM Lens

Do you need a prime lens? Sooner or later you will absolutely discover the term repaired focal length while learning to take images – right? Do you currently have one?

I bought my very first prime lens about nine months back. Now I have actually seen a few reasons why a prime lens should never be missing out on in my photo bag again.

What are prime lenses?

A prime lens is a fixed focal length lens that does not permit you to zoom in or out. Simply put, the determined focal length of the lens is the distance is the range between the point of convergence in your lens to the sensor or film in your electronic camera.

Prime lenses permit a handful of benefits compared to their zoom equivalents. The first, and most desirable, is the availability of fast apertures. With a quick aperture, a lens has the ability to take full advantage of the amount of offered light by opening its aperture to an f/2– f/1.2 and even f/.95 range! A lot of zoom lenses do not shoot any faster than a f/2.8.

Having the ability to contend a fast & wide-open aperture likewise permits the shooter a more shallow depth of field. Depth of field (DOF) is the range between the foreground, topic and background. Shooting wide-open provides a narrow DOF, isolating the topic from its surroundings in regards to sharpness and clarity. The closer the lens is to the subject, the softer the foreground/background will end up being.

Prime lenses and imagination: you compose your photo.

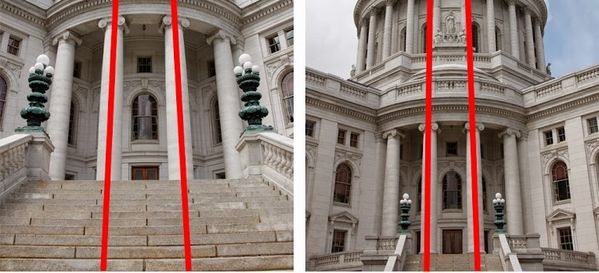
There are probably 1,000 fantastic reasons to buy a prime lens. The decisive factor for me is the structure of the image. Again and again I failed in my picture structure because of “I have too much in my image”. A 50mm set focal length is stated to have roughly the exact same field of vision as the human eye. This indicates that the view through your viewfinder represents your field of vision. That makes your photographic life simpler. Due to the fact that you simply can’t zoom. You cannot “wide-angle”. It’s not working! If you want more – or less – in your image, use your feet. It’s that simple. It assisted me a lot. I approached the topic, kept my range. I looked again and thought a lot more before I pushed the shutter button. Here.

The fixed focal length teaches you to picture the basics

Zoom lens vs. fixed focal length: Sharp images

A set focal length (in English also Prime Lens or Fixed Lens) gives you very sharp images. There are a variety of reasons that this is so. On the one hand, a repaired focal length has fewer optical components than the traditional zoom lens therefore the image is sharper on your sensor.

In addition, a zoom lens generally has increasingly more distortions and chromatic aberrations. This means color fringes on high-contrast edges, ideally near the edges of the image and the corners of the picture. These chromatic aberrations occur basically depending on the quality of the lens.

The 50mm trick: the lovely bokeh

As quickly as you research study repaired focal lengths, you will often see the term open aperture. Because that is often what makes a good repaired focal length: the possibility of taking images with a fantastic bokeh with a so-called open aperture. With a zoom lens, it is not always simple to get a terrific bokeh, since it requires little aperture values (here, by the method, a brief refresher on the topic of aperture).

Light strength: Lots of light for great images

Just as great bokeh can be created with a little aperture value, a lens with a small aperture value (for instance with an open aperture of f/ 1.8) lets a great deal of light through. The lamellas of the aperture are wide open and allow a lot of light to strike the sensing unit when the shutter is launched.

This is great if you take images in bad lighting conditions and (naturally) want to do without a flash. With a zoom lens that begins with an aperture of f/ 5.6 or in the zoom range even from f/ 6.5, you will have trouble getting a sharp photo in low light without the above ISO (Iso expensive = image- Sound) or a long exposure time (exposure time too long = image blurring). With a fast fixed focal length you are much more independent to take pictures in undesirable light circumstances.

The most inexpensive lens: the fixed focal length

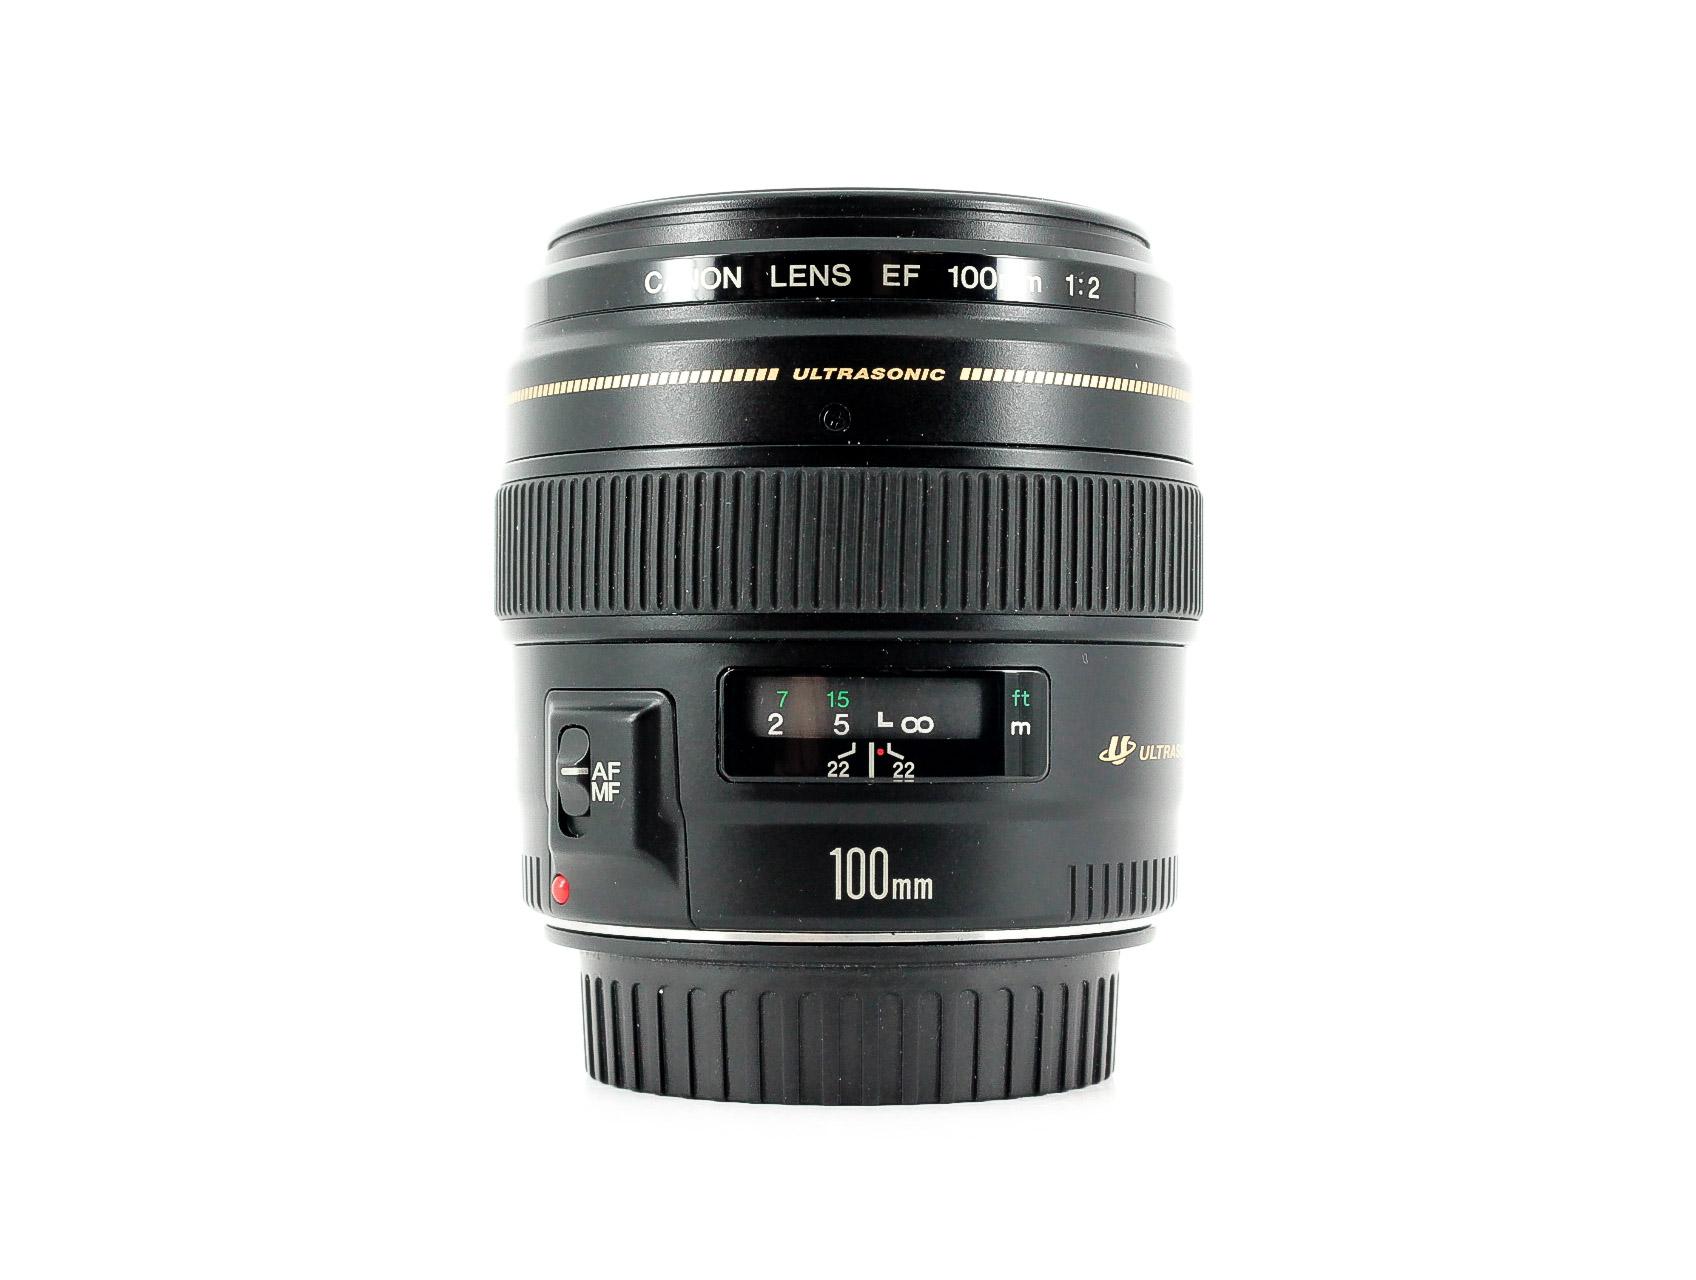
If you have a look around the entry-level market for prime lenses, you will be amazed at how cheap a usable prime lens can be. My first prime lens – the Canon 50mm prime lens with an aperture of f/ 1.8 – expense simply under 100 euros. And I still like the lens! A couple of months ago I bought an 85mm set focal length. It was a bit more expensive, however obviously – pricier is constantly possible. As soon as you look for a fixed focal length with f/ 1.4 or f/ 1.2, you will view as constantly – uh, it can be even more costly.

If you don’t desire to take expert advertising photos, you do not require these. I am really pleased with my two repaired focal lengths of 50mm and 85mm.

Posted on

Key Components of Your DSLR

Key Components of Your DSLR

I’m not going to invest a lot of time in this article on the mechanical aspects of digital SLRs.

  1. Light path. The yellow arrows represent an overly simplified path for the light entering the lens and making its way to the viewfinder and sensor. In reality, the light is refracted at angles as it passes through the lens elements (2), and is redirected down to the autofocus sensor by the mirror (3) or up to the focus screen (4) or through the shutter to the sensor (9).
  2. Lens components. Lenses include a differing number of elements made from glass, plastic, or another product. These aspects are fixed in place, or can relocate relation to other aspects to focus or zoom the image, or, in an image-stabilized lens, be shifted to compensate for camera movement
  3. Mirror. The mirror is a flip-up partly silvered part that directs the majority of the light upwards towards the seeing system and exposure meters, and some of the light downwards toward the autofocus elements. (In some SLR-like cams, a non-moving mirror may bounce light upwards to an autofocus system, while permitting the rest of the illumination to pass through to the sensing unit for live watching in an electronic viewfinder to back-panel LCD.).
  4. Focus screen. When the mirror is turned down, light that has actually travelled through the lens is concentrated on this screen.

Pentaprism/pentamirror. This optical component can be a solid glass block, or pentaprism, silvered on 2 surfaces to show the light, or a less-efficient (in regards to light transmission) hollow structure, a pentamirror, that uses only mirrors. The reflective surfaces reverse the focus screen image gotten from the lens/lower mirror both laterally and vertically, producing a right-reading view.

In the typical DSLR, the direct exposure meter discovers light in the viewingpath, utilizing a range of points in the frame that range in number from a lots to more than 2,000, depending on the electronic camera. Readings might include brightness only, or capture full red/green/blue information to allow the video camera to make direct exposure choices based on a matrix of points, a little “spot meter” set of points, or a center-weighted average of the points translated.

Some viewfinders have a shutter that can be closed to keep light from entering the seeing system and impacting the exposure meter (6 ). Vendors also might provide a rubber or plastic cover to slide over the viewfinder window to obstruct light. Extra devices, such as a magnifier lens or right-angle audience, might be provided for the viewfinder.

Some of the light from the lens is shown downwards to this sensor. It uses pairs of lenses (usually 3 to 51 pairs, depending on the camera) to divide off portions of the beam to form autofocus points or zones that are lined up, in rangefinder style, to allow stage detection autofocus functions.

The shutter is a pair of vertically taking a trip drapes (9, left) that open consecutively to produce a gap for light from the lens to pass through when the main mirror flips up. The sensing unit (9, right) consists of light-sensitive photo sites that tape the image and pass it off to the electronic camera’s analog-to-digital signal processing chip, and then to a memory card for storage.

Posted on

How to Overcome the Problem of Converging Verticals

Converging Verticals

When taking photos of structures one of the challenges that confronts professional photographers is that of Converging Verticals?

Converging Verticals is a term utilized to describe the impact in images when 2 parallel lines in an image (such as the two sides of a building) appear to get closer (converge)- as if they are leaning in towards one another at the top (as in the picture to the left which is of the Rialto towers in Melbourne- towers that do not get narrower towards the top up until the last few floorings).

The result is most obvious when you angle your camera up when taking a picture of a high structure in an effort to fit all of it in. It’s particularly obvious when utilizing a wide angle lens.

What should a photographer do about converging verticals?

Professional photographers have a number of alternatives available to them.

Improve it – as with all types of distortions in photography- one alternative is to improve it and utilize the Converging Verticals to attain a more remarkable image. You can enhance the assembling lines, however, getting closer to the structure, angling your video camera even more and by using wider angle lenses.

Reduce it – if you desire to avoid the converging verticals in electronic camera you will most likely need to move further back from the structure that you’re photographing. This will mean you will probably get more of the foreground in your end image- but you can always crop this later on. Another method to get more parallel to the building is to take the shot from higher up.

Correct it – if you are not able to alter the point of view that you are shooting from and just end up with assembling lines in your shots another option is to do some post production editing. Most image modifying software will have some way of doing this. For example, in Photoshop Elements there’s a ‘Transform- Viewpoint’ option in the ‘Image’ menu. This is how the image to the right had its converging verticals corrected.

Modification Lenses – finally, if you have a budget plan and will be taking a great deal of architectural images you may like to invest in a unique lens that has the capability to correct converging verticals. These Viewpoint Control/Tilt Shift lenses are able to move the lens axis (or optical centre) to make up for the distortion. Such lenses are not inexpensive – so unless you’re going to be getting seriously into the photography of buildings you may wish to utilize one of the other choices mentioned above to repair the problem of converging verticals.