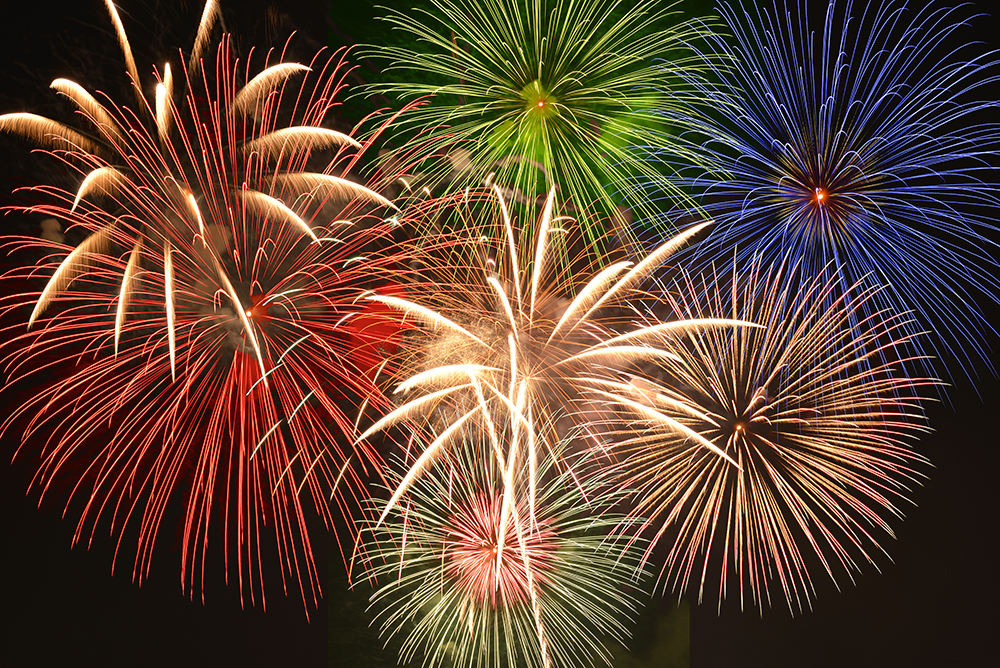
Fireworks are relatively easy to photograph. It should be clear that something like this cannot simply be photographed by hand. With a little luck you can even use compact cameras. If you want more, you should use a manually operated camera. Also recommend a safe stand with a tripod or center punch cushion. In the simplest case, the camera can also be positioned reasonably firmly on a “grain cushion”.
The most important thing when photographing fireworks is that the camera is safely and securely installed throughout the exposure. Because the principle is as follows: The camera exposes for several seconds and captures everything that is going on in the sky. In other words, we’re doing a long exposure .
I always take such night shots with a stable tripod. However, simple tripods are also suitable for lighter cameras, especially if you only need something like this for New Year’s Eve. From around 10 € you can get a simple tripod. Another possibility is the so-called “grain pillow”. To do this, you simply fill z. B. rice or peas in a bag, closes this and thus receives an individual base on which you can align the camera firmly. Disadvantage: Of course, something like this only works on a raised surface such as a table. But if you want to photograph the fireworks outside on New Year’s Eve and not from the balcony, you cannot avoid a tripod.
What must be set on the camera for fireworks?
The very simple way: no manual mode available
I already mentioned it at the beginning: The best thing is that the camera has a manual mode (“M”). If you cannot take photos manually with your camera, you can try the following:
The camera sits firmly on a tripod or something similar. Set the camera’s programmer knob to either AV mode (for Nikon A) or TV mode (for Nikon “S”). Or you simply select the program mode “P”.
However, it must be possible to switch off the flash!
With such compact cameras, however, make sure that you actually only have the sky in the picture and not a brightly lit object or a house wall!
Press the camera’s shutter button. The autofocus won’t find anything (it’s all black) and will eventually adjust to “infinity” – just right for fireworks in the distance. Now the camera initially only sees black and exposed and exposed (hopefully long enough). During this time, however, the fireworks are ignited and wander through the image, so to speak, or leave information on the camera’s chip, which is shown as the tail that you know from other photos or that you want to photograph yourself.
At some point the exposure will end automatically. With luck, you will be as a sufficient number of “tails” of fireworks recorded have. If your camera breaks the exposure immediately after a second even in the dark, it is unfortunately not suitable for this technique. You can easily try it out in a dark room at first.
The camera has a manual mode “M”
Here it gets a lot more interesting. In manual mode, fireworks can be photographed much better at night! After the camera has been placed on the tripod, it starts:
Set the M mode and deactivate the built-in flash here (or leave it folded in).
First manually set the ISO value to 100, at least to the lowest number that is possible.
Set the aperture to 8 or 11.
Set an exposure time of approx. 30 seconds on the camera.
Set the white balance so that the camera yellow light which awaits: So you select “sun” or better yet “light bulb”. Otherwise the photo will be too yellowish.
Manually set the focus to infinity.
If possible, take photos in “RAW mode” so that you can process the images better later.
Wait for the fireworks to really go off and press the trigger!
I put my Nikon on my Triopo tripod and exposed the longest time I could set with the Nikon DSLR: 30 seconds. I continued to work with the settings above: ISO 100 and aperture 8. However, I made a mistake with the white balance: I chose neutral light or “flash”. The light of the fireworks is not white but already very yellowish to red. In addition, the fog scattered the yellowish-reddish light all around.
I used an old analog Nikon wide angle with manual focus, which can easily be connected to modern digital cameras . Due to the long exposure time, I was able to photograph several fireworks following one another on just one picture!
Taking pictures in fog
Actually, I’m only semi-happy with my fireworks photos. For me they are far too red-tinged and not clear / brilliant enough. On the other hand, they are a good example of what fog can do and an incorrect white balance on the camera.
Due to the prevailing fog, all the lights of the city (all the street lighting and also a lot of fireworks that took place on the ground) were reflected and thus also visible in the sky. You have to imagine fog or haze as billions of tiny mirrors that “float” in the air and reflect (unfavorable) light towards the camera. That is simply unfavorable for brilliant images! It’s just like stargazing. The lights of the city are just as annoying there as they are in the haze in the sky.
I will also use a white balance on my camera next time, which corrects tones that are too yellow / too red. The white balance program “incandescent lamp” or “artificial light” would be ideal here. We don’t see it, because our brain automatically corrects something like this: The light from the incandescent lamp is similar to the yellow light from the street lighting, which is disturbing here. But the camera relentlessly reproduces something like that. Without white balance, the photos would get too strong a yellow cast, especially with such long exposure times.
“Catch” the fireworks even longer with long exposure
You don’t necessarily have to rely on e.g. B. Limit 30 seconds. If you have a remote release for your camera (unfortunately I don’t have something like this for my Nikon [yet “]), you can theoretically expose the whole night or capture the entire fireworks display in just one single picture.
The exposure time on the camera is set to “B”. “B” means bulb. This term comes from the old days of photography, in which a small balloon was screwed to the shutter release of the camera using a thin hose and an air pressure was generated by applying pressure, which activated the shutter release. With modern cameras this happens either via a cable or even via radio.
In any case, the camera now exposes exactly until you press the shutter release again. At 100 ISO and over 30 seconds, however, I would close the aperture of the lens further, otherwise the sky will be too bright: From 30 seconds I use aperture 11; from 60 seconds f-stop 16 and from 2 minutes fireworks f-stop 22.
If you want to expose even longer, we recommend using an ND filter . Then, however, it may be that the individual lights of the fireworks get too dark, because they only act on the camera’s chip for a few seconds. It may be possible to make them brighter again later in the image processing by changing the so-called “gradation curve” or by increasing the contrast.
A tip on composition
When photographing fireworks, I always make sure that not only sky + rockets are shown. Personally, that’s a bit too arbitrary for me. I always try to take pictures of other picture elements: trees, for example, or houses that are beautifully illuminated by the colorful fireworks.
If you want to be very colorful, in addition to the long exposure of the actual fireworks, you can manually flash the surrounding houses in the picture with a flash and a weak color filter in front of it during the long exposure. But don’t overdo it here. Because if you only flash very subtly, you will get the impression that this colored light is coming from the fireworks themselves! With such a trick you create an illusion or an even greater expressiveness of the image.
This tip does not always make sense, but it is definitely worth a try for motifs with nearby (up to approx. 20 meters) houses, walls, trees, etc.
Pay attention to the battery consumption
If you have installed your camera on a tripod outside (e.g. on a small hill) and are now waiting for the fireworks to be lit, you have a spare battery for the camera in your pocket as a precaution! The camera quickly drains the battery during long exposures! At least my Nikon DSLR does.
The trick with the black box
Finally, a tip that I already gave in my article about long exposure times: If you have longer exposure times, have a black box with you!
I swing the box in front of the lens in the empty phases, i.e. when a certain time elapses between the individual fireworks (of course so that I don’t touch it). With this shadowing I achieve the following:
The sky is not brightened unnecessarily and the contrast between the sky and the fireworks is increased significantly: the images become more brilliant!
In this way I prevent continuously illuminated elements in the picture from being unnecessarily overexposed (e.g. street lamps).
If someone walks through the picture with a sparkler, it leaves an unwanted tail. I quickly hold the box in front of the lens and then pull it away again just as quickly.
After the aforementioned empty phases, i.e. when new rockets are just rising up in the sky, I release the lens again. Curious looks are guaranteed when you use this technique to photograph the next fireworks display together with other photographers.
Or does your digital camera have a (as real as possible) multiple exposure function? Then you can record several sequences of the fireworks in one picture by double exposures and do not have to expose in a whole piece but several times (shorter) one after the other. Of course, a tripod is also essential here.


