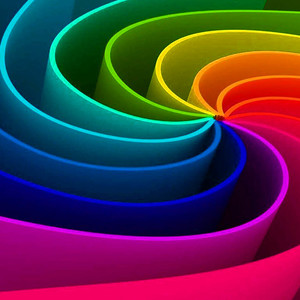
Posted on

How to Prepare Your Images for Printing

ICC-color-profile - Prepare Your Images for Printing

Select a Picture

When you prepare your images for printing take note of which pictures you like when you look at them on your phone or computer. Of course, it is an important decision what are going to hang on your wall. Especially if it is going to be here for a long time. Your choice is probably depends on the emotions it evokes, the colours or the technical excellence of the picture. Find the exact image that you are looking for.

File Format and Resolution

When you prepare your images for printing for the optimal production use the highest resolution available, don’t change the resolution and don’t resize up or down your photo. Ideally you don’t want to compress your image at all. You can test your picture in some easy-to-use configurator (like WhiteWall) to optimise your file and to achieve the best possible quality. Save it with 8-bit colour and an sRGB colour space.

Colour and Brightness

Don’t forget that colour and brightness can appear different on a monitor than they do in print. There are three reasons for this. The first reason is that a monitor is illuminated and the paper isn’t. Therefore a monitor a monitor can display a photo much brighter than the picture actually is (which is how it will look printed). The second reason is that different papers have their own base tone. It means that a pure white will look different from appear to paper, affecting the overall brightness of the colour. The third reason is that depending on the specifications of the printer such as the dots per inch (DPI), the print-head capability and the type and quality of ink/toner used is also going to affect the colour and the print quality.

For Soft Proofing Use ICC Colour Profiles

What is Soft proofing?  lets you temporarily simulate how an image will appear on another device, such as a printer, by using only a computer monitor. An ICC profile is a set of data that describes the properties of a colour space, the range of colours (gamut) that a monitor can display or a printer can output. The most widely used colour space is Adobe RGB (1998). If you have a calibrated monitor, ICC profiles are the perfect way to asses how your pictures will look on the final product. You can find downloadable ICC colour profiles on the internet for many product options.

Do Test Prints

If you do not have a calibrate monitor or if you don’t want to spend too much time assessing the variables of different things that are affecting your final product, you can do a test printing, which is a hard proof option to see if you need to change anything in order to have a perfect photo.

Best Camera for Photo Printing

If you want to take photos to print them out, perhaps choosing the right camera is the most important. Please notice that print size doubles, the megapixels required increases as well. Therefore, you can make a nice 8″ x 10″ print with a 6 or 8 megapixel camera. But to make a real photo quality 16″ x 20″ print, you would need between 24 and 30 megapixel camera.

Posted on Leave a comment

2020 TIPA Winning Cameras and Lenses

In Madrid The Technical Image Press Association(TIPA) announced the winners of the 2020 TIPA World Awards.

What is TIPA?

The TIPA Award is widely regarded as one of the best known and most prestigious photography awards. . TIPA both recognise and honour industry companies and their products and serve as an important benchmark and guide for consumers in making their purchasing decisions.

Since 1991, the TIPA World Awards logos have shown which are the best photographic, video and imaging products each year. For over 25 years, the TIPA World Awards have been judged on quality, performance and value, making them the independent photo and imaging awards you can trust. I cooperation with the Camera Journal Press Club of Japan (www.tipa.com)

The TIPA jury is made up of the world’s best-known photography and imaging professionals.

2020 TIPA World Awards Process

Finalists are usually voted on at the TIPA general assembly by representatives from TIPA member magazines from around the world. The assembly was originally scheduled for mid-March in Las Vegas. However, when travel restrictions were established, the TIPA board implemented product recommendations and an online voting procedure for members globally.

Based on detailed tests and comparisons, a list of candidates and laureates are compiled.

List of 2020 TIPA winning products:

Cameras

  • Best DSLR Advanced Camera: Canon EOS 90D
  • The best DSLR Expert camera: Nikon D780
  • Best DSLR Professional Camera: Canon EOS-1DX Mark III
  • Best APS-C Advanced Camera: Nikon Z 50
  • Best APS-C Expert Camera: Sony A6600
  • Best APS-C Professional Camera: Fujifilm X-Pro 3
  • Best Full-Frame Expert Camera: Sigma fp
  • Best Full-Frame Professional Camera: Sony A7R IV
  • Best Full-Frame Photo / Video Camera: Panasonic Lumix DC-S1H
  • Best Medium Format Camera: Fujifilm GFX100

Lenses:

  • Best DSLR – Prime lens: Tamron SP 35mm f / 1.4 Di USD
  • The best DSLR macro lens: Laowa 100mm f / 2.8 2x Ultra Macro APO
  • Best DSLR – wide angle zoom lens: Tokina ATX-i 11-16mm f / 2.8 CF
  • The best DSLR – professional lens: Nikon AF-S Nikkor 120-300mm f / 2.8E FL ED SR VR
  • The best MFT lens: Panasonic Leica DG Vario-Summilux 10-25mm f / 1.7 ASPH
  • Best without mirror – Prime Standard lens: Nikkor Z 58mm f / 0.95 S Noct
  • The best mirrorless – wide-angle zoom lens: Sigma 14-24mm f / 2.8 DG DN Art
  • The best without mirror – Standard zoom lens: Sigma 24-70mm f / 2.8 DG DN Art
  • The best mirrorless – Telephoto zoom lens: Canon RF 70-200mm f / 2.8L IS USM
  • Best Professional Portrait Photo Lens: Canon RF 85mm f / 1.2L USM (DS)

Compact cameras

  • Best Expert compact camera: Sony RX100 VII
  • Best Vlogging compact camera: Canon PowerShot G7 X Mark III
  • Best Premium Compact Camera: Fujifilm X100V

Posted on Leave a comment

Sony-D Lenses

The short answer – Sony-D lenses are Sony-A lenses that have Advanced Distance Integration. D lenses have 8 contacts, non-D lenses have 5 contacts.

Buying Sony lenses could be confusing. So before I go straight to the explanation of what is Sony-D, I will explain the main differences and the evolution of the Sony lenses.

Sony produces cameras with two lens mount systems: E-mount and A-mount. E-mount is used on mirrorless camera bodies. While A-mount lenses are for the standard Sony unique Translucent Mirror type camera bodies. Yet, using the Sony lens adaptors like LA-EA1, LA-EA2, LA-EA3 or LA-EA4, A-mount lenses can also be used effortlessly on E-mount cameras.

The A-mount was originally Konica Minolta A-mount camera system, which is now used with Sony. Sony A-mount  lenses are optically, mechanically and electrically identical to their Minolta predecessors Therefore, all Minolta AF (i.e. Minolta a-mount) lenses from Minolta are compatible with Sony alpha cameras. The older Minolta lenses for film cameras could be used on modern Digital SLR cameras.

The list of existing Sony A-mount lenses on Wikipedia.

Sony-A mount lenses in our web shop.

Also, could be confusing that the Sony-A mount is also called Sony α (the lower case to Greek letter alpha, often transliterated as Sony Alpha). To make it more complicated, Sony has caused even more confusion. Before, if the camera was an Alpha, it had an A-mount or alpha mount. If it was a Nex camera, it had an E-mount. Sony has come out with Alpha E-mount cameras. So it is good to be aware that not all Alpha cameras have Sony-A mount. If the camera says E-mount, it is not compatible with Minolta (and Sony-A) lenses without the Fotodiox lens mount adaptor. This found this website very useful when it comes to lens and camera compatibility.

Of course, as like many other models the Sony lenses are also going through transformation and development. The old Minolta lenses are not all D lenses, while most modern Sony-A lenses are all D lenses. You can quickly tell if a lens is a D lens or not by counting the number of contacts on the lens mount. D lenses have 8 contacts, non-D lenses have 5.

I have collected here some of the best explanations from different forums that explain why Sony-D lenses are better than non-D lenses:

” That doesn’t have anything to do with the ‘D’ designation. In Minolta/Sony ‘talk’ the ‘D’ indicates that the lens has the ‘D’ chip, which gives distance information to the body. You’re thinking that the ‘D’ means that the lens is optimized for digital cameras. However, as Minolta used the ‘D’ before digital came out.”

“Sony now uses the term “distance encoder” in its lens descriptions, which as far as I know means the same thing as “Advanced Distance Integration” (ADI). Personally, I’ve never noticed that using ADI makes much difference in results.”

“The Minolta 24-105mm f3.5-4.5 (D) Lens was one of the first lenses with ADI (Advanced 
Distance Integration) flash metering system. The D indicates Distance integration”

“Sony-D-compatible” means the lens has 8 electrical contacts rather than 5 which allows additional data to be exchanged between camera body and lens, and that the lens sends focus distance information back to the body. The body can use the distance information to adjust the flash output if you select ADI flash mode. 8 pin lenses started appearing with the Minolta xi range (about 1993, I think), but ADI only came in about 2000 (with the Minolta 5/7/9 series cameras). Many treasured legacy lenses (e.g. the Beercan) are only 5 pin, and even today some current lenses are still only 5 pin, e.g. the excellent Tokina 11-16/2.8.”

” The ‘D’ function was originally designed by Minolta to help with flash exposures when the subject was against a reflective background. The ‘D’ lenses were designed to work with the 5600HS D flash, and a body that was able read the ‘D’ distance information.

“This is how it works: Suppose you wanted to take a picture of a subject standing 10′ in front of you. Two feet behind the subject is a highly reflective surface. Normally, if you try and take a picture in this type of situation, the picture would come out with the subject being underexposed. This is because the light from the flash bouncing back from not only the subject, but the reflective background. Because of this strong reflection, the light output from the flash would be cut off before the subject is properly illuminated.”

“With the ‘D’ system in place, the camera would know that you are focusing on a subject ten feet in front of you. Therefore the reflection from the background would be disregarded, as it is further away from your focused point. If you were to shift focus to the reflective background, then the camera would then measure the light from the reflective background and not the darker foreground.”

“I believe every Minolta/Sony DSLR from the Maxxum 9 could take advantage of the ‘D’ chipped lenses and ‘D’ flashes. I’m not sure if Sony was found other uses for the distance information in the newer cameras.”