Posted on

DSLR camera purchase advice

DSLR camera purchase advice

Buying DSLR: What to Look For

Are you considering buying a digital single lens reflex (DSLR) camera? Are you looking for the answer for most important questions, you need comprehensive advice and reveal what to look out for when buying – from the equipment to the manufacturer?

Our DSLR buying guide will help you find the right SLR camera.

Digital single-lens reflex cameras (DSLR) deliver the best image quality of all camera types and can be used most flexibly – even if their lead over mirrorless system cameras is shrinking. That’s why more and more amateur photographers are swapping their compact cameras for a DSLR. But which DSLR model is the right one? And which one is right for you?

When buying a DSLR, you choose a system

All SLR camera manufacturers try to retain customers in the long term with inexpensive entry-level DSLRs. Because the fact is: Once you have decided on a brand, you not only buy a camera, but also commit yourself to a system – and later buy suitable lenses, flash units and accessories.

Even if photographic skills and technical requirements for the camera develop further, most photographers remain loyal to the system they have chosen, even as advanced or professional users. Accordingly, you should plan your entry into the world of digital SLR photography carefully.

What does DSLR stand for?

The abbreviation DSLR stands for Digital Single Lens Reflex. In terms of price, the cheapest and most expensive DSLR models easily differ by a factor of 10 – the differences in equipment are correspondingly large.

In this article our team has put together and answered the most important questions for you. So you are well prepared for the purchase of a DSLR camera.

What is the difference between DSLRs and other cameras?

Single-lens reflex cameras offer  two major advantages over compact cameras:

The sensors that record the image are significantly larger. This enables a considerably better image quality.

Instead of permanently installed optics, there are interchangeable lenses. In this way, the camera can be optimally adapted to every imaginable task.

The so-called bridge cameras (also known as megazoomers) play a special role. In size and appearance, they are reminiscent of a DSLR, but in fact they are classic compact cameras with a small sensor and built-in lens that covers a very large range of focal lengths from wide-angle to strong telephoto. In addition, they often offer setting options similar to those of a single lens reflex cameras.

In terms of size and weight, the mirrorless system cameras are between compact cameras and DSLRs. They are still equipped with large sensors and interchangeable lenses and are now equal to DSLRs in terms of image quality.

In general, if you don’t want to worry about camera settings when taking photos, a compact camera that makes all the important settings automatically is ideal for you. However, if you already have a basic knowledge of photography and now attach more importance to high image quality and many setting options, you cannot avoid a SLR model.

What are the advantages of DSLRs?

If it is only the image quality that counts and the purchase price only plays a subordinate role, then SLR cameras are best suited for everything, because they deliver better image quality than a compact camera in all shooting situations.

The less light is available, the greater the quality advantage the DSLR has. They score particularly well in atmospheric twilight or when taking pictures indoors without a flash unit.

A DSLR can be used flexibly thanks to interchangeable lenses (example Canon EOS-1D X Mark II with EF 400mm F2.8 lens).

In addition, DSLRs can be used universally. If you want to take photos carefree, with a suitable zoom lens and the automatic setting you can take photos as carefree as with a compact one. Conversely, thanks to the large number of different lenses and the ability to manually set all recording parameters such as sensitivity, shutter speed and aperture, you are equipped for every conceivable photographic task.

Another advantage that is often overlooked is the excellent ergonomics. The shape and weight of an SLR camera make it easy to hold and the large buttons and wheels make it easy to operate. The small compacts are often fiddly to use the buttons and difficult to hold because of the smooth (because pretty) surface. Compared to DSLRs, compact cameras are smaller, lighter and easier to use.

What are the disadvantages of DSLRs?

Of course there are also disadvantages. Size and weight score points in terms of ergonomics, but the DSLR does not fit in a jacket pocket, but is hung around the neck or carried in the hand. Neither of us does that all the time, so we miss some interesting motifs. And the purchase price of a DSLR with a few additional lenses can quickly be many times that of a compact camera.

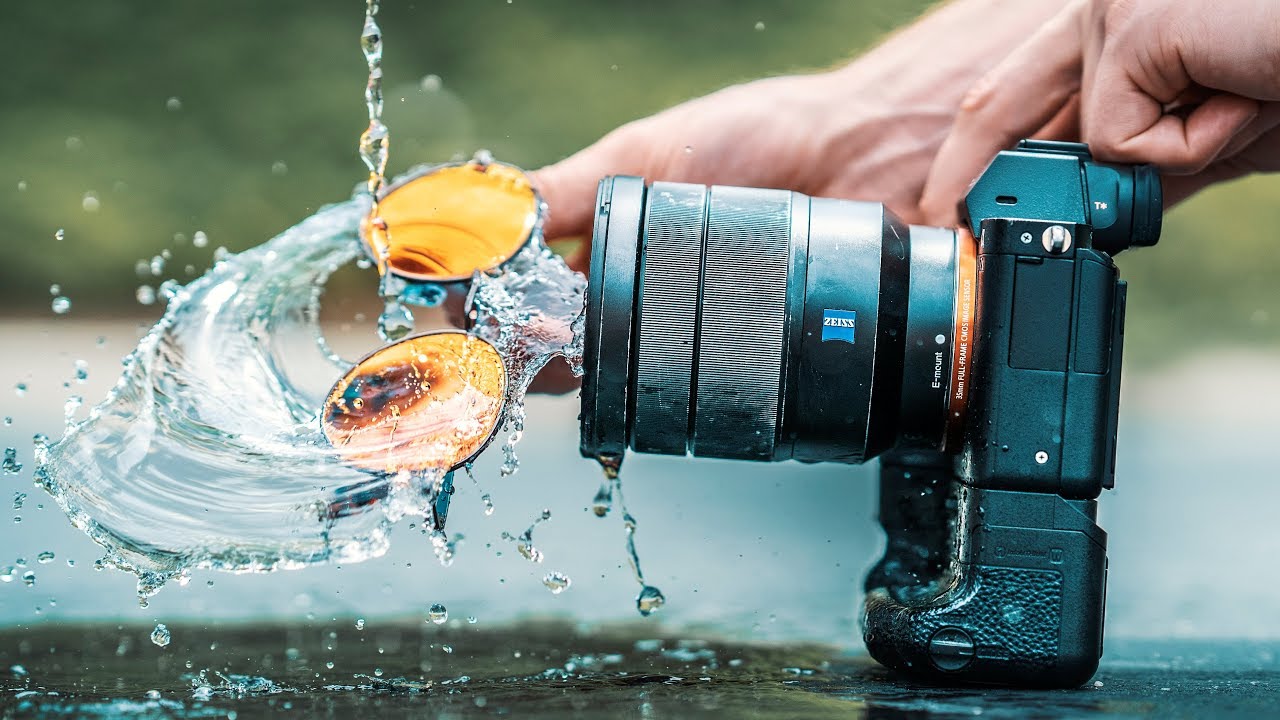
Last but not least: Even the otherwise incredibly practical interchangeable lenses can be a disadvantage. If you don’t have the right lens with you or if you change the lens in bad weather, moisture or dirt get into the camera interior and cause problems there.

How do DSLR systems from different manufacturers differ?

Since every manufacturer cooks its own porridge, you are already determined when you start. Let’s say you start with an entry-level housing and two lenses. Then you can later buy a higher quality housing from the same manufacturer and continue to use the lenses without any problems. With a few exceptions, however, the lenses do not fit the bodies of other manufacturers.

Third-party lens manufacturers such as Sigma or Tamron offer their lenses with connections for the models of several camera manufacturers, but a lens built for Canon only fits a Canon and a lens built for Nikon only fits a Nikon.

Flash units are connected via a standardized hot shoe and look as if they can be used across systems, but they are not. Due to the complex automatic functions, you also have to replace the flash unit later when changing the system. In contrast, only simple accessories such as filters or memory cards are completely independent of the camera manufacturer.

Which DSLR systems are there? An overview:

Canon and Nikon are the top dogs in the field of large DSLRs with mirrors. They have most models and cover the entire range from entry-level ( e.g. Canon EOS 1300D , Nikon D3400 ) to professional models ( e.g. Nikon D5 , Canon EOS 5DS and 5DS R ). In addition, they score with the most extensive range of lenses and accessories.

Sony has clearly caught up in terms of depth and breadth of the range in recent years and impresses with many innovations. In addition to classic DSLRs with a fixed mirror (e.g. Sony Alpha 77 II ), they developed there. This construction principle offers a number of advantages, especially when the camera is also used for video filming. However, Sony is focusing more and more on mirrorless system cameras.

Leica, Hasselblad and Pentax with their medium format models serve the professional sector – prices in the high four-digit or five-digit range ensure that. Pentax also has a number of amateur and mid-range models in various categories, from the entry-level K-S2 to the full-frame DSLR1 .

Olympus now completely relies on the more compact models without mirrors, as do Panasonic, Fujifilm and Samsung. Sony, Canon and Nikon now also have such cameras in their ranges

The best SLR cameras with APS-C sensors

Canon, Nikon, Sony and Co: In our gallery we present the currently best DSLRs with APS-C sensors.

Are there DSLRs for specific purposes?

No. The area of ​​application of a DSLR is determined much more by the lens than by the camera itself. And here too, not only the focal length range is decisive, but also the initial opening. It determines the amount of light on the sensor and the depth of field and thus makes a significant contribution to image design.

Special DSLR properties are only required in exceptional cases. This includes:

Sports photography: In addition to a bright and long-focal length telephoto lens, a fast camera is required that can also create longer series with fast image sequences while maintaining sharpness. Professional devices such as the Canon EOS 1Dx or the Nikon D5 can do this.

Video: The top models from Canon and Nikon, on the other hand, are hardly usable for good videos in HD quality. Here, mirrorless system cameras are now more than a nose’s length ahead of DSLRs. The lens must also be optimized for video and quickly adjust the focus without overshooting the target.

Outdoor: If you use the camera in places where sand, water and dirt clog it, it should be a more robust model. They can be found primarily in the professional class with steep prices, but more and more semi-professional DSLRs also offer dust and splash protection.

I still have old lenses from the analog era – is that a purchase criterion?

Some people would say “Under no circumstance!”. New manufacturing techniques make better lenses possible, which is why modern lenses are superior to any “oldie” in terms of imaging performance. If you buy a DSLR because you want to get better pictures, working with old lenses often makes no sense. However, this is not always the true. There are some old vintage lenses that have a good quality and they are most of the time chap too.

Yet, it worths to mention: Even with suitable connections within a system, not all functions are transferred from the housing to the lens and vice versa (compatibility issues). So you lose a considerable part of the automatic functions of a camera.

What trends can be observed?

Buy your DSLR when you need it. The quality has once again improved significantly in recent years and it will remain so in the future. In addition to the trend towards larger sensors – i.e. more full-format cameras – their increasing resolution can also be observed. Faster processors also manage to store more images in less time and with better quality.

In the long term, the trend is increasingly towards mirrorless system cameras . Classic DSLRs are therefore far from being on the “Red List”. Anyone entering the DSLR world today can be sure that they will still be able to access a top quality system in many years’ time.

Posted on

15 tips to Learn to take photos

tips to Learn to take photos

Are you looking for tips for better pictures? Do you want to learn photography and take better photos? Here I have 15 tips for cool photo tips for you. This makes learning photography child’s play.

Well, maybe I am a bit over the top. Because learning to take photos above all requires a lot of practice. But there are already a few tips that will help you on the way to better photos – basically the basics of photography or a great overview for beginners.

And one more word about your path into photography. We do almost everything out of habit. So when you think about your goal: I WANT TO LEARN TO PHOTOGRAPHY, then above all you should work on your habits! Make your vision or goal a habit – keep your camera on hand, daily or at least weekly. Try out new things but also get a routine in camera technology..

In this photography article for beginners, you will teach you some basic step by step important photography basics about aperture, ISO, focus, exposure time and light meter. You will learn how your camera takes a picture, regardless of whether it is a single lens reflex camera, system camera or compact camera.

1. Every photo needs a foreground

Bring depth to your photo. They also say: Every photo needs a foreground. So look for objects in the foreground of your photo. It can be a rock, a stone, a fence or a bush. That opens your picture and guides the gaze. Foreground is the portion of the frame that is closest to the camera. The foreground space in an image can be utilized to draw attention to a subject located further into the frame

A railing can be a perfect foreground, even if it’s only partially visible!

2. Give your photo a frame

A natural frame helps your composition. This can be an archway, a hedge or a group of people. So frame your photo! This also gives your photo depth. I also have a great photo task for you on the subject of “Give your photo a frame” !

A frame increases the depth of your photo


3. Get close!

Dare to approach your subject. Your photo wins by being close. Unimportant picture elements are eliminated and the view of the essentials increases.

Get close! Proximity increases the effect of the picture.


4. Zoom in with your feet

Wow, I can zoom in on it super cool. Nice to pull up the photo in the mobile phone. Huh, everything out of focus?! Remember that every zoom and telephoto effect often always has a loss of quality. So zoom in with your feet. Because then the quality is retained!

Too far away? Then get closer – instead of always zooming!


5. Pay attention to the direction

The eye always wants to follow the direction. No matter whether in the run, in the flight path or something similar. So your photographed object should always leave room for direction. For example, let the person walk into the picture, not out.

I tried to pay attention to the running direction in the running photos. Leave room!


6. In the dark with a tripod

Photos in the dark should generally always be taken with a tripod. Because in long exposure it is not possible for you to hold the camera without shaking. Nowadays, of course, many cameras can achieve infinitely high ISO values, but as a rule, the lower the ISO value, the lower the image noise. And above all, you can compose great photos in the long exposure with the remote release.

Better to use a tripod in the dark!


7. Do not cut off the feet

I often (only) pay attention to the face when photographing people. But in the full body portrait you should develop a view of the big picture of the subject. So do not accidentally cut off your feet, arms or legs.

If you’re taking full body shots, don’t cut off their feet!


8. Hard light and soft light

You should teach yourself to control the light. Because then you have learned one of the most important rules. Soft light gives your photo a natural mood, but hard light can also be totally exciting. Also you can use a flash diffuser.


9. Create tension and curiosity

If you don’t show everything, then you leave the viewer room for speculation. Much is completed in the head. But that is exactly what can create tension and curiosity.

A clever cut in particular can create a lot of tension.


10. Focus on the eyes

The eyes often determine the portrait. That’s why I always focus on the eyes in portrait photography. I also often choose a large aperture in order to have a lot of blurring in the background and thus additionally emphasize the eyes.A focus on the eyes combined with a large aperture and blurring can create tension.


11. Check the sharpness

Nothing is more annoying than blurry images when you have planned it differently. Consistent sharpness is particularly desirable in landscape photography or architectural photography. So check the sharpness during and immediately after the photo. Otherwise, vary the aperture to achieve a greater depth of field.


12. Go at eye level

Go on eye level with your subject. This is especially true for children, animals and flowers. The result is much more authentic images!

Go at eye level. This gives your photo a much more natural look!


13. Get out of the middle

Avoid placing them in the center of the picture. Better to take photos according to the rule of thirds. Visual balance is always important.

The eye perceives a placement according to the rule of thirds as very pleasant and exciting.


14. Use natural light

Light composes your photo. And if you want a natural, authentic photo here, then try to get as much natural light as possible.

It’s all about natural light


15. Pay attention to shapes

There are shapes everywhere. You can find circles, rectangles, triangles and much more everywhere. Even if you don’t recognize it right away, develop an eye for shapes in your photo. This will help you.

Posted on

6 tips for creative photo ideas: the extraordinary from the ordinary

6 tips for creative photo ideas: the extraordinary from the ordinary

I really take pleasure in writing about imaginative motivation for new picture ideas. Specifically on the method to learn photography, it is constantly important to me that you don’t have to travel to a unique place to take excellent photos – rather the opposite.

Just walk and find the wonder around you!

Content

– Discover the beauty in everyday life

– Discover the wonder around you

6 tips for more extraordinary in the ordinary

  1. The ordinary everyday life
  2. Observe light and shadow
  3. Take notice of the alignment
  4. Have fun with props
  5. Fascination in the background
  6. Take note of your corners and edges

Discover the beauty in daily life

It’s extremely delightful to take powerful, amazing images of everyday life. What can you do when you live in what you think is a truly dull place and you do not see any beauty in the everyday? The concern is of course not meant extremely seriously. Because it has to do with making something remarkable unusual. Let’s get going and try to find beauty in everyday life.

The reflection on a bonnet provides fantastic themes – and very simple to embed in scene.

Discover the wonder around you

It is a bit difficult not to wait for the big travel photography trip, but to discover the beauty – or at least the aesthetically spectacular fascination – in the everyday. But again and again I show you a lot of ideas that it is now very easy to summon something photogenic out of everything. Would you like some examples?

The view from the window with the focus on the rain-soaked pane.

Practical suggestion: Concern selective understanding

Question your perception and alter your viewpoint every now and then.

We call selective perception the psychological phenomenon that only certain elements of the environment are signed up throughout perception and others tend to be neglected. If you perceive something as allegedly uninteresting or regular, question it and attempt to look at it anew, with different eyes.

6 suggestions for more extraordinary in the ordinary

1. The ordinary everyday life

Take photos of street signs, the supermarket or simply the shopping carts in front of the door. Remember the details and nearness ideas, along with the pointers to clean up your scene:

Common obstacles in our theme search

– If the subject is too little, the viewer of your images may not recognize it as the main topic.

– Are there a lot of (unimportant) things in the picture? Oh dear, then the significance of your picture may be lost.

A completely typical theme can look really remarkable in the right image section!

2. Observe light and shadow

Observe the light and also the shadow cast. How can light and shadow assist your scene? You can find more about photographing shadows here.

Having fun with shadows is a great creative photo idea.

3. Take notice of the positioning

Viewpoint and direction are important for the wow element. As quickly as you photograph a banal pedestrian tunnel in ideal balance, the suction result mesmerizes everybody. Frequently it is only a few steps to the left or right that alter the impact of the picture.

A lot of proportion in the Soviet memorial in Berlin Treptow

4. Have fun with props

I put props in my photo. Are you interested by the texture of the wooden table in the hall? How about the glass on the table including your arm and hand in the picture? Much more alive than without!

Such a basic image idea: the hand brings life to the scene.

5. Fascination in the background

Keep an eye out for amazing patterns and textures. When you have a terrific pattern, your great image is not far away.

The background emphasizes the subject – even if it is small and put on the edge.

6. Take notice of your corners and edges

Keep in mind the pointers about the edges and corners of your photo. Notice what takes place there. Let out whatever that doesn’t belong in there, but likewise generate what makes the structure exciting.

Posted on

The Digital single lens mirrorless camera (DSLM) purchase guide

The Digital single lens mirrorless camera (DSLM) purchase guide


The DSLM; for a couple of years it has been changing the photography market. What started out as a poor SLT attempt developed into a completely new and booming market? The market for DSLMs (D igital S ingle L ens M irrorless) or system cameras.

These are now available for every budget and many manufacturers now have a mirrorless camera in their portfolio. But should you buy a mirrorless camera? Does it have any advantages over DSLRs ? That and much more is the content of this page and finally I will show you a few models that I would recommend.

What is a system camera / DSLM?

There are two types of system cameras, with and without mirrors. The system cameras with mirrors are called SLRs and those without are called mirrorless. Sounds logical, doesn’t it? The mirror in the DSLR is historical and comes from a time without image sensors. The system has been perfected over decades. But for a few years now, DSLMs have been picking up. Teething problems are being eradicated more and more and many photographers are seeing a new alternative that offers many advantages over the old DSLR cameras.

The mirrorless camera / DSLM in detail

Height and weight

Many see an enormous advantage here. The DSLM lacks the mirror and as you can see in the example above, this saves space and of course weight. That is why the mirrorless cameras are much smaller and lighter. But they are still bound by certain limits. They are not as small as compact cameras. This is simply not possible with interchangeable lenses and large sensors. But they are still smaller than the DSLRs and therefore more mobile and inconspicuous.

Lenses

This is a special feature of DSLMs that you should definitely not forget. Other lens connections are used that allow smaller lenses, but they are not that small. There are certain limits that are physically given and specify a certain size. If you only buy these cameras because you want something as small and portable as possible, you should look around for a bridge or compact camera .

Ergonomics

Ergonomics is probably the first thing anyone who is switching from a DSLR to a DSLM should notice. The manufacturers try to make this as similar as possible, but it is simply a different feeling that can seem strange, especially with long-term DSLR users. In direct comparison to an SLR camera, I find the DSLMs to get used to at first. They are just small and lie better in the hand of one than the other. In my opinion, many manufacturers simply have too many buttons on the small housing, which makes operation a challenge.

There is only one option here: try it out. I recommend that anyway before you buy a new camera. DSLM cameras come in different forms. Very large, such as the Sony A3 or Canon EOS R, but also very small such as the Sony A6000 or Canon EOS M50. Depending on the model, you have an electronic viewfinder or just the display to look at your pictures. In any case, try out what suits you and what suits your type of photography.

Electronic viewfinder

A DSLM or system camera takes photos with an electronic viewfinder or the display. This means that the viewfinder does not have a direct optical connection to the subject like the DSLR, but a display. It is like looking at the finished image through the viewfinder.

The electronic viewfinder offers several advantages:

  • Image preview: You get a direct idea of ​​your photo and actually see the finished image before you press the shutter release. If you now change the settings on your camera: for example , closing the aperture or increasing the ISO value , the image changes immediately and you can judge whether you like the photo or not. You can also see the picture in the viewfinder after you’ve taken it. So it’s a second display that works just like your large camera display. The advantage, however, is that you can use it without being distracted by the sun.
  • Exposure aids: Because our EVF is a display, we can use many aids that the optical viewfinder cannot offer us. We can show a histogram , use an overexposure warning and much more … You can see immediately if your camera is not doing something the way you want.
  • Manual focus: With manual focus, we can use the focus peaking to see where our focus is and even zoom into the image. A real help for manual focusing.
  • Much more: Since you can show almost everything in the displays, there are no limits to the manufacturers. Water cars, grids for image creation, image styles and much more is possible.

Now I’ve written so many great things about the electronic viewfinder that I would of course like to point out a few negative points. Because the electronic viewfinder naturally always has to be supplied with power. This should not be ignored with some models and some cameras have extreme problems with high power consumption and thus a short battery life. Also, for many photographers it is not pleasant to constantly look at a display (myself included). It’s a completely different feeling to actually see the subject instead of just being shown it. The cameras are getting better and better here, but sometimes they are lagging behind due to delayed display (the display is delayed compared to reality).

I would like to add one point for those who like to take photos at night (long exposure ). If you take a picture with the DSLR, you have the light intensity of your own eye available. With the DSLM, the display in the viewfinder depends on the power of the camera. That may not sound too bad, but there are a few moments when I would have wished for my DSLR…

If you are not sure which viewfinder is right for you, I recommend that you test both of them once and take a closer look. I find the DSLR to be much more pleasant, especially in series pictures and when photographing fast subjects, but something different suits everyone.

Autofocus

There are several options when focusing with a mirrorless camera (DSLM). You may be familiar with the first option from the DSLR. If you switch to live view here (i.e. using the display), the autofocus becomes significantly slower. This is because the camera is using the contrast AF. This simply shifts the focus until the image has the highest possible contrast has. This is very precise, but unfortunately a lot of time is lost in trying out and “pumping” the focus. That’s why there is still phase autofocus, which was reserved for DSLRs for a long time. Here, two sensors compare the light (phase) falling into the lens from different angles and thus know from the first measurement what needs to be changed on the lens to focus. Cool right?

Most modern DSLM cameras use a combination of these two methods in order to be able to focus both quickly and precisely. If you use a modern DSLM camera, you should make sure that it supports phase or hybrid autofocus.

Picture quality

We come to the last point, and in my opinion the most important point. The image quality. In terms of image quality, the system camera is in no way inferior to the SLR. Of course, not all cameras are the same here, but in most cases you don’t have to worry that you have something worse just because you are using a different system. Most cameras even have the same image sensors installed (Sony makes sensors for some Nikon cameras and Canon has installed the same sensor in the 5D4 & R and the 6D2 & Rp). There is only one real way you can be sure that the quality will meet your expectations. Test the camera 🙂

Choice of lenses

From my point of view, this is a major negative point. It is not the case with all manufacturers that the newer the manufacturer is in the DSLM market, the more likely it is that the choice of lenses is limited. For decades it took a long time to develop a wide variety of lenses for DSLR cameras. This has only just begun with DSLMs and although lenses are already on the market, one only starts with the most important ones at the beginning. One or the other special lens may not be found here yet. Of course there are adapters that allow the use of DSLR lenses, but I have made the experience that it often leads to problems (slow autofocus etc.).

There are always new lenses on the market, but keep in mind that you may not find everything here and that you have to expect limitations.

Is the mirrorless camera or system camera right for you?

This is of course a question that cannot be answered easily. I always recommend trying out the camera beforehand. But I would like to give you a little support along the way that should help you with your decision.

The DSLM is interesting for you if the following points apply:

  • You’re used to smaller cameras – that  was the first thing I didn’t like about the DSLM cameras. The size. Ok, I also come from the DSLR segment and am used to large cameras with battery handles. However, if you’ve been taking photos with a compact camera or mobile phone the whole time, then the size of the DSLM is perfect for you.
  • You can handle the digital viewfinder – the electronic viewfinder is not for everyone. Some have problems seeing everything on a display / digital viewfinder. If that is not a problem for you, then you can use the mirrorless camera.
  • You want to try something new – that was one of the reasons why I keep getting a DSLM for different jobs. It’s just fun to use a different camera. Maybe it fits better than the current one? Just keep in mind that you don’t need a new camera straight away because it can do one thing a little better than the current one.
  • Video – Yes, the site is actually called Learn Photography, but especially when it comes to video I would prefer the DSLM to the DSLR and any other camera. They’re small, they’re incredibly powerful, and you can’t beat the autofocus when filming.

Buy recommendations

Entry level DSLM

Canon EOS M50 * – Sony Alpha 5000 * – Olympus PEN E-PL9 * – Panasonic LUMIX G *

Advanced DSLM

Sony Alpha 6300 * – Olympus OM-D E-M10 Mark II *

Professional DSLM with full format sensor

Canon EOS R * – Nikon Z6 * – Sony A7 III *

Otherwise, make sure that you try your camera before buying and that you do not justify the purchase with the one feature that the new camera can do better. You take the photos and not your camera 🙂

Posted on

Wide angle lens – lens advice

Wide angle lens - lens advice

What is a wide angle lens?

All lenses with a very short focal length are called wide-angle . The focal length here is roughly between 10mm & 40mm. But what does that mean? Such a short focal length has a significantly larger angle of view than the human eye. We would have to turn our heads to capture the entire scene (or use both eyes 😉) The camera can capture all of this in one picture. So we can easily get a very large subject or a normal subject with little space in one picture.

What can I use a wide angle lens for?

Wide-angle lenses are very popular in landscape photography, but can be used in all areas. Whenever you have a large subject or there is not much space available, a wide angle is used. It can now be a gigantic landscape, a large building, or a small apartment that is to be rented out. Yes, it is also great to use a wide-angle lens in a small apartment, because it not only makes the apartment look bigger, but is also the only way to get the entire space in the picture.

In which areas is a wide angle still used?

Actually, whenever I want to show a lot of the surroundings. This can of course also be the case with a portrait. As you can see in this example, you can see the details in the picture as well as an incredible amount of the background. If I go more into the partial area and use a 35mm lens instead of a 17mm, we still have a lot of background in the picture, but significantly less than before.

Wide angle shot at 35mm

Wide angle shot at 17mm

The wide angle effect

Taking pictures with one has a certain effect on your pictures. First of all, everything seems bigger. The distance between the individual elements in your photo looks like there are several meters between them. The smaller the focal length, the stronger this effect is.

Subjects that are very close to the camera appear very large and puffed up and the further you are away from the camera, the smaller everything looks. I have the following example for you.

The arm in the picture looks huge, but the head is almost normal

Wide angle distortion

The extreme angle of view that a wide-angle lens brings with it not only results in the wide-angle effect, but also other distortions that cannot be avoided.

Here one speaks of a perspective distortion. The shorter the focal length , the closer the subject and the greater the angle of inclination, the stronger this effect becomes.

A perfect example of this is supportive lines. If you photograph lines (for example of high-rise buildings) from below or from above, it looks as if the lines are falling over. This can also happen if the lines are on the edge of the image.

This effect can be avoided by photographing the building from the front on the same level as possible. However, this is not always necessary, because it sometimes looks great when you integrate the effect of the “falling lines” in your subject and intensify it even further with a deep perspective.

The lanterns on the side lean slightly towards the centre as the picture was photographed from a deep perspective

No crashing lines as the picture was just photographed from a higher perspective

Focus range with the wide-angle lens

If you want to work a lot with a low focus range, it is difficult with a wide angle. Because the shorter the focal length , the larger the focus area. A diaphragm 4 on a wide angle therefore has a significantly larger field of focus than on a telephoto lens. You should definitely keep this in mind when buying a wide-angle lens. If you like to take photos with blurring, you should either pay attention to a large revelation when buying or use the normal lens. Because an aperture 1.8 on a 50mm, for example, cannot be compared with a 1.8 on a wide-angle lens e.g. B. 18mm.