Posted on

How to remove mouldy odour from cameras and lenses?

How to remove mouldy odour from cameras and lenses?

I recently bought a new old lens for one of my cameras on eBay. Everything is fine so far. But I don’t like that the lens has a stinking musty smell. Here you can quickly help yourself with a simple trick.

I like old analogue cameras. Every now and then I look at eBay, because these devices are now often sold there at a low price. Recently I have decided to buy a wide-angle lens for my Kiev medium format camera. The lens was apparently perfectly fine too – apparently. Because it actually had a mouldy smell! This was due to the bag in which it was. Unfortunately, this must have been lying in a damp cellar for too long. I didn’t want to do anything with it, so I threw away the bag with the strong musty smell.  The smell of mold had also spread to the lens. But here you can easily help yourself.

Yes, you can easily get out the musty smell with coffee!

So I first looked for a plastic box in the kitchen that my lens would fit. I put this in there. Next, I added some instant coffee. I closed the lid and put the can and its contents down for 24 hours. After this time I opened the can and the musty smell is almost gone! The coffee had so to speak soaked up the smell of mold. The lens now smelled slightly of the instant coffee. But this quickly evaporated.

With this simple trick, it is possible to drive out the notorious musty smell from smaller objects (that have been stored incorrectly or damp). With larger objects (e.g. items of clothing) you would have to take a larger bag like a garbage bag and sprinkle a whole pack of coffee into it. The container must be closed, however – especially when working with instant coffee. Because instant coffee tends to get lumpy and sticky with a constant supply of air! You don’t want it to stick to the objects with the musty smell or leave stains.

Clean your photography equipment with some cheap perfume or aftershave

Attention! Do not pour any liquid directly on your photography equipment, because it may cause internal damage, fungus, electric hazard, etc.!

Put few drops of cheap perfume or aftershave on a microfiber cloth and wipe your equipment carefully. You can use ear buds in places that you can’t access. For inexpensive dirty equipment I often use toothbrush. Let your equipment dry. Don’t put it into a bag yet, but also don’t let it uncovered for days on a direct sunlight because it can collect dust and direct sunlight can damage your sensitive  and expansive device. Also, it can get easily scratched or damaged if you forget it on the table or on the top of your kitchen. Wait for an hour after cleaning and place it in a bag or case, if you don’t use them. It is recommended to have a few small bags of Silica gels silicon dioxide that is absorbing moisture in your camera bag. Do not keep your equipment in rooms where the humidity is high. Keep your room at a normal humidity. You can use room dehumidifier to prevent you cameras and lenses. Yet, for your own health is also important. So find the balance (If your house is above 50% humidity then a dehumidifier is needed. However, if humidity levels are below 30%, a humidifier is needed).  

Prevention – Keep your cameras and lenses dry in bad weather

  • Use umbrella
  • Waterproof camera covers
  • Use lens hoods
  • Change lenses under cover
  • Wear waterproof clothing
Posted on

How to Prepare Your Images for Printing

ICC-color-profile - Prepare Your Images for Printing

Select a Picture

When you prepare your images for printing take note of which pictures you like when you look at them on your phone or computer. Of course, it is an important decision what are going to hang on your wall. Especially if it is going to be here for a long time. Your choice is probably depends on the emotions it evokes, the colours or the technical excellence of the picture. Find the exact image that you are looking for.

File Format and Resolution

When you prepare your images for printing for the optimal production use the highest resolution available, don’t change the resolution and don’t resize up or down your photo. Ideally you don’t want to compress your image at all. You can test your picture in some easy-to-use configurator (like WhiteWall) to optimise your file and to achieve the best possible quality. Save it with 8-bit colour and an sRGB colour space.

Colour and Brightness

Don’t forget that colour and brightness can appear different on a monitor than they do in print. There are three reasons for this. The first reason is that a monitor is illuminated and the paper isn’t. Therefore a monitor a monitor can display a photo much brighter than the picture actually is (which is how it will look printed). The second reason is that different papers have their own base tone. It means that a pure white will look different from appear to paper, affecting the overall brightness of the colour. The third reason is that depending on the specifications of the printer such as the dots per inch (DPI), the print-head capability and the type and quality of ink/toner used is also going to affect the colour and the print quality.

For Soft Proofing Use ICC Colour Profiles

What is Soft proofing?  lets you temporarily simulate how an image will appear on another device, such as a printer, by using only a computer monitor. An ICC profile is a set of data that describes the properties of a colour space, the range of colours (gamut) that a monitor can display or a printer can output. The most widely used colour space is Adobe RGB (1998). If you have a calibrated monitor, ICC profiles are the perfect way to asses how your pictures will look on the final product. You can find downloadable ICC colour profiles on the internet for many product options.

Do Test Prints

If you do not have a calibrate monitor or if you don’t want to spend too much time assessing the variables of different things that are affecting your final product, you can do a test printing, which is a hard proof option to see if you need to change anything in order to have a perfect photo.

Best Camera for Photo Printing

If you want to take photos to print them out, perhaps choosing the right camera is the most important. Please notice that print size doubles, the megapixels required increases as well. Therefore, you can make a nice 8″ x 10″ print with a 6 or 8 megapixel camera. But to make a real photo quality 16″ x 20″ print, you would need between 24 and 30 megapixel camera.

Posted on Leave a comment

2020 TIPA Winning Cameras and Lenses

In Madrid The Technical Image Press Association(TIPA) announced the winners of the 2020 TIPA World Awards.

What is TIPA?

The TIPA Award is widely regarded as one of the best known and most prestigious photography awards. . TIPA both recognise and honour industry companies and their products and serve as an important benchmark and guide for consumers in making their purchasing decisions.

Since 1991, the TIPA World Awards logos have shown which are the best photographic, video and imaging products each year. For over 25 years, the TIPA World Awards have been judged on quality, performance and value, making them the independent photo and imaging awards you can trust. I cooperation with the Camera Journal Press Club of Japan (www.tipa.com)

The TIPA jury is made up of the world’s best-known photography and imaging professionals.

2020 TIPA World Awards Process

Finalists are usually voted on at the TIPA general assembly by representatives from TIPA member magazines from around the world. The assembly was originally scheduled for mid-March in Las Vegas. However, when travel restrictions were established, the TIPA board implemented product recommendations and an online voting procedure for members globally.

Based on detailed tests and comparisons, a list of candidates and laureates are compiled.

List of 2020 TIPA winning products:

Cameras

  • Best DSLR Advanced Camera: Canon EOS 90D
  • The best DSLR Expert camera: Nikon D780
  • Best DSLR Professional Camera: Canon EOS-1DX Mark III
  • Best APS-C Advanced Camera: Nikon Z 50
  • Best APS-C Expert Camera: Sony A6600
  • Best APS-C Professional Camera: Fujifilm X-Pro 3
  • Best Full-Frame Expert Camera: Sigma fp
  • Best Full-Frame Professional Camera: Sony A7R IV
  • Best Full-Frame Photo / Video Camera: Panasonic Lumix DC-S1H
  • Best Medium Format Camera: Fujifilm GFX100

Lenses:

  • Best DSLR – Prime lens: Tamron SP 35mm f / 1.4 Di USD
  • The best DSLR macro lens: Laowa 100mm f / 2.8 2x Ultra Macro APO
  • Best DSLR – wide angle zoom lens: Tokina ATX-i 11-16mm f / 2.8 CF
  • The best DSLR – professional lens: Nikon AF-S Nikkor 120-300mm f / 2.8E FL ED SR VR
  • The best MFT lens: Panasonic Leica DG Vario-Summilux 10-25mm f / 1.7 ASPH
  • Best without mirror – Prime Standard lens: Nikkor Z 58mm f / 0.95 S Noct
  • The best mirrorless – wide-angle zoom lens: Sigma 14-24mm f / 2.8 DG DN Art
  • The best without mirror – Standard zoom lens: Sigma 24-70mm f / 2.8 DG DN Art
  • The best mirrorless – Telephoto zoom lens: Canon RF 70-200mm f / 2.8L IS USM
  • Best Professional Portrait Photo Lens: Canon RF 85mm f / 1.2L USM (DS)

Compact cameras

  • Best Expert compact camera: Sony RX100 VII
  • Best Vlogging compact camera: Canon PowerShot G7 X Mark III
  • Best Premium Compact Camera: Fujifilm X100V

Posted on Leave a comment

Sony-D Lenses

The short answer – Sony-D lenses are Sony-A lenses that have Advanced Distance Integration. D lenses have 8 contacts, non-D lenses have 5 contacts.

Buying Sony lenses could be confusing. So before I go straight to the explanation of what is Sony-D, I will explain the main differences and the evolution of the Sony lenses.

Sony produces cameras with two lens mount systems: E-mount and A-mount. E-mount is used on mirrorless camera bodies. While A-mount lenses are for the standard Sony unique Translucent Mirror type camera bodies. Yet, using the Sony lens adaptors like LA-EA1, LA-EA2, LA-EA3 or LA-EA4, A-mount lenses can also be used effortlessly on E-mount cameras.

The A-mount was originally Konica Minolta A-mount camera system, which is now used with Sony. Sony A-mount  lenses are optically, mechanically and electrically identical to their Minolta predecessors Therefore, all Minolta AF (i.e. Minolta a-mount) lenses from Minolta are compatible with Sony alpha cameras. The older Minolta lenses for film cameras could be used on modern Digital SLR cameras.

The list of existing Sony A-mount lenses on Wikipedia.

Sony-A mount lenses in our web shop.

Also, could be confusing that the Sony-A mount is also called Sony α (the lower case to Greek letter alpha, often transliterated as Sony Alpha). To make it more complicated, Sony has caused even more confusion. Before, if the camera was an Alpha, it had an A-mount or alpha mount. If it was a Nex camera, it had an E-mount. Sony has come out with Alpha E-mount cameras. So it is good to be aware that not all Alpha cameras have Sony-A mount. If the camera says E-mount, it is not compatible with Minolta (and Sony-A) lenses without the Fotodiox lens mount adaptor. This found this website very useful when it comes to lens and camera compatibility.

Of course, as like many other models the Sony lenses are also going through transformation and development. The old Minolta lenses are not all D lenses, while most modern Sony-A lenses are all D lenses. You can quickly tell if a lens is a D lens or not by counting the number of contacts on the lens mount. D lenses have 8 contacts, non-D lenses have 5.

I have collected here some of the best explanations from different forums that explain why Sony-D lenses are better than non-D lenses:

” That doesn’t have anything to do with the ‘D’ designation. In Minolta/Sony ‘talk’ the ‘D’ indicates that the lens has the ‘D’ chip, which gives distance information to the body. You’re thinking that the ‘D’ means that the lens is optimized for digital cameras. However, as Minolta used the ‘D’ before digital came out.”

“Sony now uses the term “distance encoder” in its lens descriptions, which as far as I know means the same thing as “Advanced Distance Integration” (ADI). Personally, I’ve never noticed that using ADI makes much difference in results.”

“The Minolta 24-105mm f3.5-4.5 (D) Lens was one of the first lenses with ADI (Advanced 
Distance Integration) flash metering system. The D indicates Distance integration”

“Sony-D-compatible” means the lens has 8 electrical contacts rather than 5 which allows additional data to be exchanged between camera body and lens, and that the lens sends focus distance information back to the body. The body can use the distance information to adjust the flash output if you select ADI flash mode. 8 pin lenses started appearing with the Minolta xi range (about 1993, I think), but ADI only came in about 2000 (with the Minolta 5/7/9 series cameras). Many treasured legacy lenses (e.g. the Beercan) are only 5 pin, and even today some current lenses are still only 5 pin, e.g. the excellent Tokina 11-16/2.8.”

” The ‘D’ function was originally designed by Minolta to help with flash exposures when the subject was against a reflective background. The ‘D’ lenses were designed to work with the 5600HS D flash, and a body that was able read the ‘D’ distance information.

“This is how it works: Suppose you wanted to take a picture of a subject standing 10′ in front of you. Two feet behind the subject is a highly reflective surface. Normally, if you try and take a picture in this type of situation, the picture would come out with the subject being underexposed. This is because the light from the flash bouncing back from not only the subject, but the reflective background. Because of this strong reflection, the light output from the flash would be cut off before the subject is properly illuminated.”

“With the ‘D’ system in place, the camera would know that you are focusing on a subject ten feet in front of you. Therefore the reflection from the background would be disregarded, as it is further away from your focused point. If you were to shift focus to the reflective background, then the camera would then measure the light from the reflective background and not the darker foreground.”

“I believe every Minolta/Sony DSLR from the Maxxum 9 could take advantage of the ‘D’ chipped lenses and ‘D’ flashes. I’m not sure if Sony was found other uses for the distance information in the newer cameras.”

Posted on Leave a comment

Common Canon fit Abbreviations

This article is focusing on common Canon fit photography terms, acronyms, & abbreviations, which are used on Canon lenses. In addition other brands as well, such as Sigma and Tamron, that can be used on Canon digital cameras.

Common Canon Abbreviations

SLR – single-lens reflex camera – typically uses a mirror and prism system (hence “reflex” from the mirror’s reflection) that permits the photographer to view through the lens and see exactly what will be captured.

Digital SLR or DSLR – a digital camera that combines the optics and the mechanisms of a single-lens reflex camera with a digital imaging sensor, as opposed to photographic film.

Canon FL lens mount – FL fit was before 1964.

Canon FD lens mount FD fit was before 1987.

EF mount was introduced in 1987.

EF – electronic focus.

EF-S (introduced in 2003) designed for EOS DSLR models with a compact sized sensor – APS–C (Advanced Photo System Cropped frame) sensor size – lenses lighter and smaller, greater wide-angle choice.

RF mount (introduced in 2018) implements a 12-pin connection between the camera and the lens, a 50% increase over the 8 pins found on the EF mount. Along with more data channels, provides higher speed data transfer for extremely fast AF, enhanced image stabilization and image quality optimization. Canon EF and EF-S lenses can be used on cameras that have the RF mount with mount adapters.

EF-M (introduced in 2012) – more compact compared to the EF and EF-S range, designed exclusively for use with EOS M cameras.

IS – image stabiliser (Canon).

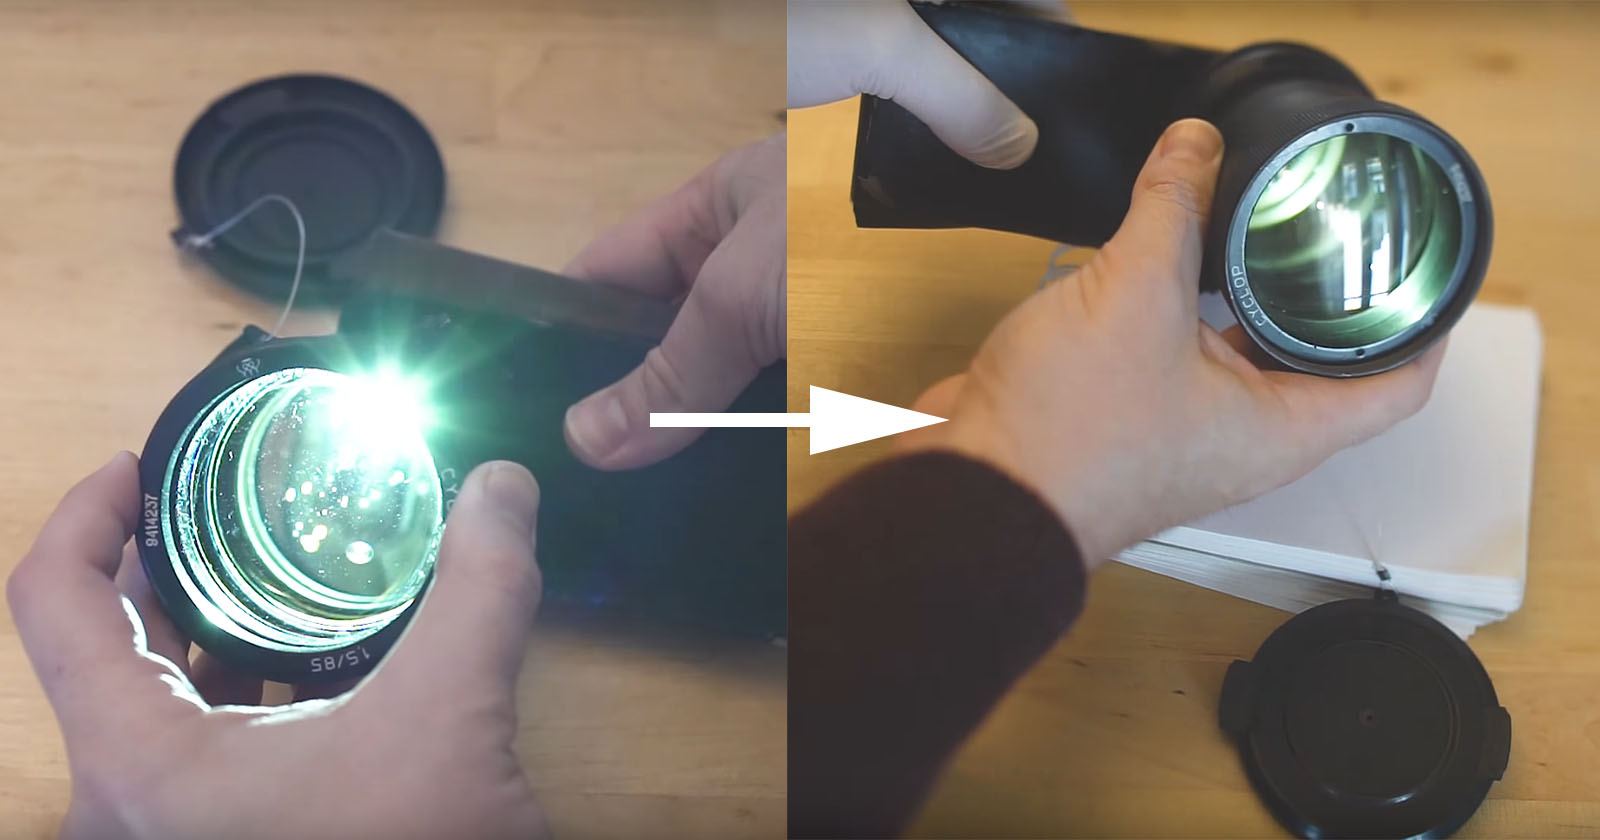
L – Designation for Canon’s professional line of lenses. While more expensive than consumer-grade lenses, these are compatible with Canon Rebel cameras and all use the Canon EF mount. If the lens has a red line, the lens is part of Canon’s L series.

AFD – Arc-Form Drive is the first autofocus motor used in Canon EF lenses. Louder and slower than USM motors. Slower reaction time and no full-time manual focus override. If an autofocus Canon lens has no indication on its barrel what sort of AF motor is used, it is either AFD or MM.

MM –Micro Motor -the least advanced AF motor used in Canon lenses along with AFD. It is a smaller version of the AFD motor. MM is only used in the cheapest Canon lenses, like the EF-S 18-55mm f/3.5-5.6 IS II kit zoom. Does not allow full-time manual focus override like the more sophisticated USM systems do. If an autofocus Canon lens has no indication on its barrel what sort of AF motor is used, it is either MM or AFD.

STM – Stepping Motor – The inclusion of the STM motor allows the camera to focus smoothly and quietly while shooting video and particularly so when using Canon DSLRs equipped with Dual Pixel AF systems. This motor also allows quick AF speeds during still image capture.

USM – Ultrasonic Motor – The inclusion of an ultrasonic motor makes the lens focusing fast and quiet.

DN – lenses designed for compact system cameras.

DODiffractive Optics lenses are built to the same exacting standards as L series lenses, but these are designated with a green ring around the lens barrel instead of a red one.

TS-E – lenses with tilt and shift functions,

MP-E – it is a is a prime lens, there is physical extension is because it focuses very close. MP-E focuses from life-size to 5 times life size, provides closer images than macro.

PL mount (Positive Locking) mount or Arri PL – lens mount developed for cinema lenses.

CN-E – cinema lenses for Canon Cinema EOS (Cinema Electro-Optical System). Prime lenses are available with an EF mount, while the CN-E zoom lenses are available in either EF or PL mount. The biggest visual difference between EF and CN-E lenses is that the cinema lenses have gearing around them that allows the focus and aperture to be easily and smoothly controlled via a follow focus or remote control.

I, II, III – designates which version of a Canon lens to distinguish the older model from the newer one.

Read more about Photography Glossary.

Common Sigma Abbreviations

Sigma makes their lenses in a variety of mounts, including Canon (also Nikon, Pentax, Sony/Minolta, some Olympus, and even their own Sigma SA mount).

They backwards engineer the mount and do not pay a license to Canon, so they generally do not use the term “EF” but instead label it as “Canon AF”.

They do not make any lenses using the EF-S mount. Instead, their digital lenses for the “crop” cameras are labelled “DC” and will fit any EF or EF-S mount without interference. So unlike the EF-S lenses, Sigma DC lenses can be used on the older non-EF-S models like the D30/D60/10D.

AF – Autofocus

ASP – Aspherical Lens Elements. A type of lenses that virtually eliminates the problem of coma and other types of lens aberration. They are particularly good at correcting distortion in wide-angle lenses as well as contributing to a lighter and smaller lens design.

APO – Apochromatic lenses. Uses special low dispersion glass for minimum colour aberration and telephoto quality improving contrast and sharpness. APO Zoom Marcos offer up to 1:2 magnification (one half life-size) in the telephoto range with instant shifting from normal to macro shooting. APO Tele-Macros offer a 1:2 image size close focus, when the macro switch is engaged the zoom control ring is fixed at the telephoto end.

CONV – These lenses can be used with the APO Teleconverter EX. It can increase the focal length and will interface with the cameras automatic exposure function.

DC – Lenses designed for APS-C DLSR cameras. Lenses which have been designed so that the image circle matches the smaller size of the image sensor of most Digital SLR’s. Also compact and lightweight.

DG – Lenses compatible with full-frame sensor DSLR cameras. Large aperture lenses with wide angles and short minimum focusing distances. Have peripheral illuminations so are the ideal lenses for Digital SLR cameras, but are still suitable for 35mm SLR’s.

DF – Dual Focus. Disengages the linkage between the internal focusing mechanism and outer focusing ring when in the AF position. Allows holding of the lens as the focusing ring does not rotate during auto-focusing, but gives an adequate focusing torque of the focus ring when manually focusing the lens.

DL – Deluxe. Full-featured lenses and come with a custom lens hood, feature half stop increments on manual aperture settings, depth of field scale, distance scale, infrared correction mark.

EX – Excellence. Used to define professional type lenses, it denotes a superior build and optical quality.

HF – Helical Focus. Eliminates front lens rotation, allowing the use of a perfect hood and easy to use polarising filters.

HSM – Sigma’s designation for Hypersonic Motor. Uses a motor driven by ultrasonic waves to provide quiet, high-speed Auto Focus. Virtually silent, highly responsive auto and manual focusing.

IF – Inner Focus. The lens is able to focus without physically changing its size, where optical movement is limited to the interior of the non-extending part of the lens barrel, allowing for a more compact and lightweight lens as well as closer focusing distances.

MACRO – Used on those lenses which have the ability to be used for close up (macro) photography. Some will have a magnification ratio of 1:3 focusing at 50cm, such as some of their standard Zoom lenses.

OS – Sigma’s designation for Optical Stabiliser. Has a built-in mechanism that compensates for camera shake. Alleviates camera movement when shooting by hand held camera.

RF – Rear Focusing. A system where all the lens elements are divided into specific groups, with only the rear group moving for focusing, making the auto-focus operation smoother and faster.

UC – Ultra Compact. The smallest, lightest lens of its type.

ART – Designed to emphasize creative expression above compactness and multi-functionality

MC – Sigma Mount Converter

Common Tamron Abbreviations

ASL – lenses use one or more aspherical lenses.

DI – Digitally Integrated Design

Di

Digitally Integrated Design – A Generation of lenses designed for optimized use with digital SLR cameras.

Di II – Lenses for APS-C sized sensors only. They are constructed for the exclusive use on digital SLR cameras with smaller-size imagers (Canon EF-S size – max. 16 x 24 mm)

Di III – Lenses for compact system cameras. They are engineered specifically for mirrorless interchangeable-lens cameras. They cannot be used with digital SLR cameras with a built-in mirror box or with conventional SLR cameras.

PZD (Piezo Drive) – it has a piezo drive motor. Read more here.

USD – it has a high-frequency Ultrasonic Silent Drive motor, enabling speedy, silent autofocusing.

XR – Extra Refractive Index Glass Technology. Gives Tamron lenses better performance and allows them to have more compact designs.

Read more about Tamron abbreviations in Tamron glossary

Example:

Canon EF-S 18-55mm f3.5-5.6 IS II DSLR Lens Black

This is a cropped frame sensor Canon electronic focus lens (EF-S) with image stabiliser (IS), 2nd version of the model (II)