Posted on

The Differences between Snappers and Photographers

Differences between Snappers and Photographers

On the one hand, this article is not intended to be a doctrine set in stone. On the other hand, it should be more about the technical details in photography that the snappers may not even know about, but which are valuable techniques for the careful photographer when it comes to the photographic implementation of an idea. What are the classic differences?

Table of Contents

•        My friend, the clicker

• The best image quality of a lens

•        Do not stop down too much: diffraction blur

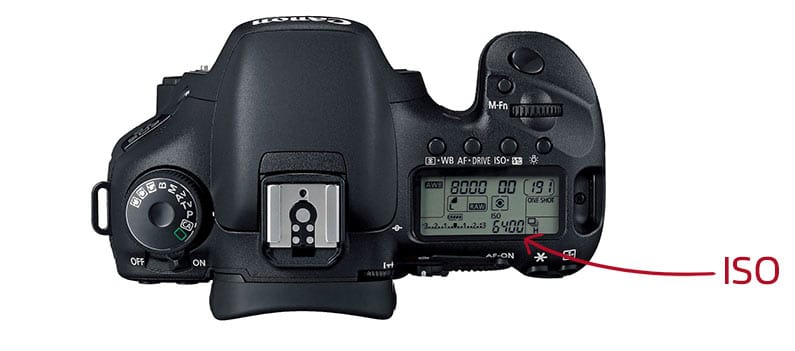
•        Do not choose the ISO value too high

•        Use a tripod

•        Types of light in photography

•        Turn off the autofocus, avoid a blurry foreground

•        Correct exposure: expose on the shadows

• Use the measured value memory of the camera

•        Use the white balance correctly

• Distortions and Converging Lines

•        Use of artificial light

• Develop a concept

My friend, the snappers

The expression  “camera snappers” (following from the German designation of “knipster” means someone who just presses the shutter release without any great consideration), yet often pretend to be a “serious photographer”

I have a good friend who has been the owner of a modern digital single-lens reflex camera that is quite usable in terms of quality. Since the 1980s, such cameras have had a “P function” (automatic program) or, even better, an “auto function”. You don’t have to worry about anything anymore, the camera will fix it. At first I think that’s really good! Because how cumbersome is dealing with physics when you just want to make good pictures. The snappers have a clear advantage here. In detail, however – and by “detail” I mean looking at a large print and not the preview on a small screen and on the other hand reproducibility – you will not infrequently be able to detect certain technical errors that can be circumvented by mere specialist knowledge. Specialist knowledge, which, for example, do not acquire professional photographers for free and initially spend a lot of time on a certain degree. There are some classic differences here with regard to the operation of the photographic apparatus.

In any case, my friend, the snappers, works as follows: He points his camera at the subject and looks at the display of his digital camera via live view. Now he turns any cogs until the displayed “live image” appears as he imagines it and then clicks. When I observe this way of working, the hair on the back of my neck easily stands on end. It’s almost as if a cook simply added sugar to the pot if the finger test was too salty. Concretely screwing maybe if there is an insufficient shadow drawing (I don’t think he knows what this is) he simply high the ISO value or opens the aperture without being aware of the consequences. If he is happy with it – very much! I certainly don’t want to take the fun away from him. But there is another way. And with a view to reproducibility and attention to detail, you should know a few basic things about photography:

The best image quality of a lens depends on you

A lens is a light collector: a lens system absorbs all the ambient light that it “sees” and bundles it into a focal point. The aperture can be used to “sort out” the area of ​​the light rays that hit the technically most unfavorable surfaces of the lenses – and these are their outer areas. Consequently, you should go for the best possible picture dim.

Every lens achieves the best image quality technically if it is stopped down by two to three values ​​(English “stops”). A stop is a doubling or halving of the amount of light let in when taking a photo.

For the most precise representation you should use a lens whose light intensity 1: 2 is stopping down to approx. F / 5.6, provided that you do not get into trouble with too high a depth of field or too long an exposure time, if the ambient light is already too dark for a correct exposure or if there is blurring threatens (here the photographer naturally uses a tripod).

Especially zoom lenses and especially the cheap “kit lenses” I would always stop down by at least two f-stops. However, high-quality and correspondingly expensive lenses often leave no questions asked when it comes to precise imaging performance in the corners of the image and with a 100% crop view.

My friend, the snappers, will never know at which aperture he is taking pictures. However, consciously working photographers know that, on the one hand, they naturally control the depth of field with the aperture (this is well known even under snaps) and, on the other hand, they can use the maximum image quality of their lens.

Do not stop down too much: diffraction blurs

However, if you stop down too far, a phenomenon called “diffraction blur” occurs in full format do not stop down to aperture 22, because here the aperture is already closed so far that the incoming light has to squeeze through the aperture blades – like through the doors of a Japanese subway or just bends over: There is a uniform blurring. So this is where  dog chasing its tail. Photographs can supposedly depict all the details from front to back, but there is the problem of diffraction blur. On a 30 × 40 cm print, such images will lack a certain degree of sharpness, whereas everything still looked okay on the small laptop screen. If necessary, I stop the lens of my crop DSLR camera (smaller sensor than the full format) down to a maximum of f/11. Then there is a visible diffraction blur.

Do not choose the ISO value too high

Digital cameras have a notable advantage over analog cameras: You can adjust the ISO value (i.e. the sensitivity) for each picture. With an analog camera, this can only be changed by changing the type of film (i.e. by inserting a different film).

Basically, the lower the ISO value, the finer the detail will be. I myself always work at 100 ISO whenever possible. This is how I achieve the maximum image quality in this regard. Above I briefly mentioned the auto function of the digital camera. In this mode there is no way to intervene with regard to the two factors influencing image quality, aperture and ISO value. The best imaging quality is obtained by choosing the lowest possible ISO value and stopping down the lens by about three f-stops.

Use a tripod

I just mentioned the tripod briefly. I almost always use such a device as long as I can transport my tripod according to the situation, because:

Every photo from the hand is blurred – the only question is whether you can still see it.

Imagine you are exposing at a fast shutter speed (exposure time) of 1/250 second. It is really a very short moment. Do you think you can shoot such pictures out of your hand with confidence? Maybe nothing seems to be blurred because the photos are all sharply focused on the small display of the digital camera. Yet, this is a mistake mistake! Because even within this 1/250 second there is hand movement while taking the picture, even if only a slight one. But the more you enlarge the corresponding images, the more you enlarge even the smallest of blurring – and at some point they become visible. However, I want maximum quality and therefore always use a tripod if possible, even with the short exposure times. Even a simple cord tripod can increase the sharpness of the images.

Imagine you are photographing a big balloon: This picture has no so-called “edges”. It will also be shown in focus with a very slight blurring.
However, photograph a single hair and enlarge it to 18 × 24 cm Even a minimal motion blur will affect the image sharpness. Because the edge of the hair will only be shown sharply by using a tripod, because the camera must be positioned absolutely rigid for an optimal result.

This is one of the reasons (maximum sharpness) why some photographers look wander even in broad daylight with heavy tripod-monsters. While on the snappers shoulder a full-format camera swings on their shoulders to their hand and simply again in auto mode clicks are made, without having to think too much.

Of course, such a tripod is also mandatory for a very conscious image composition that is well thought out to the millimeter, as well as for the absolutely vertical alignment of the camera in order to avoid falling lines (see a little further below).

Types of light in photography

The most important factor in photography is – the light. No, it’s not the camera, not the lens. Just imagine: A hundred years ago, carpenters built cameras, not technology companies. These people had little knowledge of photography (because they mainly dealt with tables and massive cupboards): They only had to make light-tight wooden boxes with gear screws and leather bellows. These were very simple devices. Why are we still fascinated by the pictures that were made with such anachronisms? Certainly: there is some romance when looking at these pictures. However, at that time the photographers knew how to concentrate on the most essential thing in photography: the light. (Because quite a few came from academic painting,

No camera can vary the character of light.

Light exists in many different ways. Now imagine you want to photograph a woolen sweater under an overcast sky: The image will clearly show such a piece of clothing. Now the sky breaks up and the sun comes out: This sun alone creates a prompt hard light: Suddenly every fibre of the sweater becomes visible! Consider the following picture:

 
The snappers simply take photos. The consciously acting photographer only takes photos when the light is favorable according to his imagination – if of course possible. I myself have often returned home frustrated when suddenly bright sunshine prevailed, when I needed a very diffuse and uniformly illuminating one of my plan. Here I wanted to be professional and prefer not to take a picture at all than one that did not meet my expectations. How good it is for the snappers in their modesty.

Turn off the autofocus, avoid a blurry foreground

A particularly noticeable mistake is the ignored foreground. I allow myself to speak of a mistake at this point. Because it can of course also be the case that this should be deliberately set. The snappers focus on the subject. The consciously acting photographer, on the other hand, thinks about from where to, where the focus area should extend and deliberately adjusts the focus point and aperture accordingly. Most of the time this cannot be done automatically.

Correct exposure: expose for the shadows

There is a phrase: Expose on the shadows. Develop according to the lights. This means: Give the camera enough light so that even the darkest picture elements still show detail, but make sure that the brightest picture elements do not appear “eroded” and pure white.

My buddy, the snappers, doesn’t pay attention to anything like that, because he looks at his subject (on the small screen) globally. However, he risks that, for example, the shadows under the trees in the background of his subject lose their richness of detail, because he relies on the simple exposure metering on his digital camera. The result: monotonous black surfaces. A purely technically well-made photography is alive on the other hand, from shades  creates the impression of three-dimensionality. Therefore, one should expose in such a way that even the darkest areas of the image still have a hint of drawing (visual arguments e.g. From Anders Petersen, however, prove the opposite). I myself work basically by constantly looking at the camera’s histogram and checking the brightness of the image. So I also look at my photographs locally (in details and not globally).

The most important control tool of a DSLR: the histogram . Based on this, I can see whether all areas in the subject still have drawings. This can hardly be read correctly from a preview image on the small display of the digital camera, especially not in bright ambient light.

Use the measured value memory of the camera

I prefer to take photos in mode “A” (or AV with Canon): Here I preselect the aperture and the camera automatically determines the “correct” exposure time. It usually does this quite well – thanks to “matrix measurement”. For subjects with a high proportion of very bright areas, however, even the most intelligent metering method tends to be underexposed.

Use the white balance correctly

Often the so-called white balance is set to “Auto”. That’s a good thing, because in most cases the colors are reproduced realistically

Distortions and Converging Lines

This point is mostly only relevant when taking pictures of houses or tall buildings. What photographers know: If you move the camera out of the absolutely vertical position, all vertical lines (e.g. buildings) narrow upwards. In concrete terms, this means: Buildings are depicted like houses of cards that appear to tilt backwards.  There are two remedies: On the one hand, you can of course use a real shift lens. On the other hand, the photo can be later be rectified on the computer with image processing. Here, however, there is a problem: The rectification on the computer is always accompanied by a certain amount of cropping. So you lose a bit of resolution. You have to take this crop into account when taking the picture and consequently move a little further away from the subject or use a slightly shorter focal length or zoom setting of the lens so that you will have enough margin on the photo, which later has to be partially cut off again.

The photos of “snappers” are often marked by restlessness, which is expressed by converging lines, careless areas of blur and unfavorable light.

Use of artificial light

Even with the built-in flash, you can skillfully create subtle effects.

Flash units seem to be rather inconvenient for most snappers. They are only used as an emergency solution if it is too dark and a flash would destroy the natural light mood of the picture. That’s true at first, but only if you don’t know how to deal with it.

Have you ever wondered why a dedicated wedding photographer wouldn’t want to part with his flash on the camera even in the most beautiful sunshine? It’s bright enough here. Correct. However, the wedding photographer does not use artificial light as the primary light source (this remains the sun). He uses the flash as a so-called fill light or “fill flash”.
Because what does the sun cause? Well shadow! The high-lying sun creates dark shadows under people’s eyes and creates high and disturbing contrasts within clothing. With a flash, however, such shadows can easily be brightened in such a way that the inexperienced viewer does not even notice that an additional flash has been used. The flash unit also creates a slight brightening effect (people stand out slightly from the background) and a so-called “catch light” in the eyes (a sparkle). The photographer almost always uses a simple clip-on flash, but its light output is somewhat more subtle. As a result, he easily gets exempted people. This effect is not noticeable as “over-flashed”, but provides a certain brilliance in the foreground (well, sometimes it doesn’t quite succeed).

It is clear that the intensity of the additional artificial light source must never be set too high for this! Otherwise it will look as if portrayed people are standing in front of a photo wallpaper.

Develop a concept

So far, I’ve only ever written about techniques with which the tool (the camera) can be operated precisely so that the image results can exactly match the ideas.
But what kind of ideas do you have about photography? An elementary component of “conscious” photography is to think about it beforehand (instead of just snapping around wildly). I often work in series. So I dedicate myself to a very specific topic with my pictures and always prepare the pictures with this idea in mind. Of course, it is important to me that the parameters (a type of light, depth of field, color saturation …) remain the same as possible for all individual photographs. So I keep my handwriting, so to speak at and don’t change anything here.
The photographic topic itself is a broad field: You can deal with documentaries or with a certain milieu, with landscape shots at a very specific time of the day, with interior portraits, etc. The only important thing here is that you don’t snap randomly.

Posted on

Choosing the DSLR That’s Right for You

Choosing the DSLR That’s Right for You

You may have studied the descriptions of digital SLR technology in this article since you’re considering which DSLR to buy. Because technology changes so rapidly, it’s unlikely that the electronic camera you buy today will be your last. On the other hand, even the least expensive DSLR is a significant investment for most of us, especially when you consider the expense of the lenses and devices you’ll buy. You wish to make the right choice the first time. Digital SLR choice makers often fall under among 5 classifications:

■ Severe professional photographers. These consist of picture enthusiasts and experts who might currently own lenses and accessories coming from a specific system, and who need to maintain their financial investments by choosing, if possible, a DSLR that works with as much of their existing devices as possible.

■ Professionals. Pro professional photographers buy equipment like carpenters purchase routers. They want something that will get the job done and is rugged enough to work dependably in spite of heavy use and mistreatment. They do not necessarily appreciate cost if the equipment will do what’s needed, because their companies or customers are ultimately bearing the cost. Compatibility may be a great idea if a company’s shooters share a pool of specific devices, but a professional picking to switch to a whole brand-new system probably won’t care much if the old stuff needs to fall by the wayside.

■ Well-heeled professional photographers. Lots of DSLR purchasers show a high turnover rate, because they buy equipment mainly for the love of having something new and intriguing. Some actually feel that the only way they will have the ability to take decent (or better) images is to own the really most current equipment. I enjoy letting these folks have their enjoyable, since they are typically a good source of mint utilized equipment for the rest people.

■ Serious newcomers. Numerous DSLRs are sold to new photographers who are buying their very first digital camera or who have actually been utilizing a point-and-shoot video camera design. These buyers do not plan on junking whatever and purchasing into a new system anytime quickly, so they are more likely to examine all the alternatives and select the best DSLR system based on as many elements as possible. Their caution may be why they have actually waited this long to acquire a digital SLR in the first place.

■ Casual newcomers. As rates for DSLRs dropped a lot, I saw a new type of purchaser emerging, those who might have acquired a point-and-shoot video camera at the exact same price point in the past, and now have the concept that a DSLR would be cool to have and/or might offer them with better pictures. A lot of these owners aren’t serious about photography, although they might be severe about getting excellent photos of their household, travels, or activities. A large number of them find that a basic DSLR with its kit lens fits them just great and never ever purchase another lens or device. It could be said that a DSLR is overkill for these casual buyers, however many will wind up very pleased with their purchases, even if they aren’t using all the offered functions.

Questions to Ask Yourself when Buying a Camera

As soon as you choose which category you fall under, you need to make a list of your requirements. What sort of images will you be taking? How typically will you be able to update? What abilities do you need? Ask yourself the following questions to assist determine your genuine requirements.

Just How Much Resolution Do You Required?

This is an essential concern since, at the time I write this, DSLRs are readily available with resolutions from about 10– 12 megapixels to 24 megapixels (and beyond, if you consist of some unique types called medium format cams). A lot more intriguing, not all digital SLRs of a particular resolution produce the exact same outcomes. It’s totally possible to get better photos from a 12 megapixel SLR with a sensor that has low sound and more accurate colours than with a comparable 12 megapixel model with an inferior sensor (even when the differences in lens efficiency is discounted). Looking at resolution in general, you’ll want more megapixels for some types of photography. If you wish to produce prints larger than 8 × 10 inches, you’ll be happier with a video camera having 12– 14 megapixels of resolution or more. If you wish to crop out small areas of an image, you might require a cam with 16– 21 megapixels. On the other hand, if your main application will be taking pictures for display on a websites, or you require thumbnail-sized pictures for ID cards or for a brochure with small illustrations, you might get along simply fine with the lowest-resolution DSLR camera you can find. Keep in mind that your requirements might alter, and you may later be sorry for choosing an electronic camera with lower resolution. Complete Frame or Cropped Frame? Throughout this chapter I’ve pointed out a few of the differences between full-frame sensors and cropped sensors. Your choice between them can be among the most crucial choices you make. Even if you’re brand-new to the digital SLR world, from time to time you’ve heard the term crop factor, and you have actually most likely also heard the term lens multiplier element. Both are deceptive and inaccurate terms used to describe the very same phenomenon: the reality that some electronic cameras (normally the most budget-friendly digital SLRs) provide a field of view that’s smaller and narrower than that produced by certain other (usually a lot more pricey) cams, when fitted with precisely the exact same lens. The picture rather plainly shows the phenomenon at work. The outer rectangular shape, marked 1X, reveals the field of view you may anticipate with a 28mm lens mounted on a “complete frame” (non-cropped) camera, like the Nikon D3-series or Canon 1Ds series. The location marked 1.3 X reveals the field of vision you’d get with that 28mm lens set up on a so called APS-H kind element cam, like the Canon 1D series. The area marked 1.5 X reveals the field of vision you’d get with that 28mm lens installed on an APS-C form element camera that includes practically all other non-Four Thirds /Micro Four Thirds designs. Canon’s non-full-frame electronic cameras, like the 60D and 7D, have a kind aspect of 1.6 X, which is virtually identical and likewise called by the APS-C classification. All 4 Thirds/Micro Four Thirds electronic cameras use a 2X crop aspect, represented by the inner rectangular shape. You can see from the illustration that the 1X performance provides a wider, more extensive view, while each of the inner field of visions is, in contrast, cropped. The cropping impact is produced since the “cropped” sensors are smaller sized than the sensors of the full-frame electronic cameras. These sensing units do not determine 24mm × 36mm; rather, they spec out at roughly 23.6 × 15.8 mm, or about 66.7 percent of the location of a complete frame sensing unit. You can calculate the relative field of view by dividing the focal length of the lens by.667. Hence, a 100mm lens mounted on an APS-C camera has the exact same field of vision as a 150mm lens on a full-frame camera. We human beings tend to perform multiplication operations in our heads more quickly than division, so such field of view comparisons are normally computed using the reciprocal of.667– 1.5– so we can multiply rather. (100/.667=150; 100 × 1.5=150.) This translation is usually helpful just if you’re accustomed to utilizing full-frame video cameras (normally of the film range) and want to know how a familiar lens will carry out on a digital camera. I strongly prefer crop aspect over lens multiplier, since nothing is being increased; a 100mm lens doesn’t “become” a 150mm lens– the depth-of-field and lens aperture remain the very same. Only the field of view is cropped. But crop factor isn’t better, as it implies that the 24 × 36mm frame is “full” and anything else is “less.” I get emails all the time from professional photographers who explain that they own full-frame cams with 36mm × 48mm sensing units (like the Mamiya 645ZD or Hasselblad H3D-39 medium format digitals). By their reckoning, the “half-size” sensors discovered in full-frame cams are “cropped.” Probably a much better term is field of view conversion element, however no one really uses that one. If you’re accustomed to utilizing full-frame film video cameras, you might discover it practical to use the crop aspect “multiplier” to equate a lens’ genuine focal length into the full-frame equivalent, despite the fact that, as I said, absolutely nothing is actually being increased.

How Frequently Do You Want to Update?

Photography is one field occupied by large numbers of techno maniacs who merely need to have the most recent and finest devices at all times. The digital photography world seldom disappoints these device nuts, because newer, more sophisticated designs are introduced every couple of months. If staying on the bleeding edge of technology is essential to you, a digital SLR can’t be a long-lasting financial investment. You’ll have to count on purchasing a brand-new electronic camera every 18 months to two years, since that’s how typically the average vendor takes to replace a current model with a more recent one. Some upgrades are minor ones. Thankfully, the common DSLR replacement cycle is a much longer schedule than you’ll discover in the digital point-and-shoot world, where a particular top of the line camera may be replaced every six months or more frequently. Digital SLRs normally are changed no more frequently than every 12 to 18 months– 12 months for the entry-level models, and 18 months or longer for the intermediate and sophisticated models. On the other hand, perhaps you’re not on a relentless quest for a shiny brand-new gizmo. You just desire excellent pictures. Once you acquire a video camera that gets the job done, you’re not likely to upgrade till you discover there are particular pictures you can’t take because of limitations in your existing devices. You’ll be happy with a cam that does the job for you at a rate you can afford. If your desires are large but your pocketbook is limited, you may wish to downsize your purchase to make those inescapable regular upgrades possible.

Sell or Keep your Devices?

Normally, come upgrade time, your old DSLR will deserve more as a hand-me-down to another user than as a trade-in. That’s why I’m currently eagerly anticipating using my present preferred DSLR as a second or 3rd video camera body when I do update to the next generation. An additional body can be available in convenient. When I leave town on journeys, I usually take one additional body just as a backup. Still, I end up using the backup more than I expected when I mount, say, a telephoto zoom on my “main” video camera and a wide-angle zoom on my backup so I do not have to switch lenses as typically.

Posted on

Using Interchangeable Lenses

Interchangeable Lenses

Among the most essential part of a digital SLR is the lens- or, more properly, lenses, because, unlike other types of digital cameras, which might utilize add-on lens adapters, the lens of a DSLR is totally interchangeable. I’m not going to inform you much about how lenses work. The majority of the rest of this area will handle useful matters connecting to interchangeable lenses on a DSLR. The only things you truly need to understand about lenses are these:

■ Lenses consist of precision-crafted pieces of optical glass (or plastic or ceramic product) called aspects, organized into groups that are moved together to alter the magnification or focus. The components may be based upon pieces of spheres, or not (in which case they are aspherical), and provided special finishes to decrease or get rid of undesirable reflections.

■ Lenses include an iris-like opening called a diaphragm that can be changed in size to admit basically light to the sensing unit. In addition to adjusting the amount of light that passes through the lens, the diaphragm and its shape impact things like relative overall sharpness of an image, the amount of an image that remains in focus, the brightness of your view through the viewfinder, and even the shape and qualities of out-of-focus highlights in your image. I’ll describe these elements in more information as they show up.

■ Lenses are installed in a real estate that keeps the aspects from rattling around and supplies a method to move them to change focus and magnification. The lens housing can include a microprocessor, a small motor for changing the focus (and, in non-DSLR electronic cameras, for zooming), and maybe a mechanism for reducing the effects of cam shake (called vibration reduction). Included are threads or a bayonet mount for attaching filters, a fitting that connects to your electronic camera, and different levers and electronic contacts for interacting with the cam body. You might find a switch or two for changing from autofocus to manual focus, locking a zoom lens so it doesn’t extend mistakenly while the cam is being carried, and a macro, lock/lockout button to restrict the looking for range of your autofocus mechanism so your lens won’t seek focus from infinity to a few inches away whenever you partly depress the shutter release. Everything else is details, and we’ll take a look at them in this and later chapters of this book. Lens Interchangeability The ability to remove a lens and swap it for another is one of the crucial advantages of the digital SLR. Interchangeable lenses make a very cool tool because they broaden the professional photographer’s flexibility in several ways:

■ Swapping lenses lets you alter the “reach” of a lens, from wide-angle to medium telephoto to long telephoto. The zoom lenses on non-SLR cameras offer some of this flexibility, but they can’t provide the zoom of the longest telephotos and telephoto zooms, nor the wide-angle point of view of the quickest focal lengths discovered in some interchangeable lenses and zooms

■ Interchangeable lenses let you pick a lens optimized for a particular function. Do everything zooms are necessarily a compromise that might perform fairly well in a broad series of applications, however excel at none of them. Using an SLR lets you select a lens, whether it’s a zoom or a repaired focal length lens (called a prime lens) that does a specific thing effectively undoubtedly. A lens with a zoom variety, extending from wide-angle to long telephoto might be plagued with distortion at one end of the variety or another (or both!). A multi-purpose lens is most likely much slower than an enhanced optic, perhaps with an f/4.5 or f/5.6 optimum aperture. With the schedule of interchangeable lenses, you can select a really quickly, f/1.4 lens when you need one, or select a lens that’s particularly excellent in a provided zoom range (say, 12-24mm). Select another lens for its splendid sharpness, or since it provides a dreamy blurred effect that’s perfect for portraiture. Use zooms when you need them and prime lenses when they are better fit for a task.

■ Lens swaps make it simple for those with extra-special requirements to discover some glass that fits their specific requirements. Fisheye lenses, those with a point of view control shifts, macro lenses for a bug’s eye view of that prize flower, or hyper-expensive super-long telephoto optics with built-in correction for electronic camera shake are offered to anyone who can afford them. As you know, however, lenses aren’t definitely interchangeable. Lenses designed to fit on one specific supplier’s brand name of video camera probably won’t fit on another supplier’s cam (although there are exceptions), and it’s highly most likely that you’ll discover that many lenses produced by the manufacturer of your digital SLR can’t be used with present cam designs. I can’t provide a thorough lens compatibility chart here, because there are hundreds of various lenses readily available, however you might discover some of the guidelines in this section helpful. The first thing to understand is that lens compatibility isn’t even a problem unless you have older lenses that you wish to use with your current digital camera. If you have no lenses to move to your new camera body, it makes no distinction, from a lens perspective, whether you choose a Nikon, Canon, Sony, Olympus, Pentax, or another DSLR. You’ll want to purchase existing lenses produced your video camera by the vendor, or by 3rd parties such as Tokina, Sigma, or Tamron, to fit your electronic camera. One exception might be if you had a hankering for an older lens that you might acquire used at an attractive cost. In that case, you’ll have an interest in whether that older lens will fit your new camera. You likewise might be thinking about backwards compatibility if you own a lot of costly optics that you want to use with your brand-new electronic camera. That compatibility depends a lot on the style approach of the video camera vendor. It’s easier to create an entire brand-new line of lenses for a new camera system than to find out how to utilize older lenses on the current devices. Some vendors opt for bleeding-edge innovation at the expenditure of compatibility with earlier lenses. Others bend over backwards compatibility.

Posted on

How to Overcome the Problem of Converging Verticals

Converging Verticals

When taking photos of structures one of the challenges that confronts professional photographers is that of Converging Verticals?

Converging Verticals is a term utilized to describe the impact in images when 2 parallel lines in an image (such as the two sides of a building) appear to get closer (converge)- as if they are leaning in towards one another at the top (as in the picture to the left which is of the Rialto towers in Melbourne- towers that do not get narrower towards the top up until the last few floorings).

The result is most obvious when you angle your camera up when taking a picture of a high structure in an effort to fit all of it in. It’s particularly obvious when utilizing a wide angle lens.

What should a photographer do about converging verticals?

Professional photographers have a number of alternatives available to them.

Improve it – as with all types of distortions in photography- one alternative is to improve it and utilize the Converging Verticals to attain a more remarkable image. You can enhance the assembling lines, however, getting closer to the structure, angling your video camera even more and by using wider angle lenses.

Reduce it – if you desire to avoid the converging verticals in electronic camera you will most likely need to move further back from the structure that you’re photographing. This will mean you will probably get more of the foreground in your end image- but you can always crop this later on. Another method to get more parallel to the building is to take the shot from higher up.

Correct it – if you are not able to alter the point of view that you are shooting from and just end up with assembling lines in your shots another option is to do some post production editing. Most image modifying software will have some way of doing this. For example, in Photoshop Elements there’s a ‘Transform- Viewpoint’ option in the ‘Image’ menu. This is how the image to the right had its converging verticals corrected.

Modification Lenses – finally, if you have a budget plan and will be taking a great deal of architectural images you may like to invest in a unique lens that has the capability to correct converging verticals. These Viewpoint Control/Tilt Shift lenses are able to move the lens axis (or optical centre) to make up for the distortion. Such lenses are not inexpensive – so unless you’re going to be getting seriously into the photography of buildings you may wish to utilize one of the other choices mentioned above to repair the problem of converging verticals.